DIY Frosted Branches
Let’s make DIY frosted branches to use for winter decor. This is an easy and inexpensive project and it’s one that can be saved to use from year to year.

I’m sharing my DIY Frosted Branches for this month’s Thrifty Style Team project hosted by Julie of Redhead Can Decorate.
You’ll find links to all of the projects shared this month at the end of this post.
DIY Frosted Branches
I have been busy taking down Christmas and changing my decor over to winter. It has been a slow process and I’m still not finished decorating.

Last year when I decorated for winter, I made some frosted branches but didn’t share how I made them. I saved those branches and used a few of them in my vintage Coke crate coffee table arrangement that I shared in November.
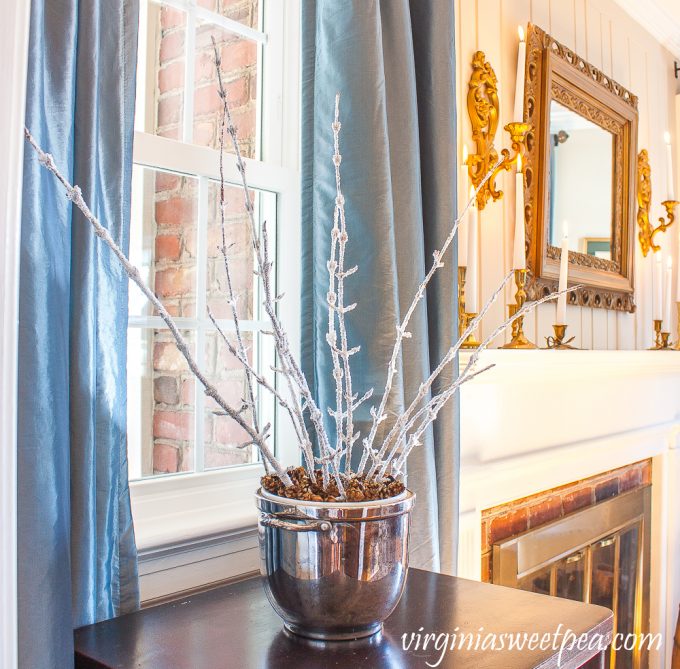
Making frosted branches is easy and I love how the ones I made look on my great-great-aunt’s music cabinet in our formal living room.

I’ll explain the easy process to make the frosted branches in a bit, but first will share how I used them to make this winter arrangement.
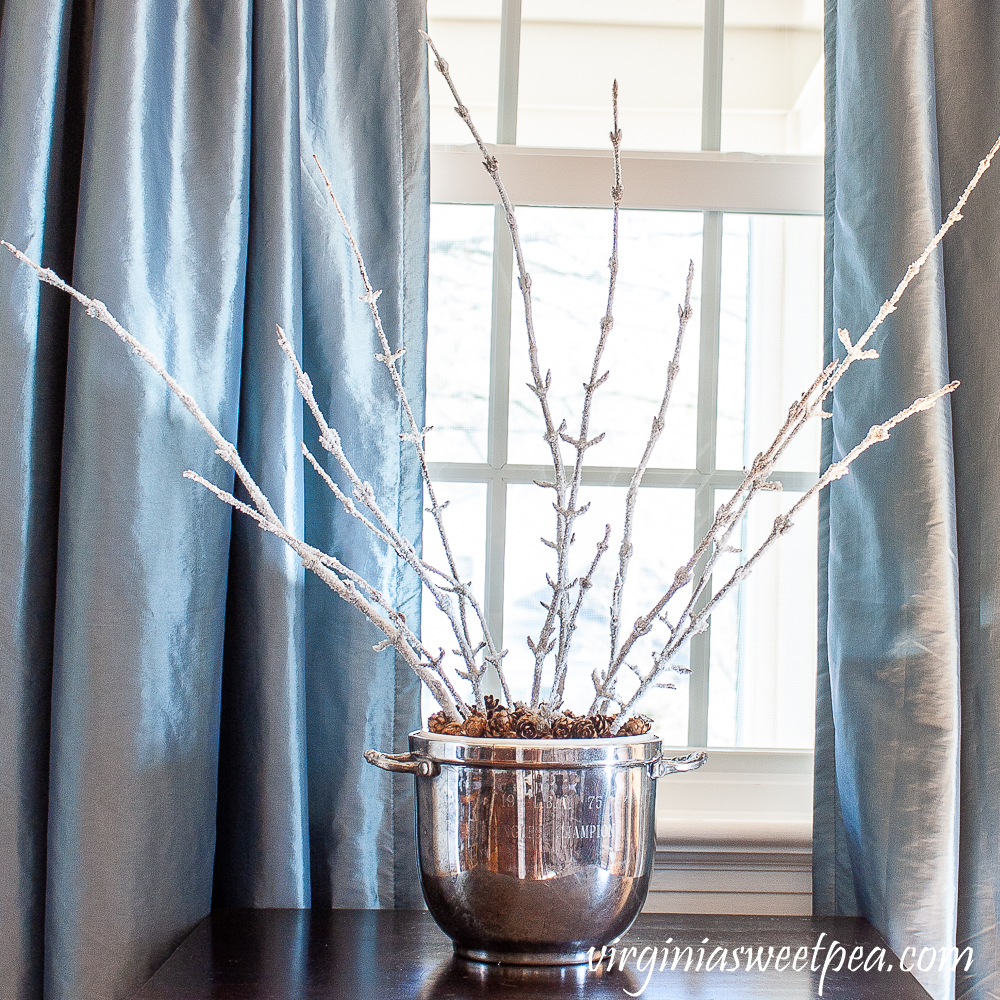
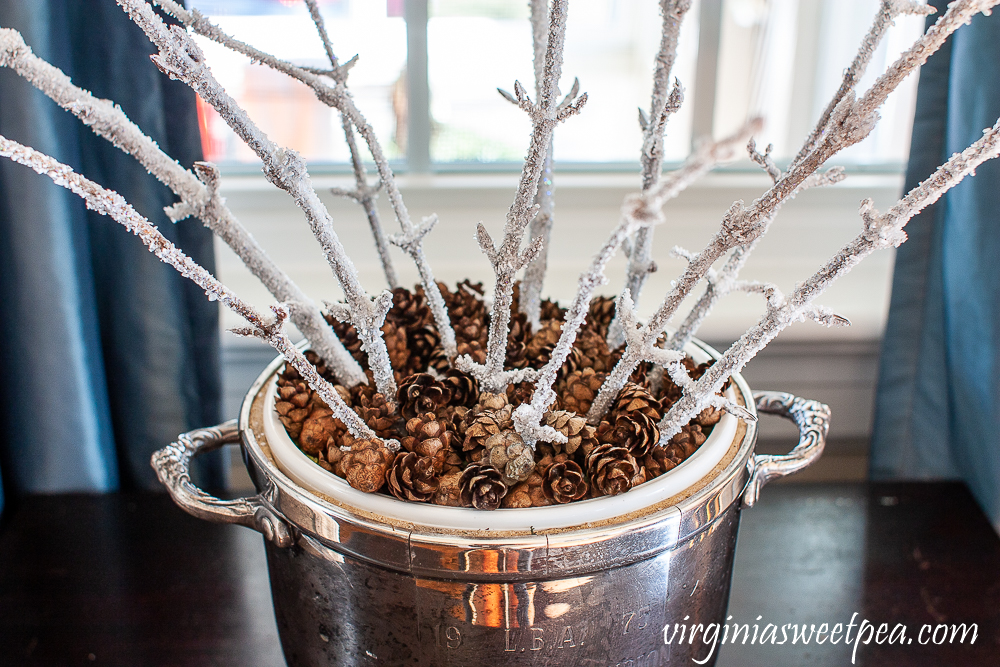
The container is a vintage ice bucket that served as a trophy for the singles division of a 1975 tennis tournament. I bought this at an estate sale, so I don’t know any details on what LBA stands for or where the tournament was held.
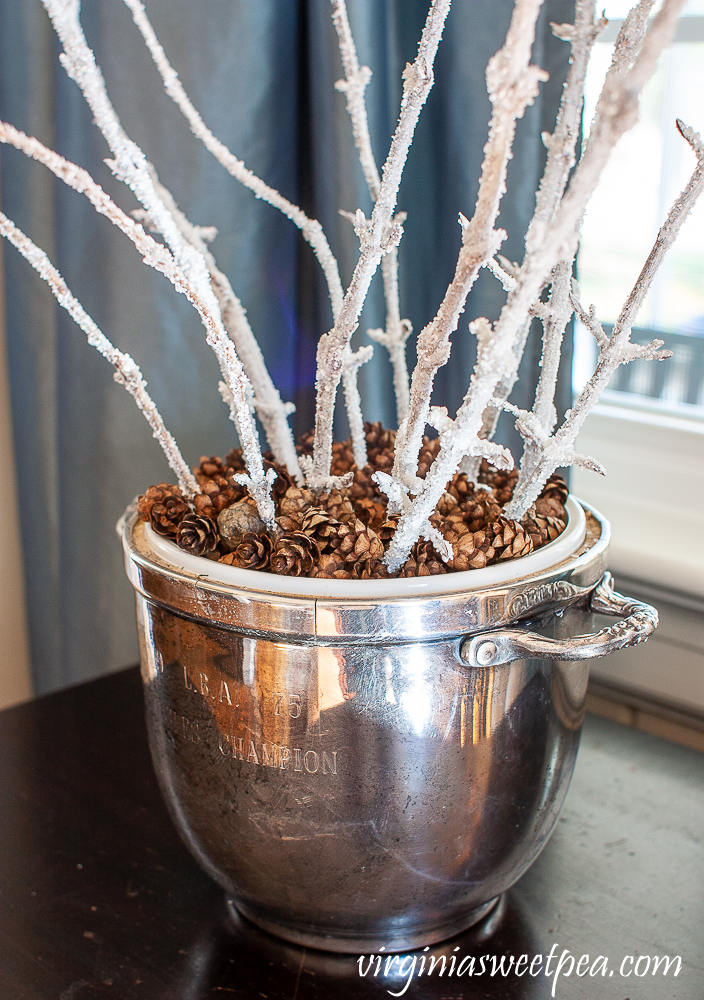
To make it easy to arrange the branches, I filled the container with dried split peas. I’ve used the same split peas for years as an anchor for stems in various arrangments.
After I arranged the frosted branches, I covered the split peas with Hemlock cones picked up on walks with our dog.
Vintage Ice Buckets You Can Buy

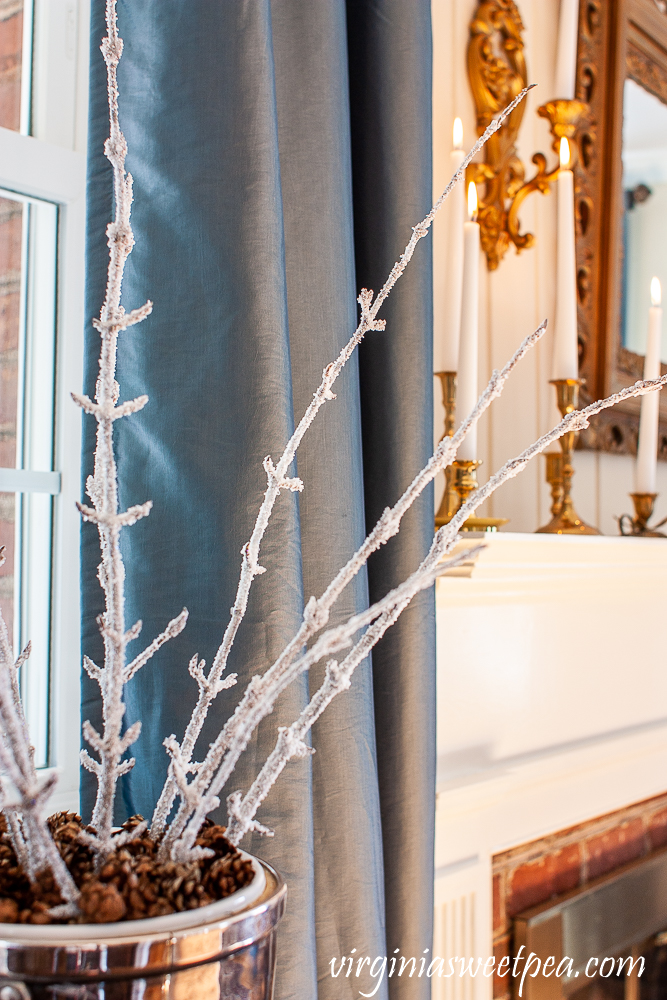
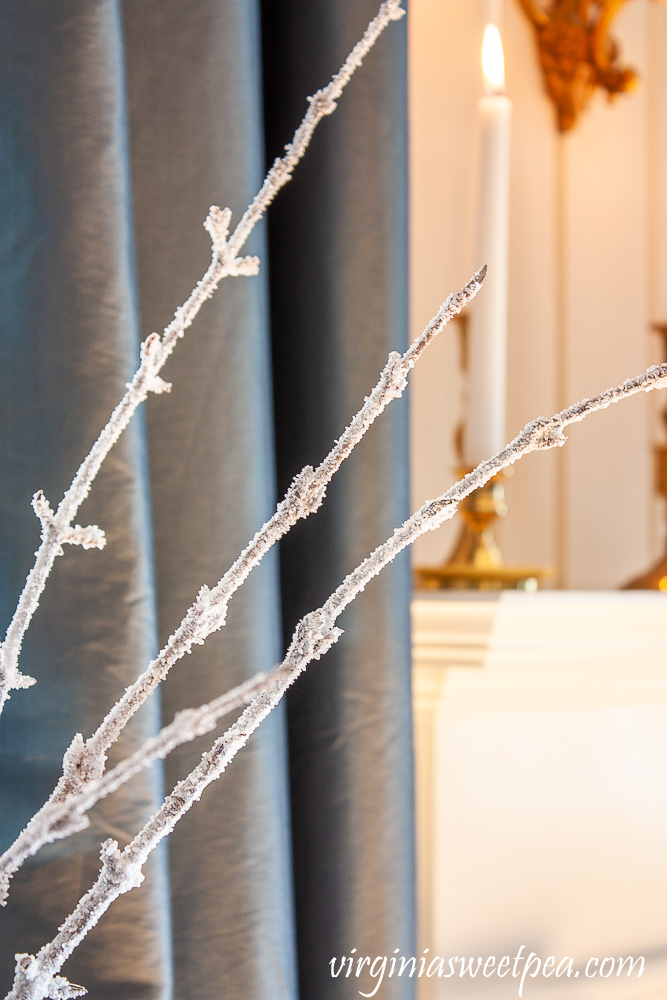
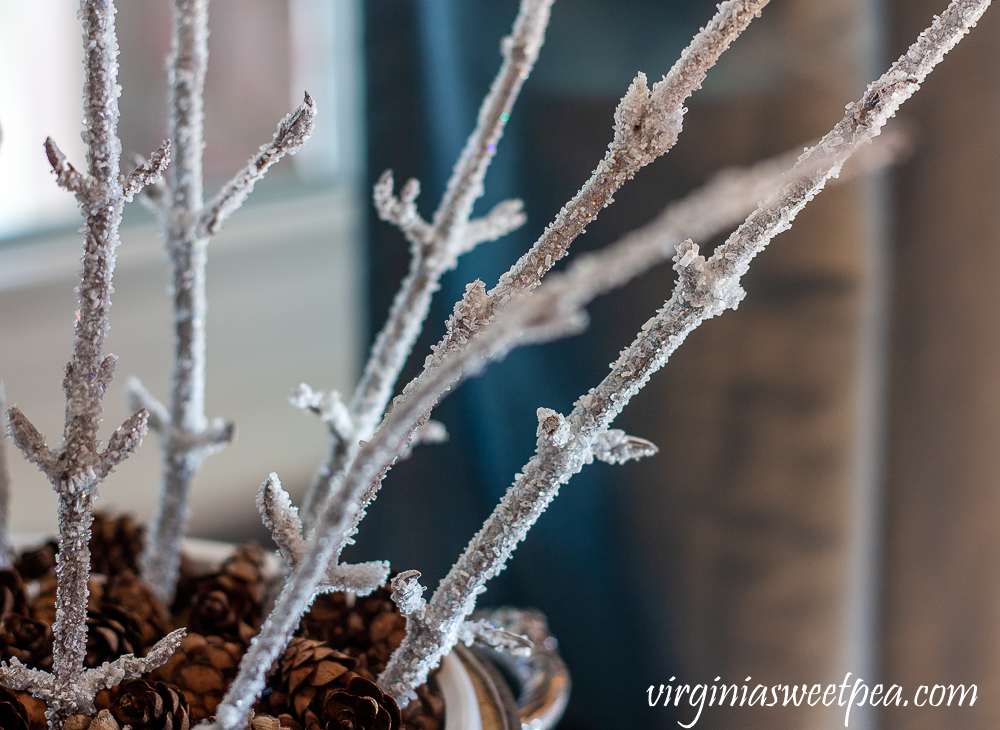
Frosted Branch Detail
When I made frosted branches last winter, I didn’t paint the branches white before adding Epsom salt which gives the branches the icy, frosted look.
This year I painted the branches white before I added the Epsom salt, and I like this year’s look much better.
It is hard to see that there is white paint under the Epsom salt.

Any branch will work for this project. I used Shasta Viburnum because I liked how straight the branches are and I liked the buds along each branch.
How to Make Frosted Branches
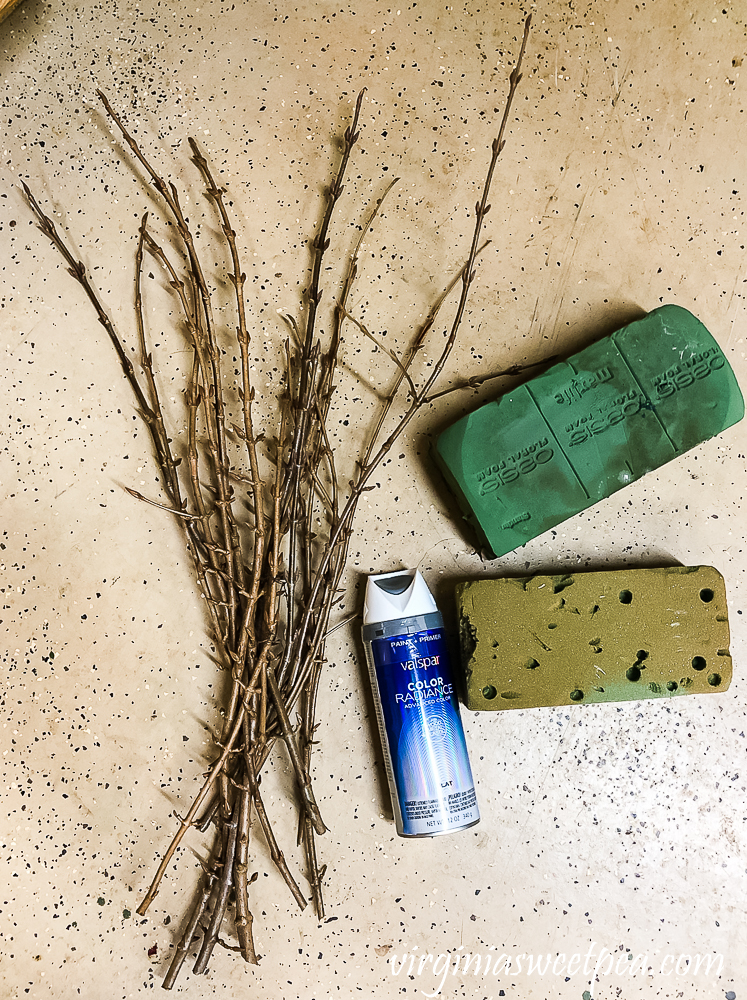
To make frosted branches you will need:
- Branches – I used Shasta Viburnum.
- Pruners – I use and recommend Felco pruners.
- White Spray Paint – I used one with a flat finish but any type will work.
- Floral foam or a piece of Styrofoam from a package
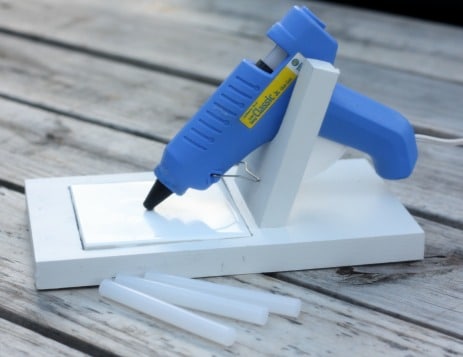
- Mod Podge – I used glitter Mod Podge.
- Craft Paint Brush
- Epsom Salt
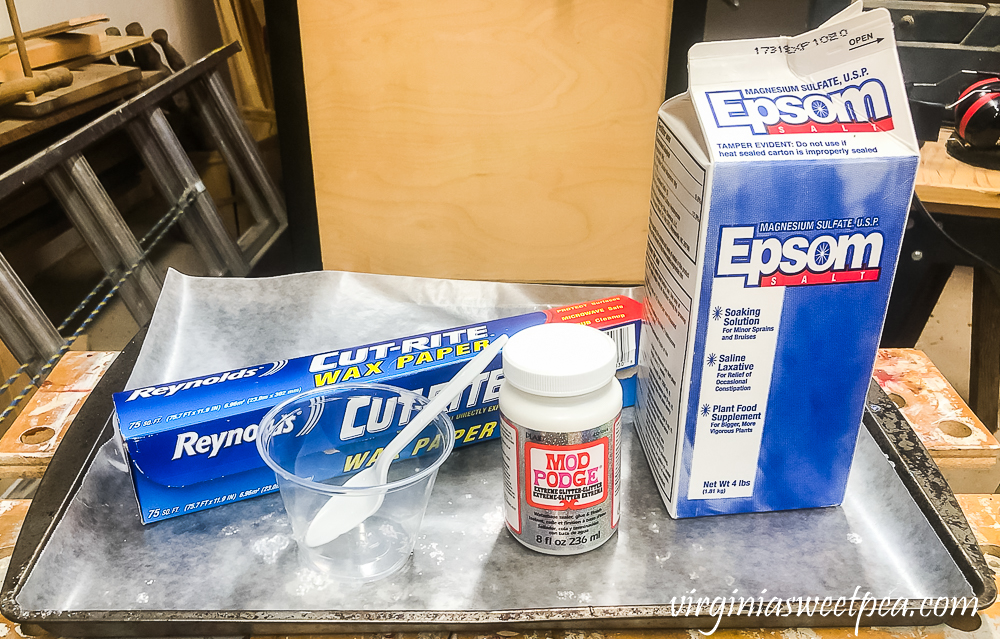
- Waxed Paper
- Plastic cup and spoon
Start by cutting branches. If you don’t have branches in your yard, look around your neighborhood or in public parks for branches to use.
Paint the Branches
The next step is to paint the branches white. I used materials that I had on-hand, so my white spray paint was flat. I believe that any finish would work just fine for this project.
To make painting the branches easy, I stuck them in leftover floral foam and oasis. Styrofoam packing from a package would also work.
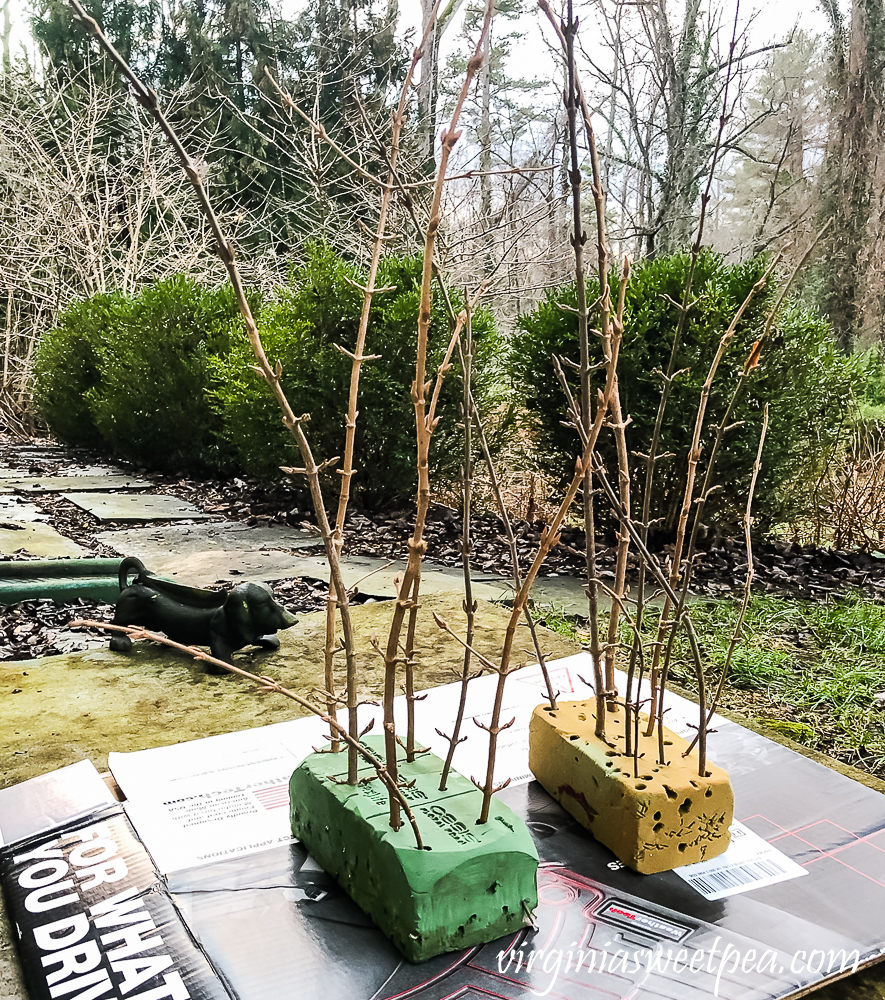
I should have moved my cardboard off of our concrete stoop before painting but it was really wet when I painted, so I didn’t. That was a mistake because our concrete stoop now has white spray paint on it. Oops.
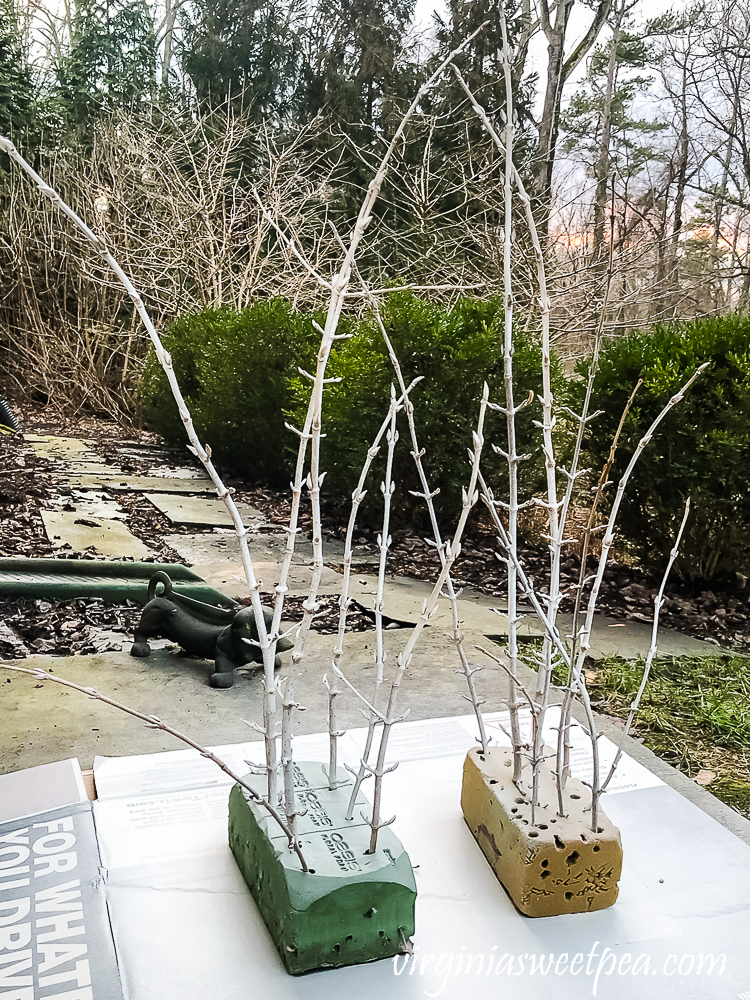
Make the Branches Look Frosted with Epsom Salt
After the spray paint dried, it was time to add the Epsom salt. I have had this Epsom salt for a long, long time. I think it now only comes in plastic bags.
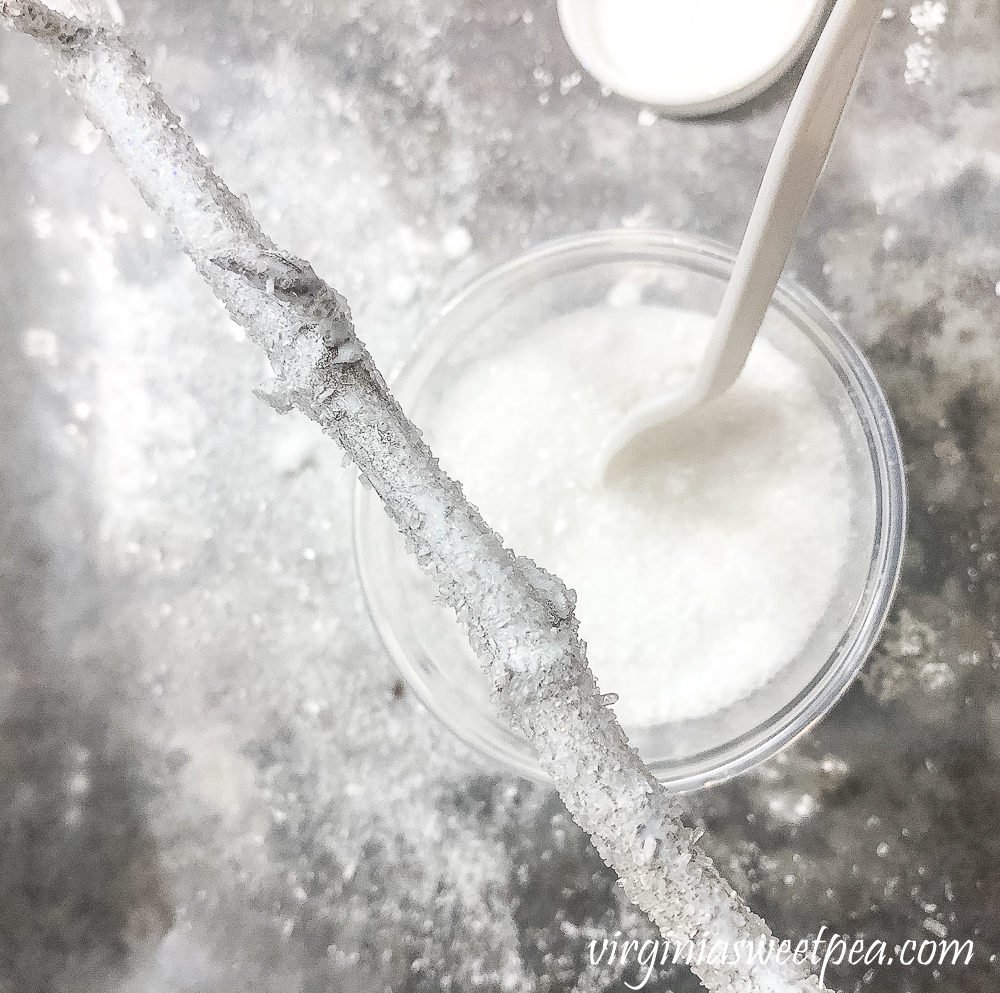
I used glitter Mod Podge as my glue. It adds a subtle touch of glitter to the Epsom salt. I keep this old cookie sheet in my craft cabinet for projects like this.
Lining the cookie sheet with waxed paper makes clean-up easy. If I’m glittering something, the waxed paper lets me pour the unused glitter back into the container so that none is wasted.
I poured Epsom salt into the cup so that it was ready to be used and then working one branch at a time, painted Mod Podge over all of the surfaces that I wanted to add Epsom salt to.
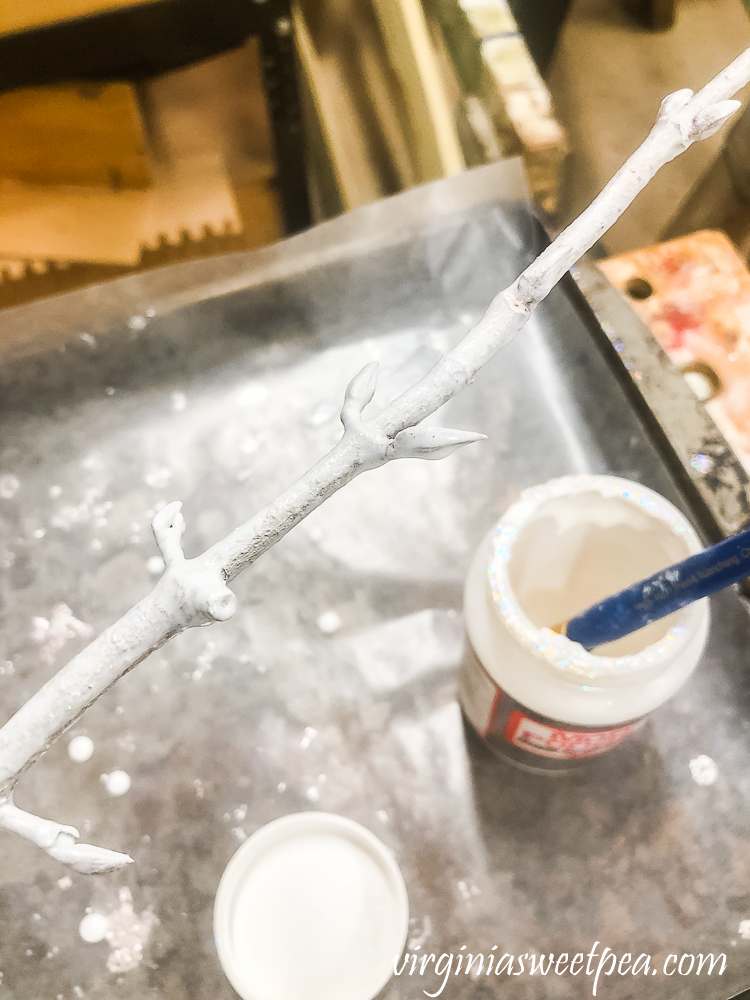
Then I held the branch over the cup of Epsom salt and used the spoon to sprinkle the Epsom salt onto the Mod Podge.
After I finished adding Epsom salt to each branch, I put it back into the floral foam to dry.
Once the branches are dry, they are ready to be used for decorating.
Last year when I decorated with the frosted branches that I made, I poured Epsom salt into a clear vase and used it to anchor my branches. This was a really pretty look.
Storing the Branches
To store the branches, wrap them in tissue paper. When I unwrapped the branches that I made last January, I was surprised at their appearance.
The crystals of fresh Epsom salt (Magnesium Sulfate) are easily seen.
When I unwrapped the branches that I made in January in November, I discovered that over time the MgSO4 crystals become much smaller and resemble snow.
Here is a branch made in January 2020 used in November 2020. See how much smaller the crystals are?

I really enjoyed making this craft and I love that I can use it for winter decorating now and Christmas decorating in the future.
Here are branches available to purchase
More Projects to Enjoy!
Now it’s time to enjoy the projects that the rest of the Thrifty Style Team is sharing today. Click on the links below to see each project.
Redhead Can Decorate – DIY Home Gym
The Painted Hinge – How to Repurpose Cabinet Doors into Wall Decor
DIY Beautify – 7 Thrifty Cleaning and Organizing Solutions for the Home
2 Bees In A Pod – Repurposed Vintage Tea Towel
Postcards From The Ridge – Paper Heart Wall Art
The How To Home – DIY Family Charging Station
The Tattered Pew – Bergere Painted Shutters
Sweet Pea – DIY Frosted Branches
What Meegan Makes – How to Refresh a Stand Mixer with Spray Paint
Cottage At The Crossroads – Fabric Hearts with Yo-yos
Lora B. Create & Ponder – Upcycled Old Tin Organizer DIY


Love this!
Thank you! They were fun to make and I like that I can reuse them in the future.
Oh my gosh Paula – these branches are so pretty! We can’t wait to make some of our homes. Thanks for sharing such a wonderful tutorial!
Thank you so much, ladies! I love what you made this month for Baby Bee’s nursery.
These frosted branches are so pretty! You made the step by step process easy to follow. Who knew to put split peas in the bottom?! What a great idea. Thanks for sharing!
Thank you so much, Kim!
These are lovely, Paula! So smart to paint the branches white first, and I actually like that it looks like snow after they have been packed away… it’s another lovely look! PInned!
Thank you, Julie! I had fun making these.
I love these. I totally need to do this; I think my winter mantel I’m working on needs some. Thanks for the how to!
Winter decorating is always hard for me. Probably because I want to pack ALL of Christmas away and not use any of it for winter decor. I had a lot of fun making these.
Pinned – thanks!
Thank you so much for pinning, Rita!
Love this project Paula, the frosty branches sparkle and keep that magical Christmas feeling going a little longer!
Yes! And they look extra sparkly when the light hits them just right.
Well, if there is one thing that I have a lot of, then it would be branches!!! I am staring at an empty space right now and I’m thinking some of these branches would look pretty in a vase. Wish I would run across one of those trophy ice buckets, though!
That ice bucket was a lucky find a long time ago. Let me know if you make some branches for your home.
These are really pretty, Paula. And your tutorial makes it sound super simple to make. And since I also have a very old carton (not bag) of epsom salts, I’m thinking this is a great use for it, lol. Actually I made some bath salts with some of it recently, but there’s still plenty left. Thanks for the inspiration!
Now you have me inspired. Bath salts are something that I would like to make.
Oh these are so cool! I love how they turned out…so smart to use epson salt! Pinning!
I love these so much Paula! They’re perfect for winter decor!
Paula, I absolutely love this idea & am going to collect some fallen branches on my walk tomorrow. I was just telling my daughter how I wanted to do a craft of tree branches & place paper Valentines on it.
I am so glad that I inspired you and now I think that you may have inspired me. A Valentine’s Day tree is a great idea!
Very pretty!! I have lots of branches that I could use to make these 🙂
Tania
Thank you for sharing, Paula. I was hoping to find a tutorial like this. It’s perfect for what I need in my living room. I hope you are doing well.
Happy New Year, my friend!
Thank you for sharing your technique, Paula. I have a Walking Stick Tree and the branches would be perfect for this idea. Pinning and thank you for sharing at Party In Your PJ’s.
Love these perfect-for-winter branches. And that container is fantabulous! Such a great idea. And how awesome is it that you get to say “my great great aunt’s music cabinet”?! So fun!
Your frosted branches are so beautiful, Paula! I love how you styled them in the vintage trophy bucket with the pinecones on top. Now I want to make some, too! Thanks for sharing the great tutorial. Pinned!
These are so pretty and seem so easy to make! Thank you for sharing!
I am in love with this project and can’t wait to try it! I love how you displayed them!!! Pinned to remember for my Winter Decor! Thanks for sharing the inspiration at Charming Homes & Gardens!
I am loving these frosted branches Paula. Such a great idea for winter. Thank you for sharing at Charming Homes nad Gardens.
I love these. I want to do that next year.
I love this project so much, Paula! In fact, I might use the technique on those adorable rose cones I ordered from your other post! Pinned 😊
That is a great idea!
These are so pretty–impressive but so simple, too! It’s a gotta do later this year! I have a warped sense of humor—and a time/energy conservation bent. One year I sprayed my dried hydrangeas while they were still on the bush; gold and copper. I’m sure my sister-in-law across the street was sure that I’d lost my mind! Hey, it worked!
I would love to see a picture of your spray painted Hydrangeas.
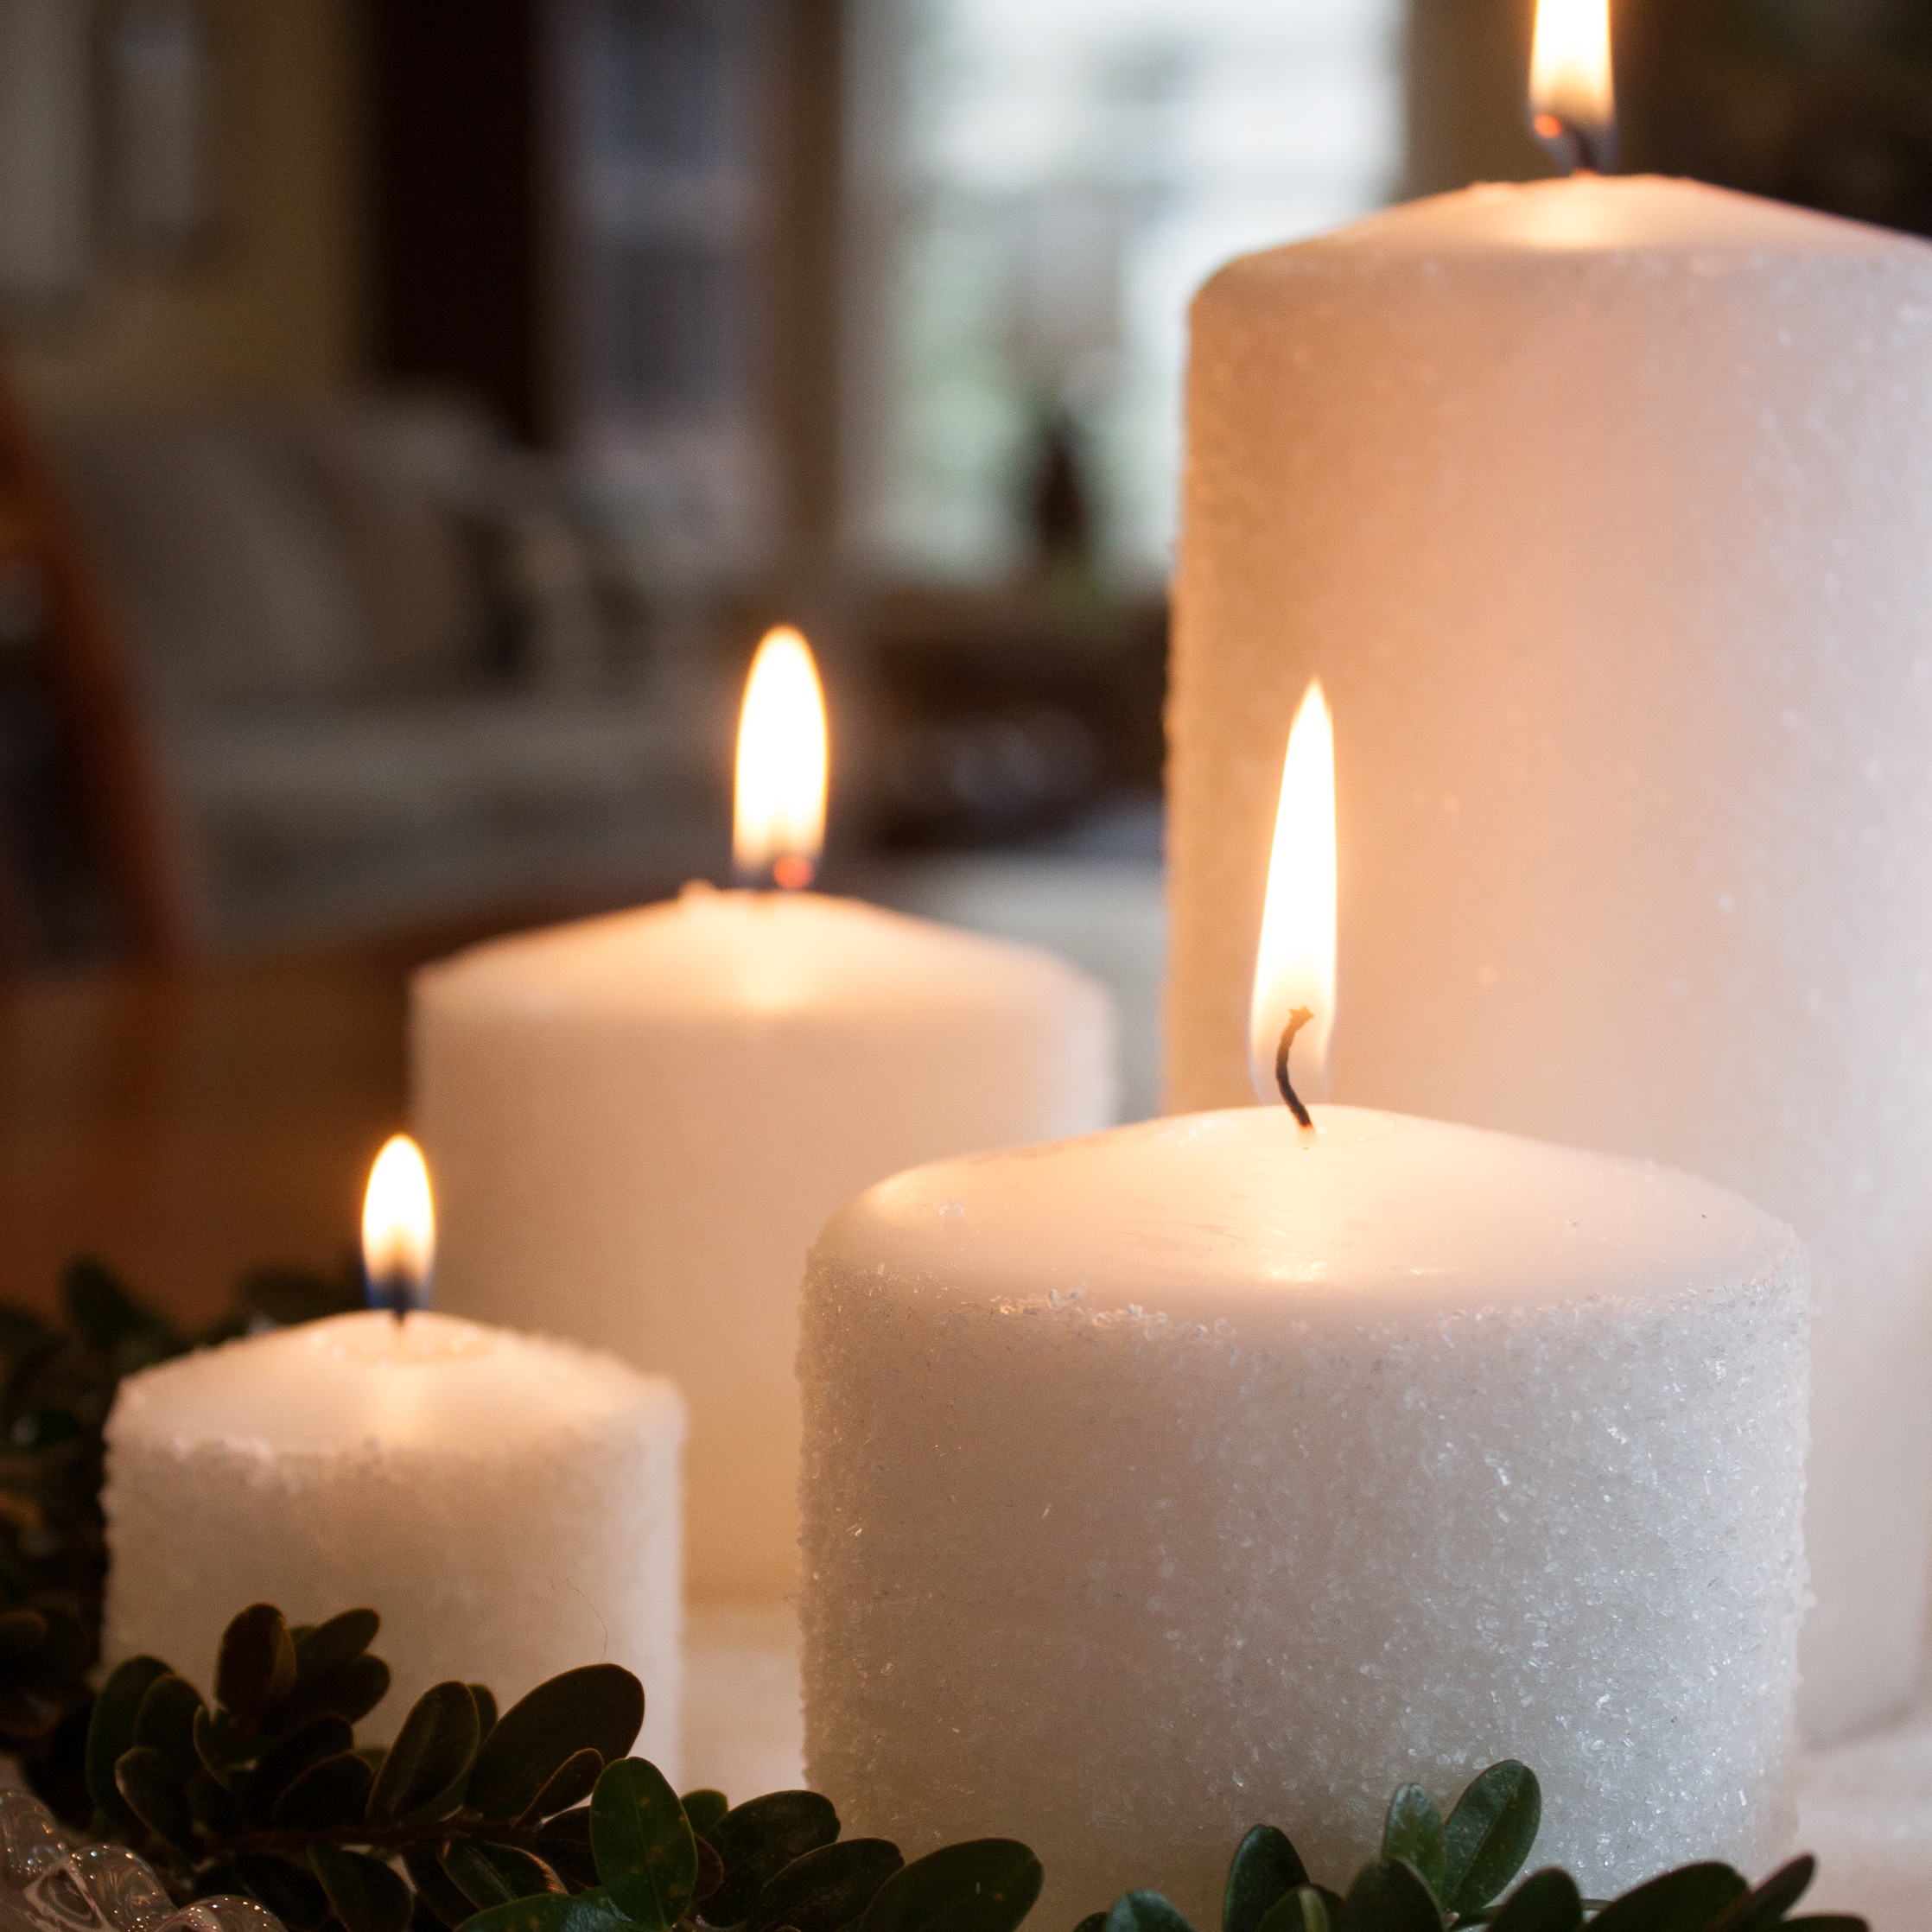
These are so pretty, Paula! I love how they look set against the candlelight! Thanks for sharing at Vintage Charm!
Thank you so much, Cecilia.
I love these so much, Paula! I’m featuring your post at Tuesday Turn About this week! Pinned (again)!
Thank you so much for the feature, Julie!
I love this idea! I have a very similar ice bucket and I would love to break it our for this project. Pinning. hanks for the inspiration! XO- MaryJo
Thank you so much, MaryJo!
These branches are so pretty Paula! Pinning for inspiration! Hugs!
Thank you so much, Michelle.
Love these winters branches. I have always wanted to make some bug didnt know how. And that they keep from year to year is a bonus!
Thank you so much, Peggy.