DIY Patio Stone Veneer at Smith Mountain Lake
In 2017 we added a patio and walkway to our Smith Mountain Lake house. When this project was completed in 2017, we did not add stone veneer to the patio to match the house knowing that we could complete the work ourselves at a later date. Two years later, we finally completed this project and love the end result.
Patio Stone Veneer Before and After
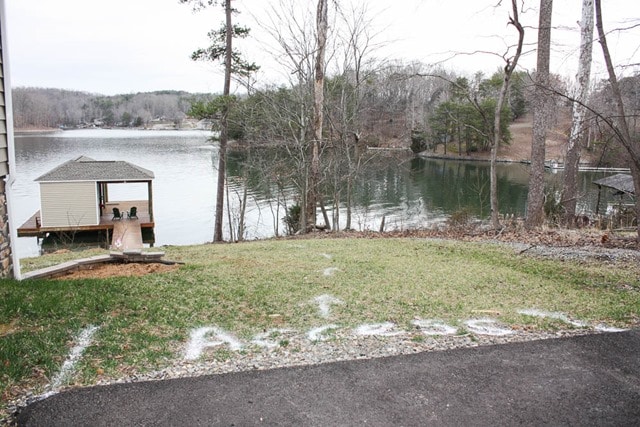
We started this project in March, so all of my “before” pictures show no furniture on the patio as it was still stored away for winter, and no leaves on the trees.
We love the outdoor space that our patio gives us but the exposed concrete walls made the space look unfinished.
This side of the patio isn’t one that is often seen unless you are one of our lake neighbors or if we are mowing the grass.
My goal was to have this project completed by my 50th birthday on May 26 and we almost met that deadline. I’ll explain later what delayed the completion of this project for us.
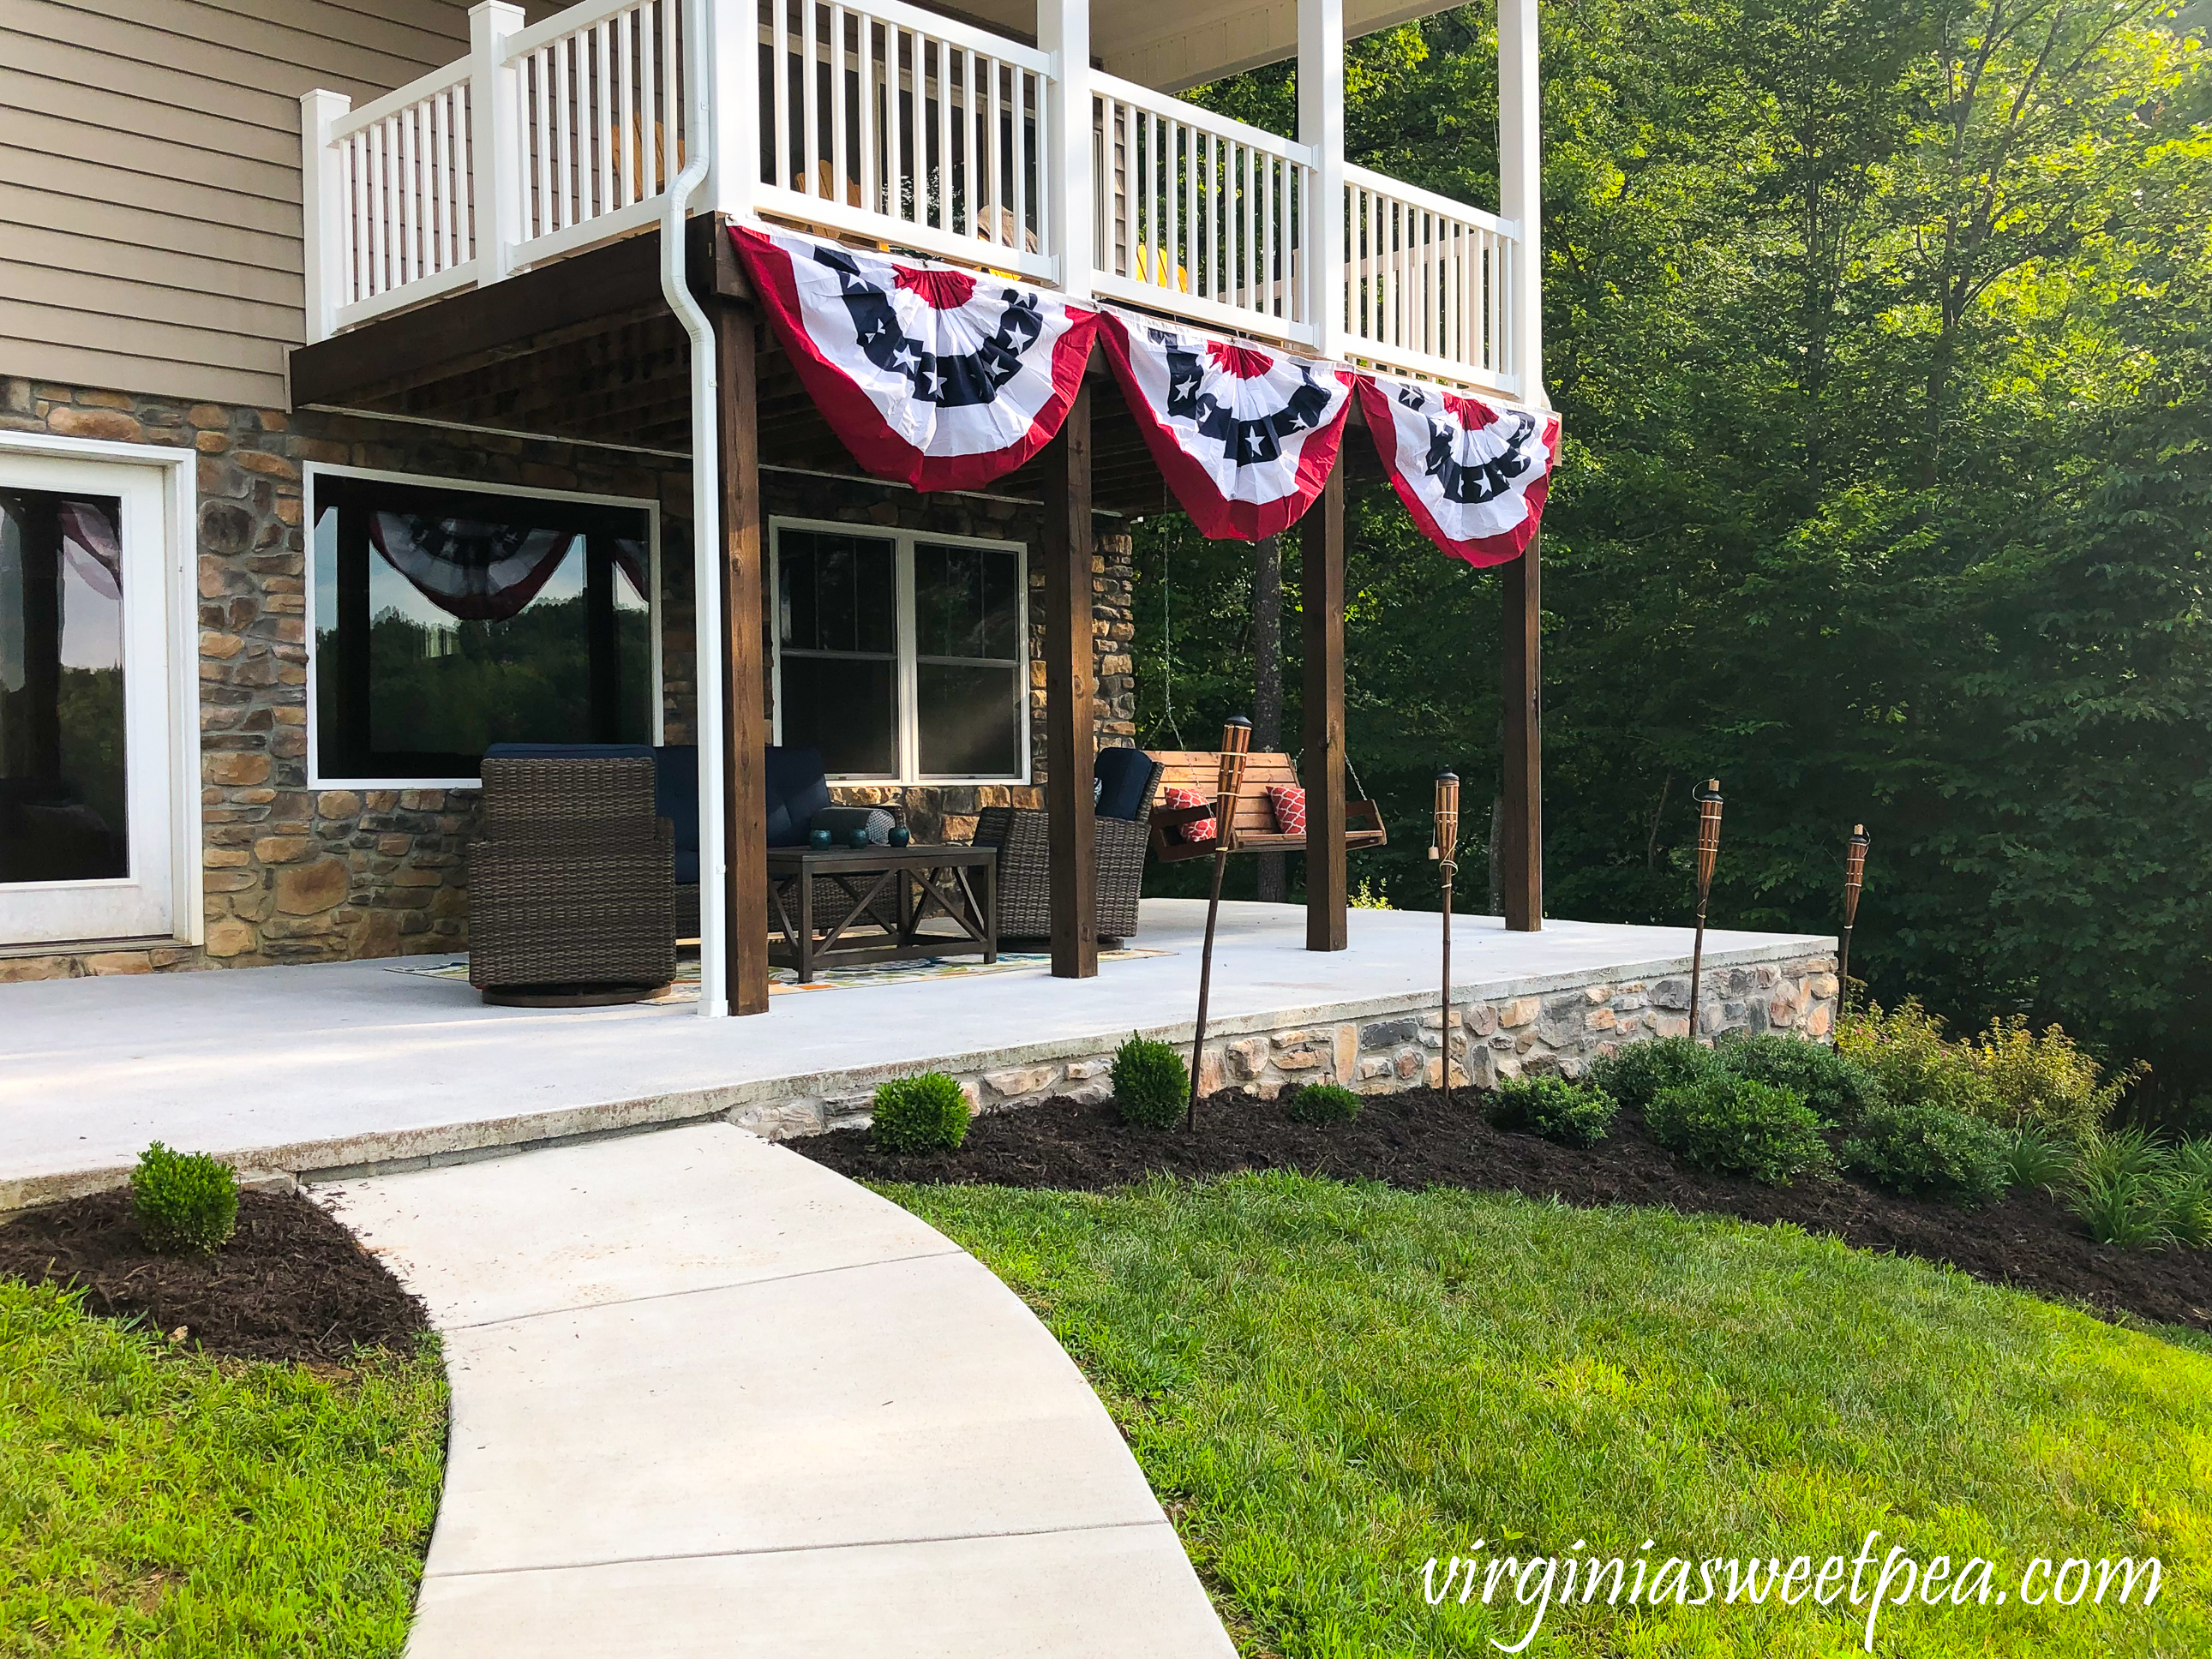
Now let’s look at the after pictures. What a difference adding stone veneer makes!
Here’s a side-by-side before and after of this view:

We were able to order the same stone veneer used on our foundation locally. It’s so nice to have it all matching.

I love a good before and after picture and our porch definitely looks so much better after the stone veneer was added.

We spend nearly every summer evening when we are at the lake on this patio. Most recently we enjoyed viewing fireworks that neighbors released over 4th of July week and weekend.

Project Details – DIY Patio Stone Veneer
We started this project by measuring the length and height of the patio wall and calculating how many square feet of stone that we would need. We looked back through our paperwork for when the lake house was constructed to find the brand and variety of stone veneer that was used on the foundation. We were able to order the stone veneer that we needed for this project from Boxley.
Supplies
6 Boxes of Tuscan Ridge Sienna Flats
1 Box Tuscan Ridge Sienna Corners
2 Bags Stone Hold Mortar
5 – 5 gallon buckets of masonry sand
Concrete Mixing Tub
Tote to hold Stone Hold Mortar
Garden trowel to mix sand and concrete
Trowel to spread mortar
Safety glasses

Procedure
Step 1 – Expose all of the Foundation
Dig the soil away from the foundation. We exposed about an additional 6″ of patio block wall in this step.
Step 2 – Apply a Skim Coat of Concrete to Patio Walls
We originally thought that a skim coat of concrete wouldn’t be necessary but after mixing the concrete and trying to apply a few stones, we found that the stones wouldn’t stick. Plan B was to apply a skim coat and hope that the stones would stick to that.
We mixed a small batch of concrete at a time, used it, and then mixed more. We worried that mixing too large of a batch at one time would result in it drying out before we could use it all.
To mix the concrete, we started with mortar in a mixing tray.
Next the masonry sand was added to the mortar. We used a small bucket to transport the sand from the heavy 5 gallon buckets to the mixing tray.
The mortar and masonry sand were mixed with water until a ~pancake batter consistency was reached.
After the mixing, Mr. SP applied a thin coat to the patio walls.

Here you can see that he is applying a thin layer (< 1/2″) of the mixture to the block wall.
This shot also shows how we dug the soil away from the block wall.
While the concrete was still wet, it was roughed up with a DIY tool – a paint stirrer with a few nails stuck in it.
We stay at our lake house typically just on weekends and resumed this project the next weekend which gave the skim coat of concrete plenty of time to dry.
Step Four – Face the Patio with Stone Veneer
We started adding the stone veneer at the corner using the corner pieces that we ordered. We only needed a few pieces but had to order an entire box, so we have a lot of corners left over.
We mixed a small batch of concrete and sand as shown above and got to work. Adding stone veneer is a lot like tiling a backsplash. Pick up some concrete on your trowel, smooth it across the back of the stone, then push the stone into place. We found that it was helpful to hold the stone in place for about a minute to make sure that it wouldn’t slide.
While Mr. SP added the corners, I worked on laying out the stone in a pleasing pattern.
This was a messy job and I didn’t get any pictures of us applying the veneer stones to the porch wall but here’s how it looked a few hours later.
Figuring out which stone to use where ended up feeling like part puzzle and part art project.
Step Five – Tuckpoint the Wall
Tuckpointing means to fill in between the stones with mortar. We mixed our mortar, poured it into a concrete “pastry bag” and got busy. We quickly found that tuckpointing is an art and that our initial effort at it was not satisfactory. We stopped for the day, watched some YouTube videos and tried again the next day. The results the next day were no better so rather than do the tuckpointing ourselves, we hired someone to do it.
It took us a while to find someone to do the job, thus the delay in finishing this project by my May 26 birthday.
Lucky for us, when the guy we hired got to our house, he informed us that he did our foundation stone veneer. $350 later, our patio walls were beautifully tuckpointed. Sometimes you DIY, sometimes it’s worth it to pay a professional. We both agreed that it was 100% worth $350 to finish this job.
A Final Look
A flagpole is another new addition to our lake property. Mr. SP gave this to himself for his birthday in April. Our neighbors love it and it makes it easy for friends to find our house by water as we are the only home in our cove to have a flagpole. The bunting was a 4th of July addition to our deck and we love it so much that it will stay in place until fall.
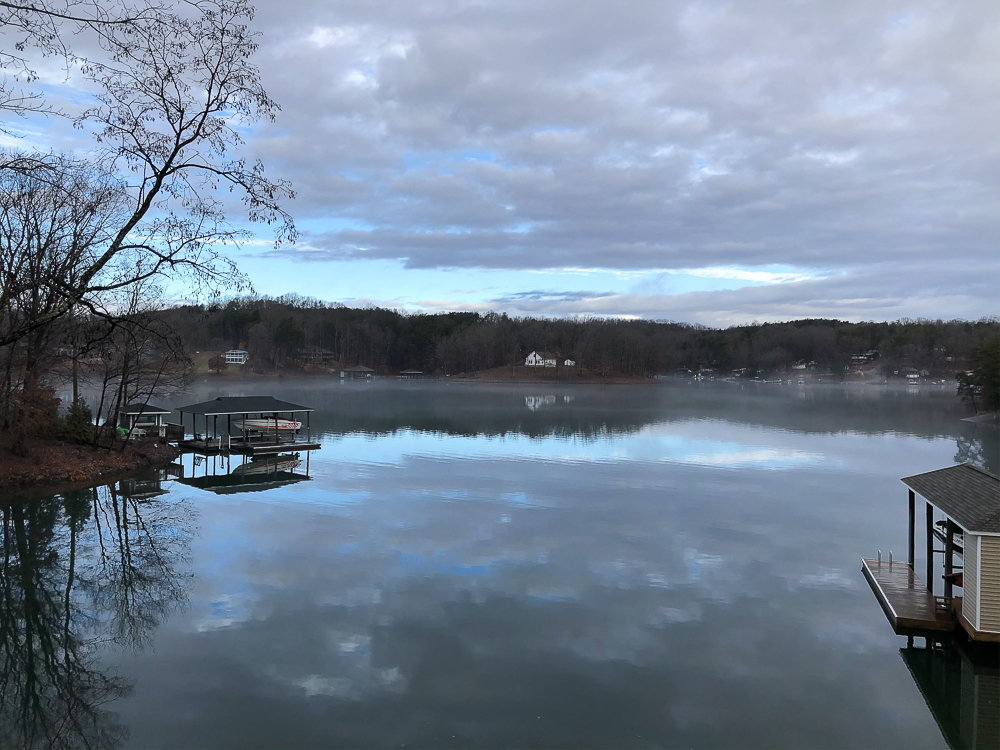
This shot was taken from our floating dock. We think that the lake water level used to have been higher based on the ledge above the shoreline. Speaking of shoreline, our rip-rap took a beating this past winter when the lake levels stayed high. On our “want to do” list is to add more rip-rap. We also plan to work on getting rid of tree stumps.
On a typical summer evening you’ll find us relaxing on our patio with Sherman. 
We are so happy that this project is finally complete and I’m still admiring it every weekend.
Pin It

Please pin this post to Pinterest! Pinning helps my work to be discovered by others on Pinterest. 
Hi Paula!
This project turned out beautiful! Thank goodness for “Plan B’s”! Y’all did a great job adding the stone veneer. It’s so cool that the guy you hired was the same guy who was there originally. Your back porch and flag look so pretty from the view of the water. My hubby has been talking about getting a standard flagpole like yours. We need to decide where we would put it. I hope you’re having a great week! Thanks for sharing at Homestyle Gathering!
>>> Kim
We are so happy with the end result of the patio veneer project. I’ve wanted to complete it since we had the patio installed in 2017.
I love our flagpole and I’ve told my husband that he can get one for our L’burg home IF he has the giant Magnolia in our front yard cut down. I’m tired of cleaning up after that tree and I think a flagpole would look great in our front yard.
hi paula
this looks great! I want to add stone to the front of our steps. Great tutorial! laura in CO
Looks great! Can I ask where your blue patio set is from? We are working on a screened porch build and I am on the hunt for a comfy set to put out there.
Hi, Amy! I bought the patio set last summer at Sam’s. I really like it and I’m also on the hunt for furniture for our screened porch. Our store doesn’t have the same set but it’s possible that it is available online. If it is, I’ll let you know!
Fantastic job Paula…it’s beautiful!!!
Blessings,
Cindy
Thank you, Cindy! It’s so good to hear from you. I know you’re really enjoying staying at your mountain house this summer. I’ve enjoyed seeing it on IG!
Great job! Yes, sometimes it is worth it to pay someone else. I love a good Before and After, too!! : )
One whole side of our house has only the concrete below the siding, where our basement door is. I would love to put something there to make it look more pretty and finished, like what you did. Except a brick veneer is what would match our front flower beds. Or maybe one day we will add a garage there instead. A garage would be so nice!
Liberty @ B4andAfters.com
I have never in my life had a garage and I would love to have one. I’d vote for a garage if you have room for one!
I am so glad to know there is something you can’t do!
Ha-ha! We tried so hard to do all of the work ourselves but the tuckpointing is an art that needs practice and we didn’t want to ruin our hard work.
I hope that you’ve been enjoying the lake this summer!
Paula, it turned out beautiful. What a wonderful home on the lake. I love the buntings on the railings.It would be hard for me to leave for the week. You can really relax there I am sure. The stone made it look complete. I agree that some times it is better to hire a professional to do certain things. Now just sit back and enjoy how great it looks.
Thank you so much, Yarlette! We do love staying at the lake on weekends and it is very hard to leave. If we can ever get Internet service to our lake place we could stay longer as we both could work from home.
Paula
It looks amazing Paula!….it must be so wonderful to sit out on the porch and enjoy the view!
Thank you, Shirley! It is wonderful to sit on the porch and enjoy the view. I’m enjoying seeing construction pictures of your new home. Very exciting!
Paula
Just Beautiful!! Your hard work definitely paid off even if you did hire someone to do the tuckpointing!! You designed the layout so other than the finishing, you and Mr. SP did a great job for sure!!! Enjoy!
It looks so lovely, Paula! And I agree… $350 was a steal for hiring someone to do the last step. Also, I’m figuring ‘rip-rap’ is the rock edge along the water? 😉
What a beautiful transformation…so worth the work! Thank you for sharing at Party In Your PJ’s!
Hi Friend!
I’m stopping back by to let you know that you’re one of this week’s features at Homestyle Gathering. Thanks so much for sharing at HG! Have a beautiful day!
>>> Kim