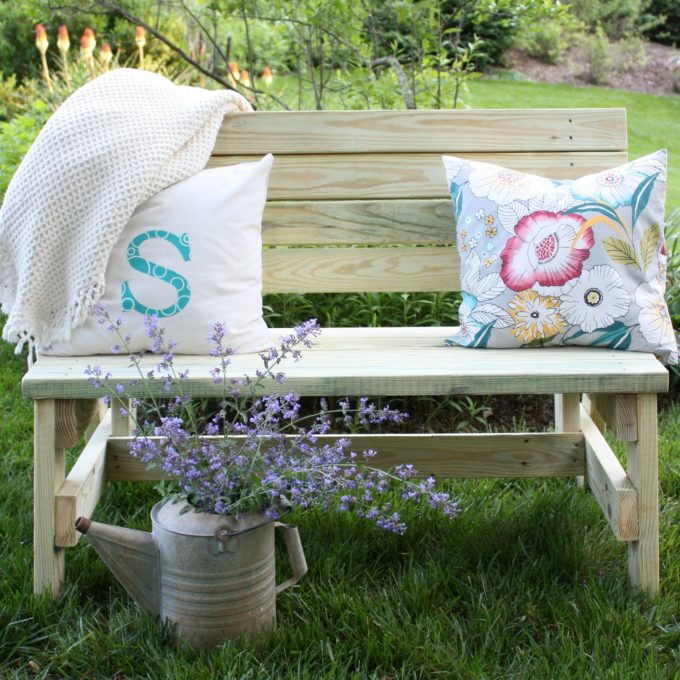
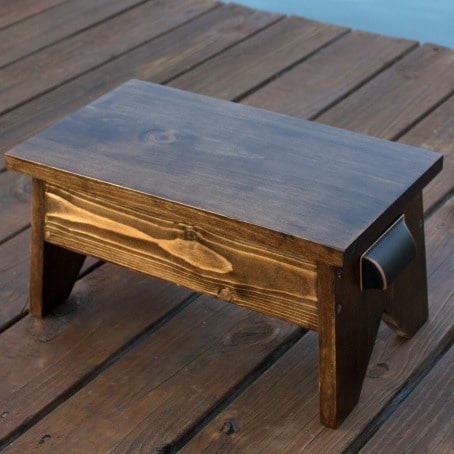
DIY 2×4 Bench
It’s once again time for the Power Tool Challenge Team to share project made with power tools. Last month our theme was “Repurposed / Upcycled” and I shared a tennis racket table. This month the theme is “Patios and Porches” and for it I’m sharing how to make a DIY 2×4 bench.
DIY 2×4 Bench
Mr. SP found an awesome plan by Jay’s Custom Creations and we followed it to make this bench.
I’ve never before used a woodworking plan to make a project and I couldn’t be more pleased with how this bench turned out. My pictures were taken in our yard but this bench will find a new home on our front porch at the lake this weekend.

The bench is constructed from pressure treated lumber so we decided not to stain it. This bench is very comfortable. In fact, I am thinking about building a second one for our dock.

The watering can came from my grandmother’s house. The Catmint in it is from my yard and if you are looking for a deer-proof plant, this is one of them.
How to Make a DIY 2×4 Bench
Prior to making this DIY 2×4 bench, the part of woodworking plans that confused me were the cutting diagrams. Now that I have followed these plans and had Mr. SP explain the cutting diagram, I am ready to find a plan and build something else. 
Supplies
- 8 – 8 ft 2×4’s (I used pressure treated since this bench will stay outdoors.)
- 2 1/2” Deck Screws
- Outdoor Wood (waterproof) Glue
- Miter Saw
- Drill
- Carpenter’s Square
- Measuring Tape
- Pencil
- Random Orbit Sander

Steps to Make a DIY 2×4 Bench
Cut the Pieces
Following the cutting diagram on Jay’s Custom Creations, cut the pieces using the miter saw. The instructions provided on this website are outstanding. These pieces will form the sides and back support for the bench. The angles are all either 15 or 90 degrees.

Four boards were cut in half to form the seat pieces.

Hint: Cut two boards at a time to be efficient.

I am not normally clad in camo. It was freezing cold on Sunday when I made this bench and I found this jacket stuffed in the corner of the workshop and put it on for warmth, not fashion. 🙂
Assemble the Legs
Glue and screw the leg pieces together.

Hint: Use a scrap piece of 2×4 to determine the distance between the two horizontal members.

After completing the first leg use it as a template for making the second.
Line up the pieces for the second on top of the first to make sure that they will be identical.

Now the legs are complete.

Add Back Support Side Pieces
Attach a back support to each leg.
Be careful that both sides have the same angles when the boards are screwed together.

Construct the Bench Seat
Attach the 40’’ seat stretcher piece.

Determine which boards will be used for the seat.

Place the boards on a workbench lining up the ends.
To center the boards on the seat rails, the distance between the rails was measured (center-center) and was subtracted from the total length of the seat board length. The remainder is the amount of total overhang.
Half of the total overhang is the line in which you will place the screws. Use the carpenter’s square to draw a line where the screws will go – then determine the screw spacing and mark with pencil (I used 1” from each edge of each board).
Drill and counter bore the intended screw holes so that the deck screws are flush with the seat surface.

Sand the boards (top and edges) with the orbital sander – making sure to slightly round the edges. Screw boards into place leaving 1/4” between each board.

Construct the Bench Back
Mark and drill the seat back similarly as you did the horizontal seat boards – noting that the distance between the back support rails is shorter than that of the seat support rails.
Sand each board as before.
Attach the top seat back board first making sure that both the back support rails are vertical and parallel (as viewed from the front).

The remaining back boards were clamped, then screwed, into place from top to bottom in sequence.
As with the seat boards, there is approximately 1/4” spacing between the back boards.

Enjoy the DIY 2×4 Bench
Dang, this thing is solid and heavy! I think it will be enjoyed for many years at the lake.


Pin It!

If you like this project, I’d love for you to pin it for others to discover.
More 2x4 Projects

More Patio and Porch Power Tool Projects to Enjoy
I am looking forward to seeing what my friends made for this month’s “Patios and Porches” challenge. Click on the links below to visit each project.
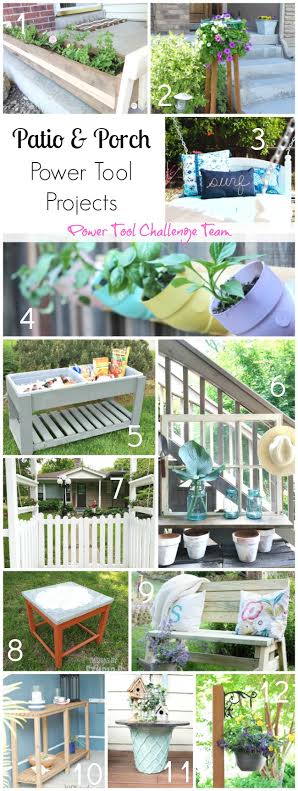
1. Long Porch Planters by My Love To Create
2. DIY Flower Pot Plant Stand by Her Tool Belt
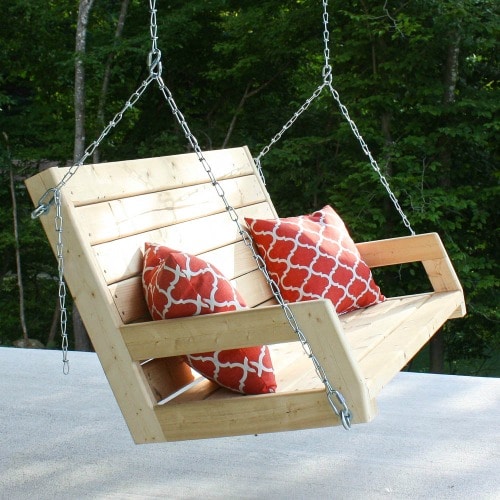
3. DIY Easy Swinging Bed by Domestically Speaking
4. PVC Pipe Vertical Garden by Kim Six
5. How to Build An Outdoor Serving Table by Create and Babble
6. Repurposed Window Garden Shelf by Refresh Restyle
7. Trimming Out Porch Posts by My Repurposed Life
8. Stenciled Concrete Topped Table by Designs By Studio C
9. 2 X 4 DIY Bench by Virginia Sweet Pea
10. DIY Outdoor Sofa Table Tutorial by H2OBungalow
11. Repurposed Electrical Spool Holder Table by Designed Decor
12. DIY Outside Standing Plant Hanger by Confessions of A Serial DIYer


Your bench looks awesome! Jay has some great plans, I love the look of this one!
I love your bench, it is so cute!!!
Love your bench & your pillows!
Whoa. This seems really complicated. I am impressed!!! Plus, you want to make another one! Way to go!
You rock, Paula! 🙂
You rocked this bench, Paula! I have never followed a building plan either, but I guess it’s just like a pattern. This will make such a great addition to the lake house and I know it will get lots of use! XO
This is awesome! Seriously cool with the back on your bench. This will be perfect for your lakehouse and heavy duty too. My readers will love this when I share it!
What an awesome bench! I love how sturdy it looks. You’re gonna be on a roll now that you’re a cutting diagram pro!
I love 2×4 projects. Your bench is awesome Paula.
gail
The bench is amazing – you did a fabulous job! (And for the record, you were totally rocking the camo!)
Awesome! This is beautiful and thanks for walking us through it, step-by-step. Pinned! 🙂
Awesome project! I love how sturdy it is and hey, your styling!
This is a great build! It is so pretty and I love your design! I pinned it as well!
Another fabulous outdoor furniture project, Paula! Love how you staged the photo too btw. I bet your bench looks perfect at your lake too.
This bench looks awesome!! I’m sure it will look great on the front porch of your lake house.
Thanks, Keri! We took the bench to the lake last weekend and are really pleased with it. It’s great to have a spot to drop packages or to sit when we need to put on our shoes.
I noticed you did not use pocket screws – is that correct, and just used deck screws that were countersunk?
What a great DIY! Love those pillows!
I was wondering about how long it took you to cut and assemble the bench? Also, I noticed that your bench has 4 boards on the back instead of 5. Was that on purpose? What was your reasoning for that? I do like the 4 back boards better. 🙂
Hi, Laura! We made the bench in an afternoon, I’d say in three hours, tops. I followed the directions on the link in my blog post for making it. I made it a while back, so I’m not sure about the 4 or 5 boards on the back.
Paula
Thanks! I made 2 of these benches last year shortly after my comment, so around the end of July ’18. It’s now June ’19. It’s been about a year. Like you, I used treated wood and left it unfinished. They turned out great. Thanks for the tutorial!
However, the benches (one more than the other) warped some being left outside all year. So I wanted to mention that it may be best to at least clear coat the benches to protect them from water to prevent the warping.
Image of my bench new…
https://www.screencast.com/t/ScCBAOLcCGj
Is t it so fun to build something like this and then look back and admire your work? You did an awesome job on this bench! A simple yet very functional piece that you will cherish forever…or until it falls apart…lol JK
I am well beyond this point of building but had to give it up for quite some time. I think now I might be able to do this bench but I still have to be careful. Working on rebuilding my muscle so I have to take it slow. Great job on this!
Thank you so much, Shirley! Take care of yourself and work hard to rebuild your muscle strength.
Such a charming bench, Paula! Thanks for sharing at Vintage Charm!
What an awesome bench you have there. I think Jay has some great plans for this bench, and I really love the look of it!