DIY Footstool
For this month’s Power Tool Challenge, I made a DIY Footstool. Actually, I made two and they are so useful!
When we are at the lake, we love to relax on the deck in rocking chairs or on the dock in Adirondack chairs. My preferred way to relax is with my feet up, so these DIY footstools will get a lot of use on both our deck or dock.

Instead of designing my own footstool, I followed these plans from Ana White. This is the second time that I’ve followed woodworking plans, last month I followed these to make a DIY 2×4 Bench, and slowly but surely, I’m starting to understand woodworking lingo.
I’m thrilled with my DIY Footstools and look forward to using them all summer.
How to Make a Footstool
Making these two footstools was relatively easy and only took a few hours.
Finishing them with stain and several coats of polyurethane took longer than the construction.
Materials
(List is for one stool.)
- 1 (1 x 10) pine board
- 1 (1 x 3) pine board
- 1 5/8” exterior deck screws
- 1 1/4” pocket hole screws
- Kreg Jig
- Wood Glue
- Woodworking Square
- Tape Measure
- Compound Miter Saw
- 2 cup pulls or any drawer pull (optional)
- Band Saw
- Drill
- Palm Sander
- Wood Stain
- Tack Cloth
- Polyurethane

I made two footstools, so note that I have double the wood needed and four cup pulls.
Building the Footstool
1. Square off the end of a 1 x 10 and cut a 16” piece to form the top of the footstool.
2. The two end pieces are cut at 7 1/2” (edge to edge) with parallel 5 degree angles.

Setting up a stop block jig ensures that each side piece will be 7 1/2”. Note that the board is also marked at 7 1/2”

After the first 7 1/2” piece was cut, flip the board to cut the other end at a 5 degree angle such that the edges have parallel 5 degree miters.
After cutting the top and bottom parallel 5 degree angles, the sides of the board are tapered, also at a 5 degree angle, from bottom to top (angles tapered so that the top is narrower than the bottom). Note that the jig is now set to the width of the bottom edge for these tapered cuts.

3. Cut 2 – 13” pieces, also at a 5 degree angle (not parallel, but tapered to the top) for the side pieces.
4. Notch the bottom of each side. I measured in 2” on each side and three inches up and then connected the points with a pencil. These lines were cut with the band saw.


5. Sand each piece.

6. Connect the side pieces and end pieces. These side pieces can either be attached vertically (w.r.t. the ground), or aligned with the edge. I chose to align the sides with the tapered edge of the legs. Start by marking points for screw holes 3/8” from the side and 1” down and 2 1/2” down – noting that there is a distinct outside and inside surface to these legs. Countersink the screw holes on the outside of each side piece.

Apply glue to the end pieces and screw to the side pieces.


7. I wanted the screws to be hidden when I attached the top to the base, so I used my Kreg Jig to make 3/4” pocket holes that face upwards from the inside.


8. Center the base of the footstool on the bottom side of the top and mark with a pencil on the inside. Apply glue around the pencil line.

Put the base on the top upside down and screw into place.

The footstool is now complete other than staining and attaching the cup pull handles on the sides.

Staining the Footstool
Here the footstool has been stained and protected with polyurethane, ready to be used at the lake.

The stools were stained in Dark Walnut by Minwax .
.
After the stain dried, I sanded each stool, wiped the wood down with a tack cloth, and applied a coat of polyurethane .
.
After the polyurethane dried, I went over each with fine steel wool to make the finish super smooth and then applied a final coat of polyurethane.
After the polyurethane dried, the cup handles were screwed into place.

Enjoying the Footstools
At the end of the day, we will pull our Adirondack chairs to the end of the dock, prop our feet up on our footstools, and watch the sun go down.

The Adirondack chairs are another DIY project, you can see how we made them here.
This is one of the rockers that usually is on our deck, but since it folds, it’s easy to carry down to the dock. Sitting in this rocker with my feet propped up is going to be pure heaven.

I’m really happy with this project and can’t wait to make something else to use at the lake.


If you like this project, please pin it for others to discover.

Summer Power Tool Project Ideas
Now it’s time to see what my friends made for this month’s Power Tool Challenge.
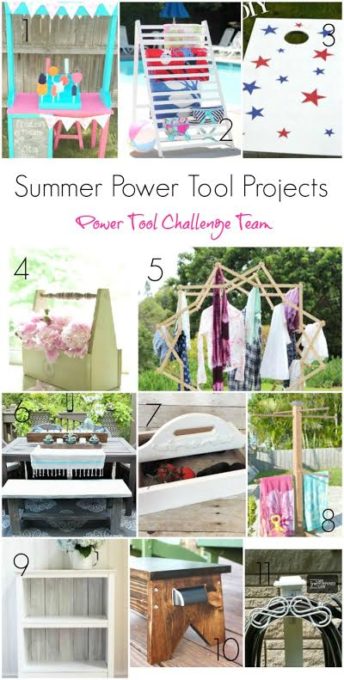
Click on the links below to visit each project.
Frozen Treat Stand by My Love To Create
Red White And Blue Cornhole Game by Create And Babble
Drying Rack From Old Crib rail by The Kim Six Fix
Chair Spindle Wooden Garden Caddy by Interior Frugalista
Star Clothes Drying Rack by A Piece Of Rainbow
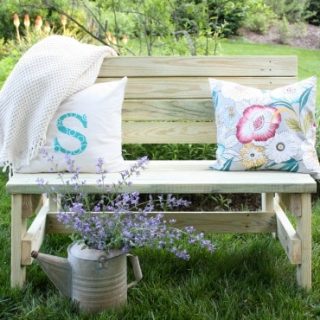
Farmhouse Bench Building Plans by Refresh Restyle
Vegetable Gathering Basket by Designs By Studio C
DIY Standing Towel Rack Tutorial by H2OBungalow
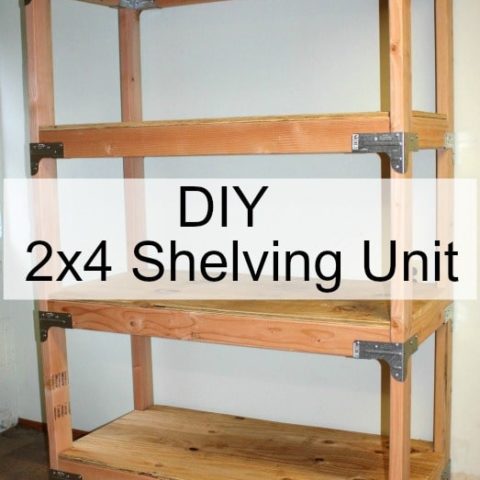
Reclaimed Wood Bookcase by Confessions of A Serial DIY’er
DIY Footstool by Virginia Sweet Pea
DIY Hose Hanger by My Repurposed Life
Favorite Projects
If you liked this post, check out more popular projects.


These stools are darling, perfect for your lake house! I can imagine how nice mornings will be with a cup of coffee lounging with your feet propped up. Enjoy!
Thanks, Wendi! I am hoping to enjoy many mornings and evenings with my feet up on those stools.
Paula
I love your little footstools! I’m one that always likes to put my feet up when I rest, so of course this speaks to me.
pinning!
gail
My mom and I were rocking in our rockers one day saying that we needed something to put our feet up on and that’s when the idea for this project was born.
Paula
Your footstools are so cute!
Thanks, Tammy! I am so pleased with how they turn out.
Paula
How adorable is that – his & her lakeside footstools! Ooooh, I could spend many hours relaxing with my feet up on your pier. Love the rustic look you gave them and the cup pull handles are perfect for function and looks. Nice job!
Thanks, Marie! I can’t wait to use these stools this summer and for years to come.
Paula
Nice, Paula! I love the style of the footstools, the finish and especially the handles on either side! These are great!
Thanks, Cher! We are really going to enjoy using these for many years.
Paula
Those are great! I love the handles on the side! They look so great on your dock. All those images just make me so relaxed just looking at them!
Thanks, Megan! It’s something about looking at that water that instantly is relaxing.
Paula
These are the cutest stools! And I love the handles on the sides! Use them in good health relaxing by the lake this summer!
Thanks, Jeanie! I hope that we’ve worn the finish off by the end of summer from propping our feet up on them.
Paula
These are so pretty, Paula, and perfect for putting your feet up on at the lake! You are really going to enjoy that house this Summer! XO
Thanks, Christy! We were at the lake for two nights earlier this week and I didn’t want to leave!
Paula
Paula, I’m with you – love putting my feet! But these are almost too pretty for that! Love the design!!
Thanks, Debbie!
Paula
Such cute little footstools! I love the finish, and they are perfect for putting your feet up!
Thanks, Mindi! I know we will enjoy using these.
Paula
Great job on the footstools! They look great! 🙂 ~Rhonda
Thank you, Rhonda!
Paula
so BEAUTIFUL!!! i love the hardware details, how creative! the form and finishing is gorgeous too! <3
Thanks, Ananda. I know we will really enjoy using these.
Paula
The stools are beautiful! I love the stain you used.
Thank you, Bernice. I wasn’t sure about the stain at first but after applying the poly, I really like it.
Paula
Those stools are too pretty to put feet on.
So nice, Paula! They look lovely with the chairs, too! (I wanna say something about your muscles in that one pic… but can’t figure out what to say without being awkward or embarrassing you, or me! See what I mean?! 😉🤪)
I love the side handles and dark walnut stain. I’m choosing this as one of my features for the #littlecottagelinkparty next Monday. Have a great weekend!
Paula, I’m so impressed with your DIY footstool project and can’t wait to feature it on Tuesday Turn About this week. Thanks so much for sharing it with us.
This little stool is perfect for my chair! Great tutorial, great photos!
These are darling. I’m featuring them today. I really want to make one. So cute.
I just don’t think it is possible to have too many footstools! They are so handy. Thanks for the how-to! Now I don’t need to buy anymore!
Loving these stools, you make it look so easy!