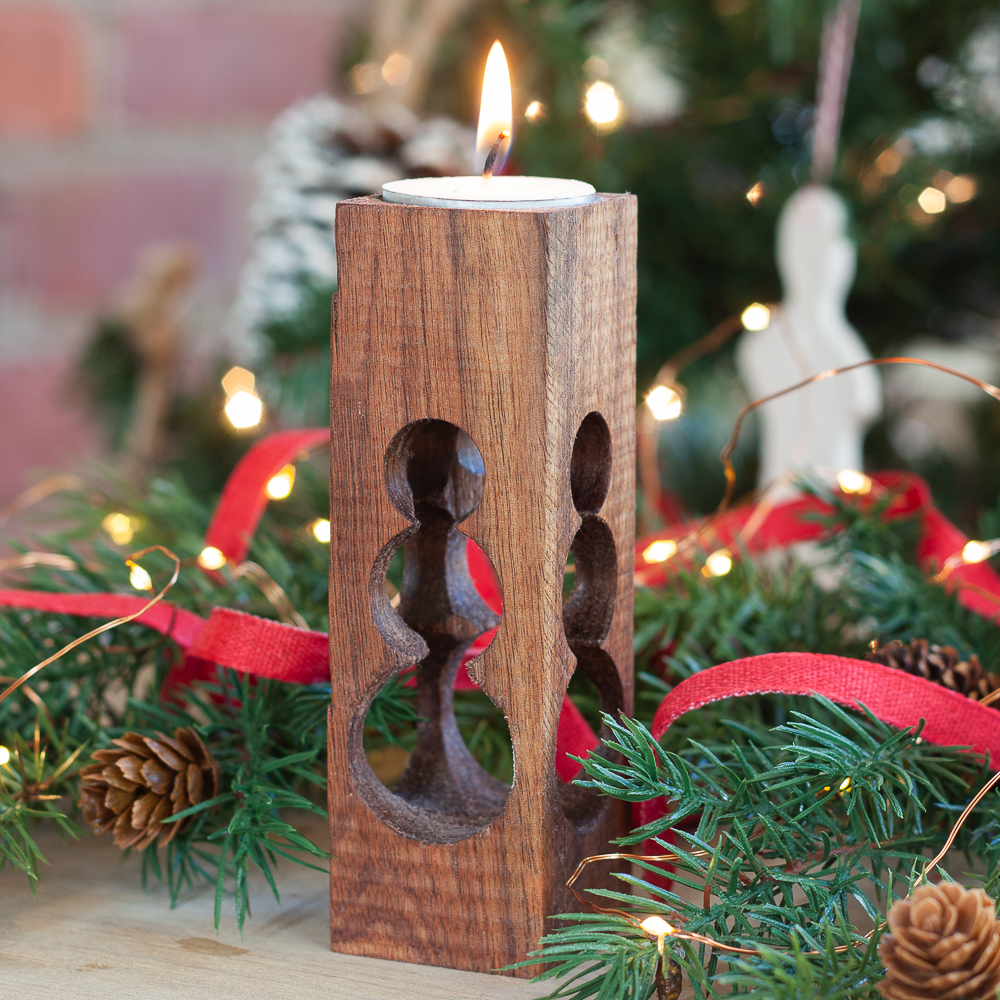
How to Make a Pierced Wood Candle Holder
Today I’m sharing how to make a wood candle holder that can be used for decor in any season.
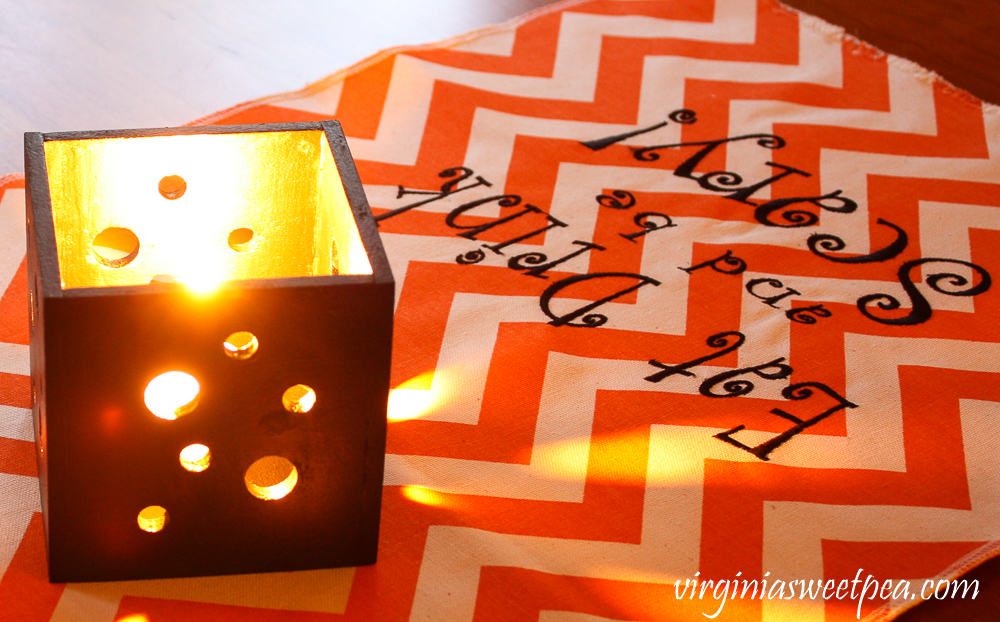
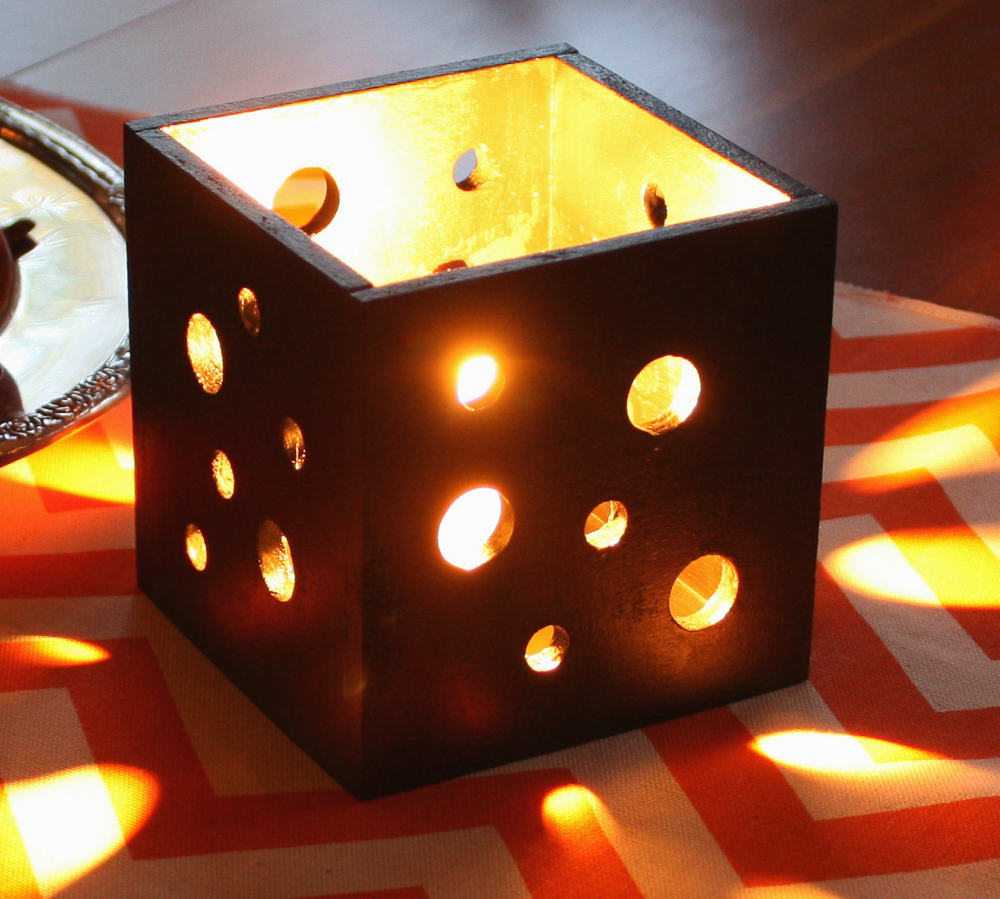
Each side of my wood candle holders contains holes of varying sizes to let candlelight shine through.

This project was relatively easy and Mr. SP and I made two candle holders in under an hour.
Painting and waxing took extra time, but all-in-all this project was completed fairly quickly.
How to Make a Pierced Wood Candle Holder
This post was first shared back in 2015. I’m sharing an updated version of it today since it’s a project perfect for fall or Halloween decor.
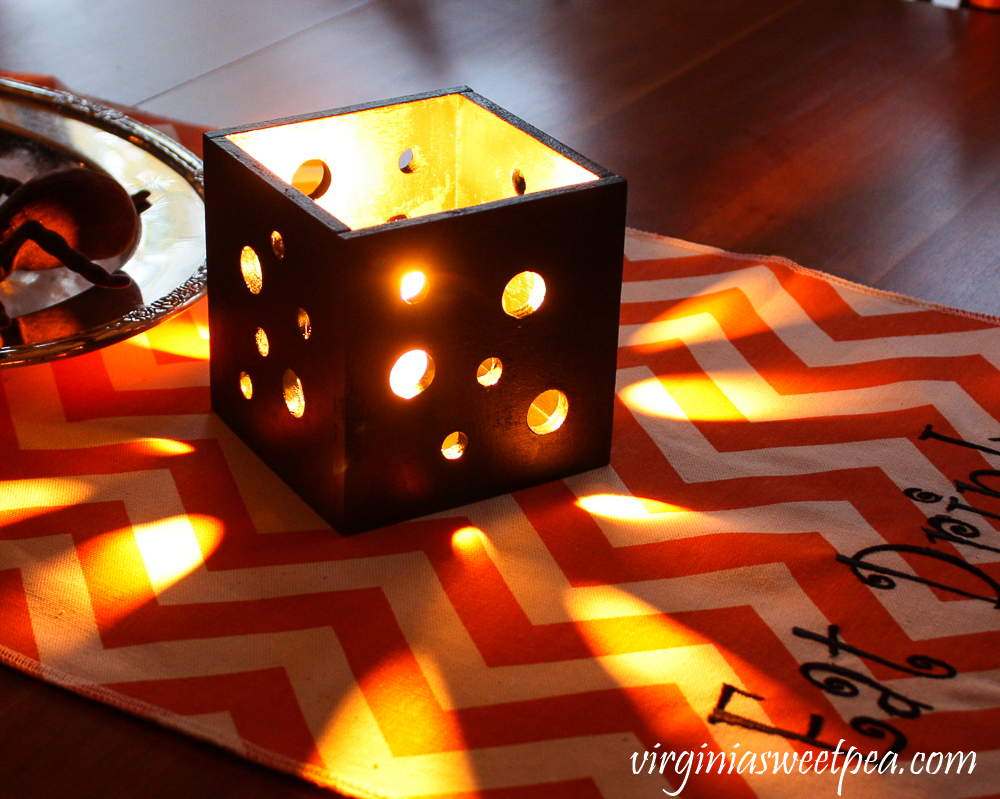
Holes drilled into the sides of the candle holders make pretty patterns of light to enjoy when the candles are lit at night.
It looks like the insides of the holders are painted with gold paint but they aren’t, the paint is black with liquid wax applied over the top.
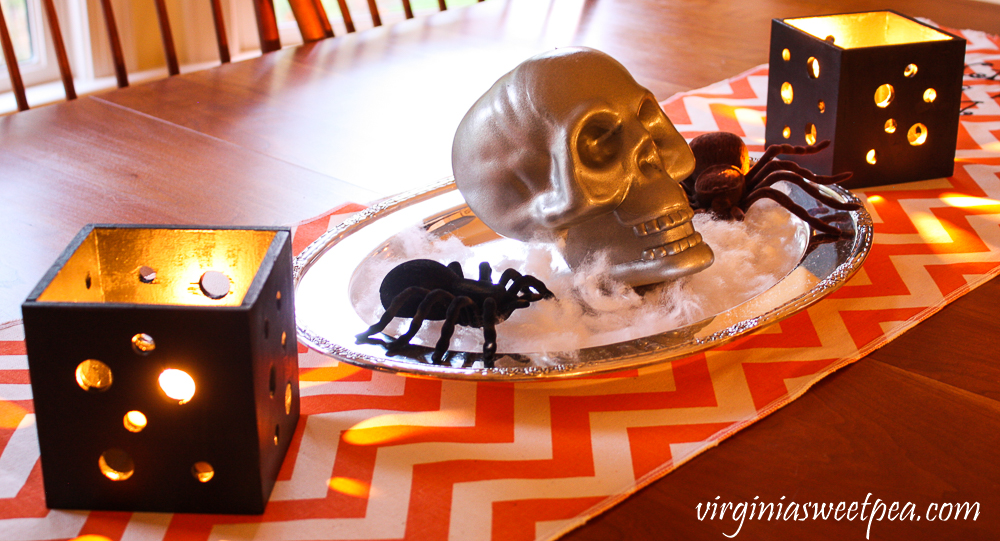
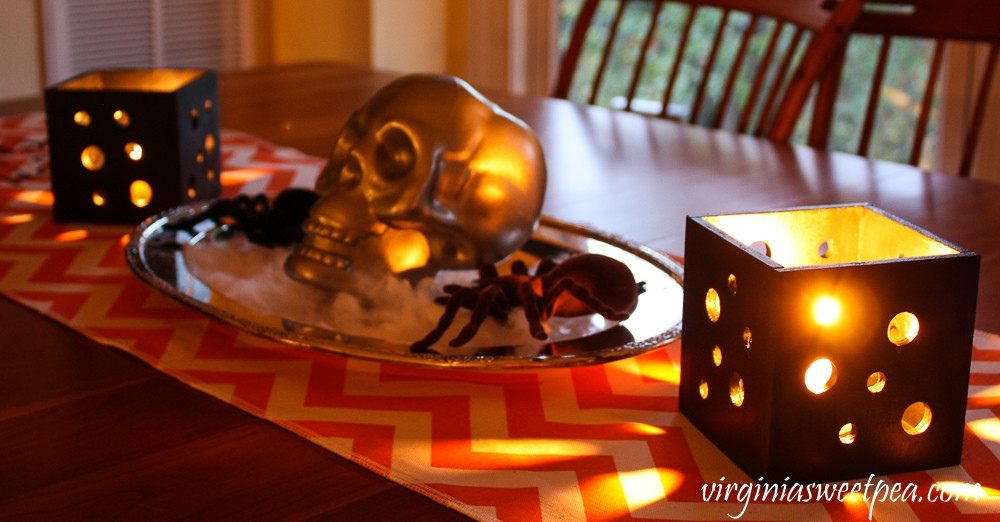
Combined with a orange and white chevron table runner and a semi-scary centerpiece, my candle holders make a great decoration for my kitchen table.
Materials
- 1/4” x 6” x 4” Poplar Board (I purchased mine at Lowe’s)
- Forstner Bit Set
- Wood Glue
- Clamps
(This is our favorite clamp and you can never have enough of these!)
- Table Saw, Compound Miter Saw, Drill Press
, Orbital Sander
- Paint


Cut the Candle Holder Sides
The first step for this project was to decide on the dimensions.
After experimenting a bit, we decided to make a 4” square box meaning we would need these pieces for each box:
- 2 – 4” x 4” (Sides of the Box)
- 2 – 3 1/2” x 4” (Sides of the Box)
- 1 – 3/ 1/2” x 3 1/2” (Bottom of the Box)
Our poplar board was 6” wide, so we used the table saw to cut the board to a 4” width.
Our basement doesn’t have a dust collection system, so we work outside as much as possible.
Mr. SP put wheels on my grandfather’s 1950’s table saw so that we can roll it outside to use. This antique piece still works just fine and we are thankful to have it but we both eye more modern saws when we shop at Lowe’s or Home Depot or when we browse tools online.
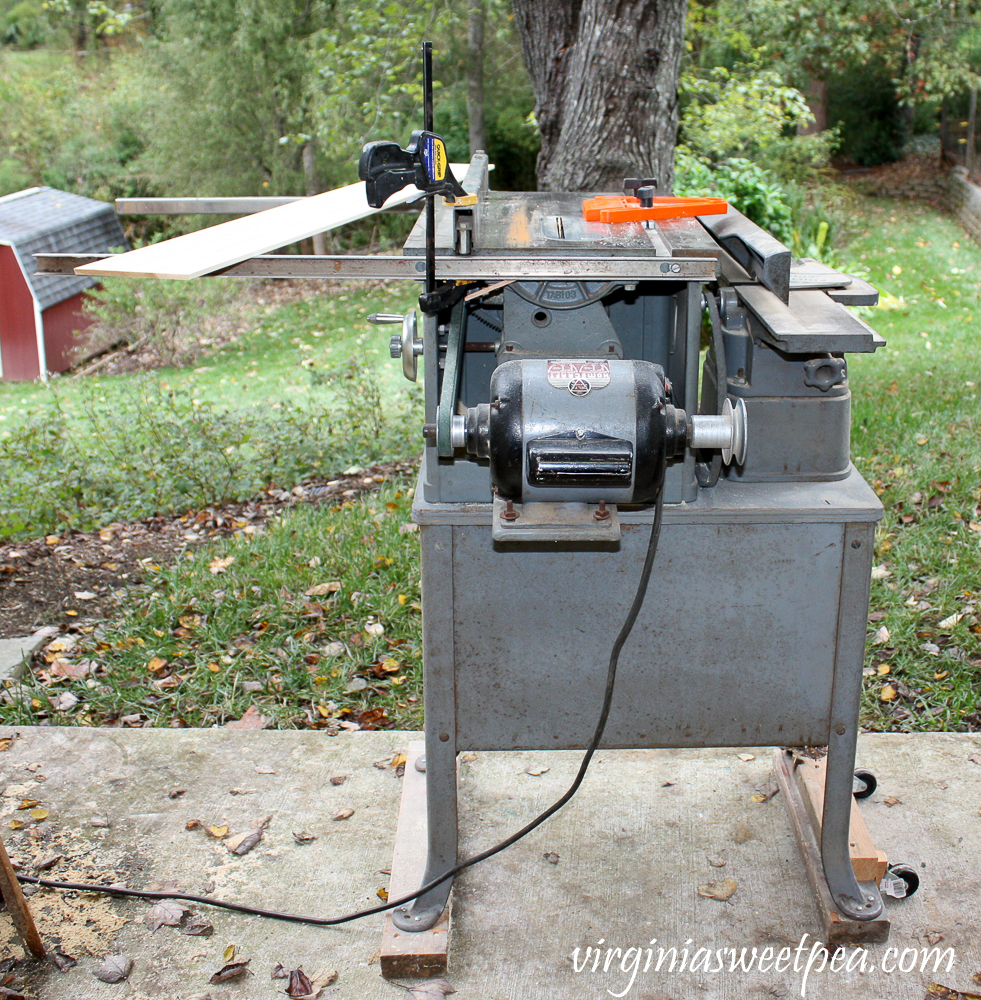
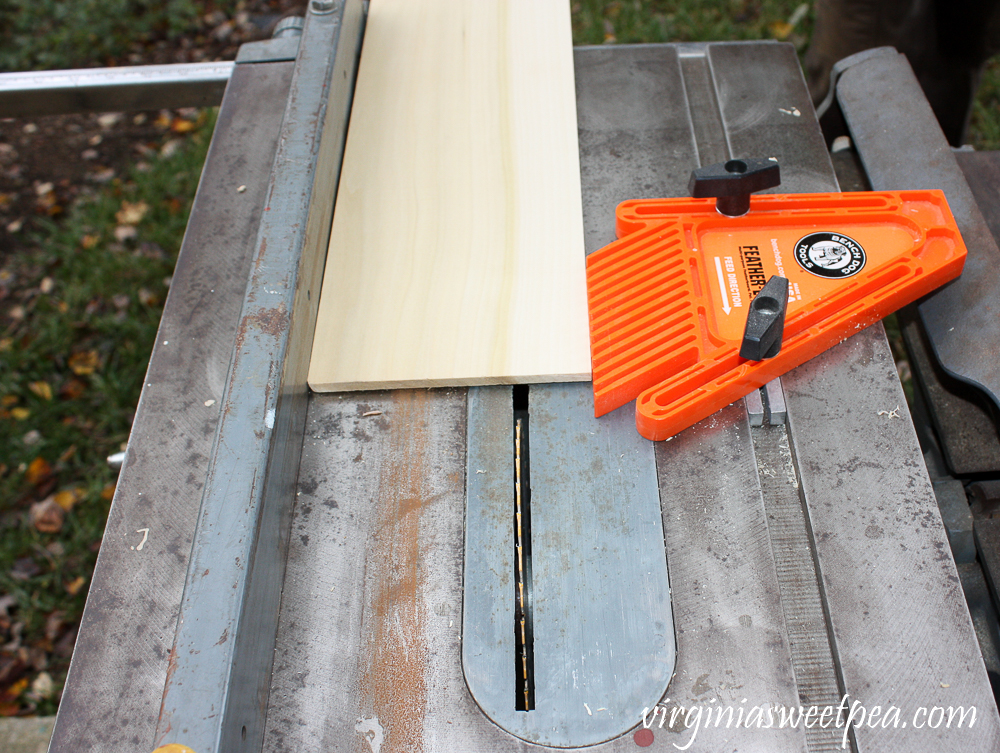
We set the saw up to cut the board 4” wide. A Bench Dog Feather-Loc
The tightening nut on the end of our table saw’s fence is broken so we have to clamp it in place. That’s the down side of using a 60+ year old piece of machinery. 🙂
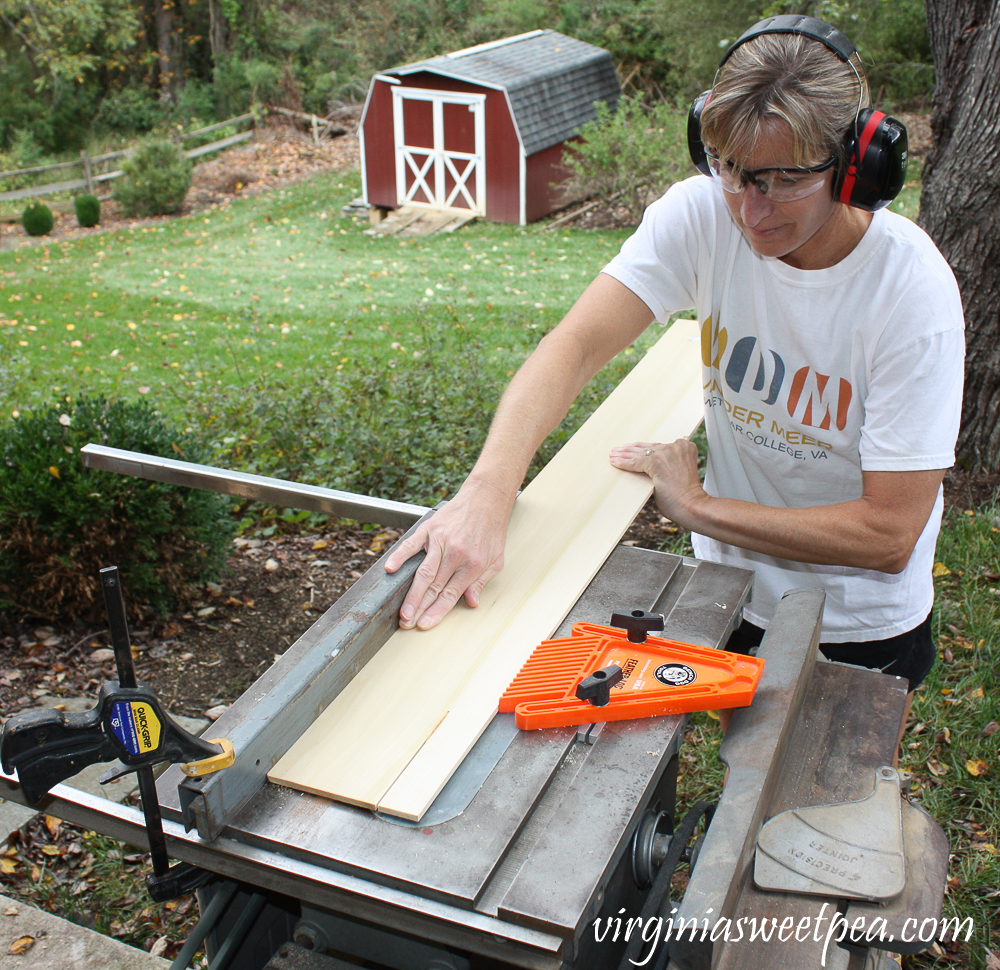
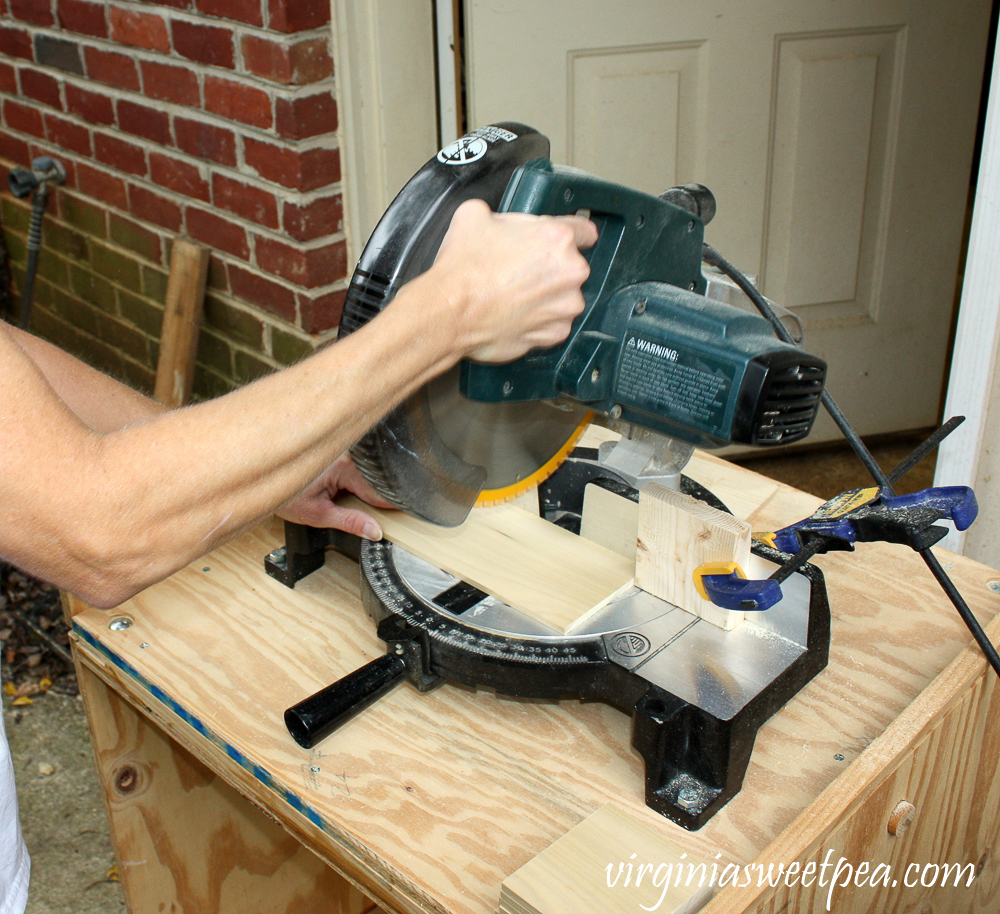
After ripping the board to 4”, the next step was to cut the box pieces.
Since two pieces needed to be cut at 4”, we clamped a scrap piece of wood 4” from the right side of the saw blade to serve as a stop-block as we cut.
We then moved the stop-block to 3 1/2” for the other two side pieces and the box bottom.
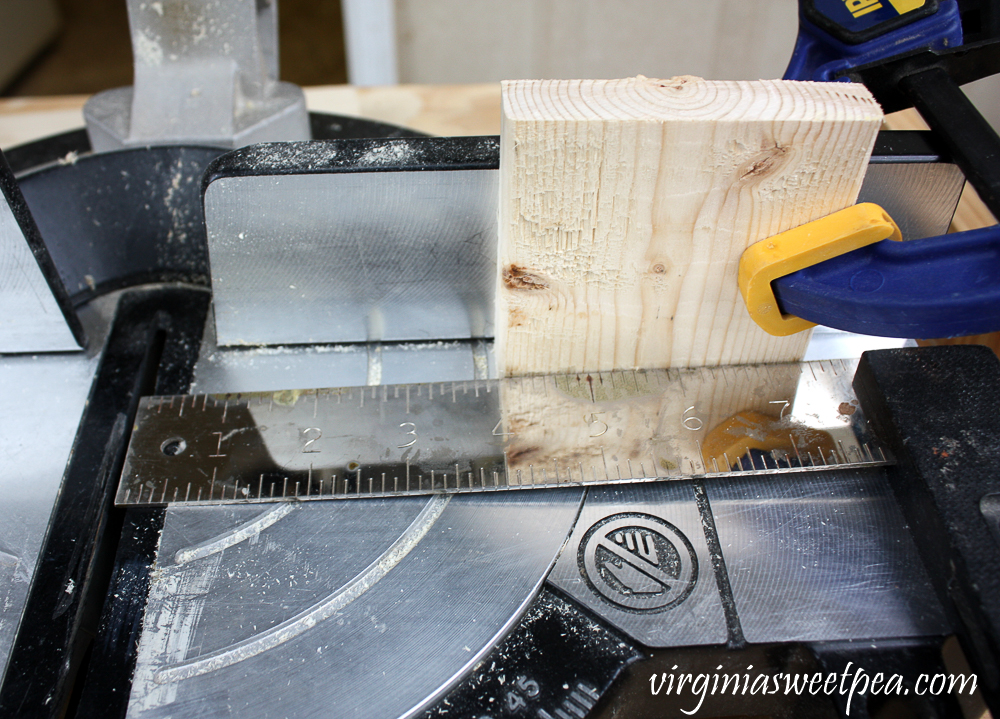
Using a stop-block works like a charm to do accurate cuts.
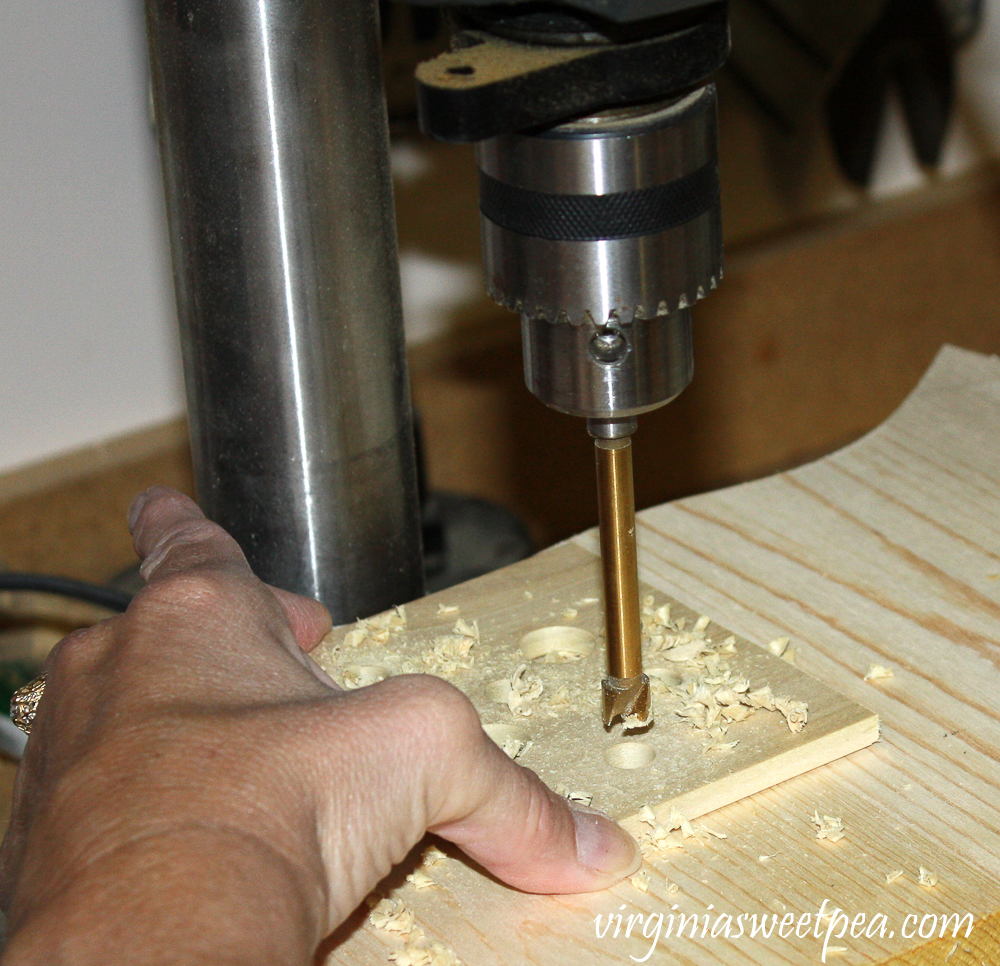
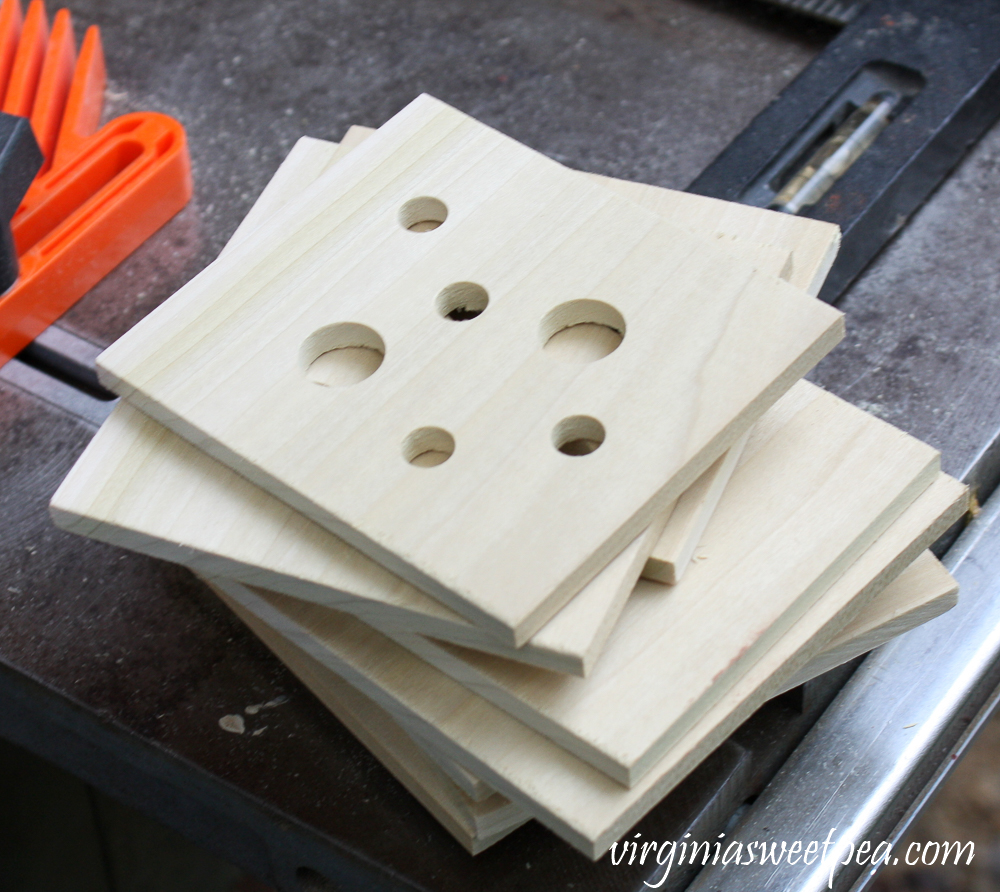
Drill Holes in the Candle Holder Side Pieces
The next step was to drill holes in the box sides using a drill press.
I experimented with our forstner bit set and chose a large and a small bit size.
Sand the Pieces
After the holes were drilled, I sanded both sides of all of the pieces.
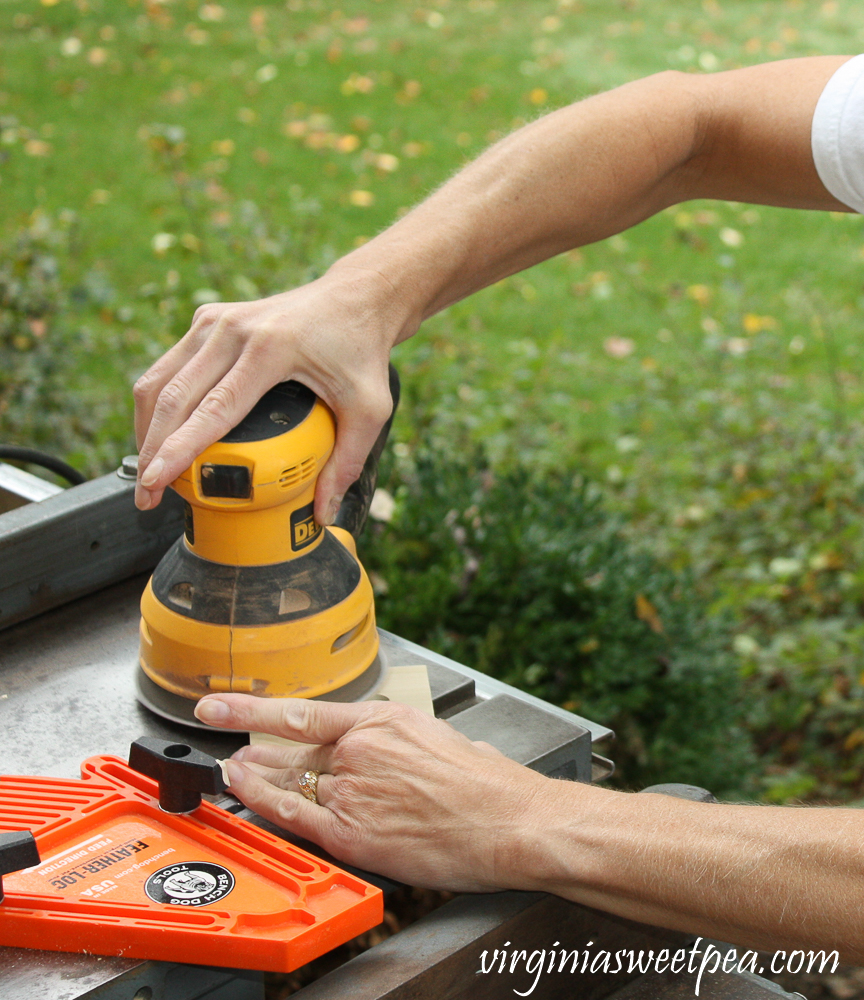
The pieces of our two candle holders are now ready to be assembled.
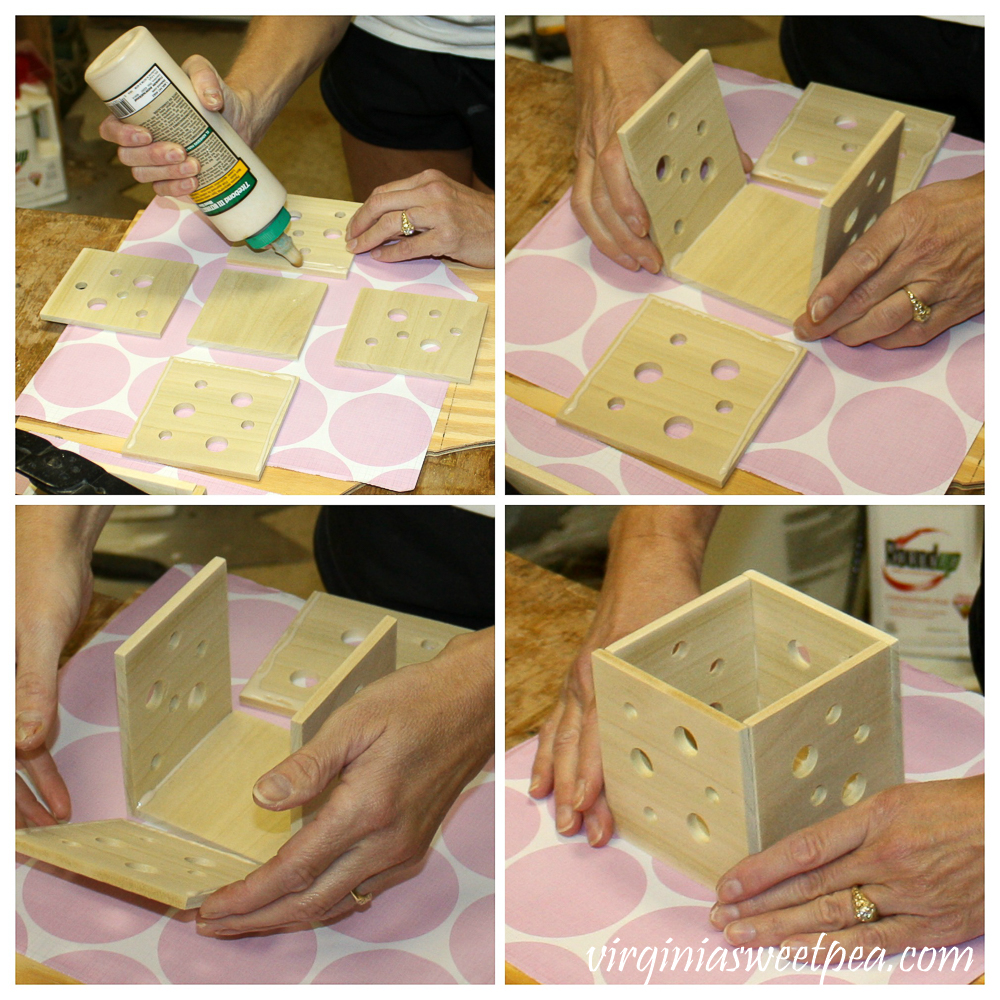
Assemble the Candle Holders
These are the pieces for two boxes. They are on a vintage teacher’s desk that I found at Goodwill. See what the desk looks like after I refinished it here and check out another vintage office desk that I restored here.

Since the pieces needed to be glued, I put them on scrap wood with scrap paper over it since I knew the glue would ooze out. (In retrospect, the paper over my scrap wood was unnecessary.)
Wood glue was squeezed on all edges and the box was assembled. Have a rag handy to wipe off any glue that oozes out.
After assembling each box, we clamped them in as many directions as possible to keep them square as they dried. You can never have enough clamps in a workshop!
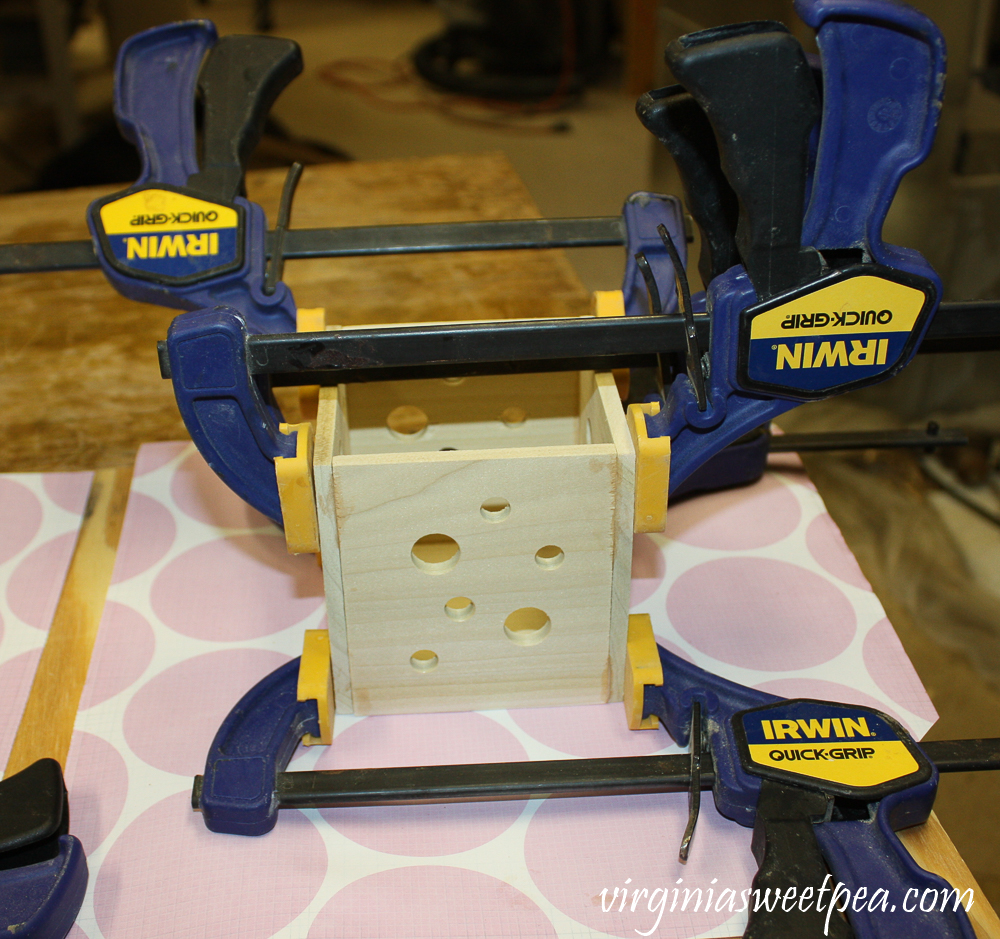
In my excitement to complete this project, I didn’t take a picture of my candle holders when the clamps were removed.
Paint or Stain the Boxes
After removing the clamps, I sanded the sides smooth and then painted them with two coats of paint from The Plaster Paint Company in Black Tie.
To add a sheen to the paint, I waxed them with liquid wax also from The Plaster Paint Company.
The inside of the candle holder looks like it is painted gold, but it’s painted black with liquid wax over the paint.
Isn’t it pretty with a tea candle lit inside?
Decorate Using the Candle Holders
My pair of wood candle holders are on my kitchen table being used for Halloween decor.
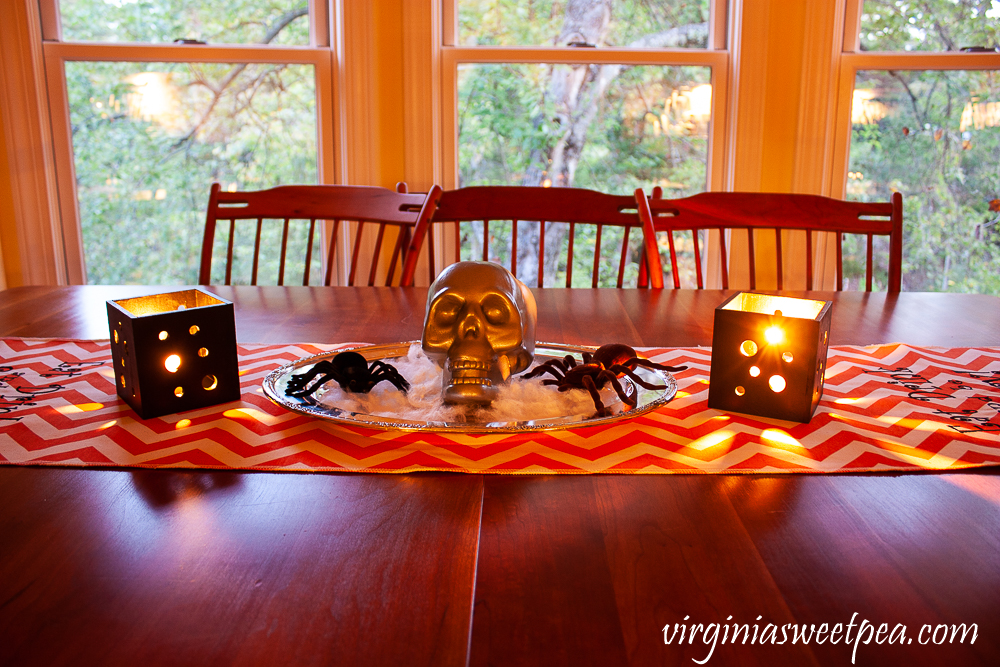
The skull and spiders are from the dollar store. I spray painted the skull a silvery color and glued it to a scrap piece of wood so that it would stand up on its own. The tray is a $2 Goodwill find.
To be honest, I am not crazy about using skulls as Halloween decor because I think it is disrespectful to the dead.
I have no issue with spiders and think I may replace the skull with gourds that I bought last week. I think I’d rather admire gourds through Halloween rather than a skull! 🙂

This project was fun to make and I’d like to make a few more with stained rather than painted wood.

These are so fun, and I think I’d have to keep them out year round too:) I can’t get over your vintage table saw! Wow.. How special that it’s been in the family and now you have it to build stuff with as well!
I see so many possibilities with this – plus a great way to use up your scraps.
Love it! What a perfect idea to give a great glow to your table and halloween decor. I think I need a drill press!
These are so cool, Paula, and they are the perfect addition to your spooky table top display! Very creative! XO
Oooo these are so cool! I like that they are spooky for your Halloween table but I bet you can dress them up differently for other holidays! It’s amazing how many tools it can take to make smaller projects!
Love fall creations, and this one looks amazing! 🙂 I would love for you to stop over and say hello!
Cath
I’m seriously crushing over these Paula – what a great idea! They work for Halloween, Fall, Christmas, New Years and the list goes on. You really rocked the power tools on this one too!
So beautiful, especially as a centerpiece! These candleholders would be great all year ’round! Love them, Paula!
What a cute project… they’d be perfect for Christmas too!
Love this project. It could be used for different occasions.
These are really cool! I love the way they look with the lights in them!
What a fun project! I love all the holes and would definitely keep them out year round.
Very cute! In one of the photos, the light across the table cloth made it look like candy corn.
It’s crazy how that liquid wax makes the light reflect different colors. Candy corn colors are perfect for this time of year!
Paula
Wow, Paula! I didn’t know you were so handy in the workshop! These candles are a brilliant idea for fall. I can imagine they cast many pretty streams of light on the table.
I used to be in a blog group that shared a woodworking project every month. It really motivated me to make things and my husband and I had a great time in the workshop coming up with projects and then making them.
Paula
What a great project. Thanks so much for sharing.
They are so pretty and cozy looking. I would use them all year!
Such a cool and unique project!!
These are fun for year round decor! The effect of the wax is so cool.
These are really pretty. I wouldn’t have know that the inside was not gold paint. I can think of so many things these could be used for. Great project. Pinned.
What a unique and easy project to do! They great on your table! Thanks for sharing the inspiration!
This is really cool!! I think I am going to try it out for next year!!!
What a fun project, Paula! These lanterns are perfect for Halloween!
Easy for a beginner and looks very high end. I’d love it if you shared this project on my Friday Favorites Linky Party
What a great idea! I’m pinning for later 🙂 And that liquid wax effect, amazing!
What a perfect project for October! Bring on Halloween!
So many options with this DIY! Entertaining ideas galore. Thanks so much for this post!
These are beautiful! I think they’d look great stained, too.
So pretty, Paula, and it could be styled for Thanksgiving and Christmas too! Thank you for sharing at Party In Your PJ’s.
What a great project! I can see a use for these year round! xo
Paula your candle holders are so good looking! I’m always amazed with your projects…I guess you can say I have power tool envy LOL! I’m looking forward to featuring your post this week on the Tuesday Turn About Link Party.
Great project, Miss Woodworker! I’m so impressed with your woodworking skills and your creativity. Thanks for sharing at Tuesday Turn About Link Party.