Lake Basement Project – Update Six
Each weekend we get a little more done on our lake basement project and it’s rewarding to make progress.

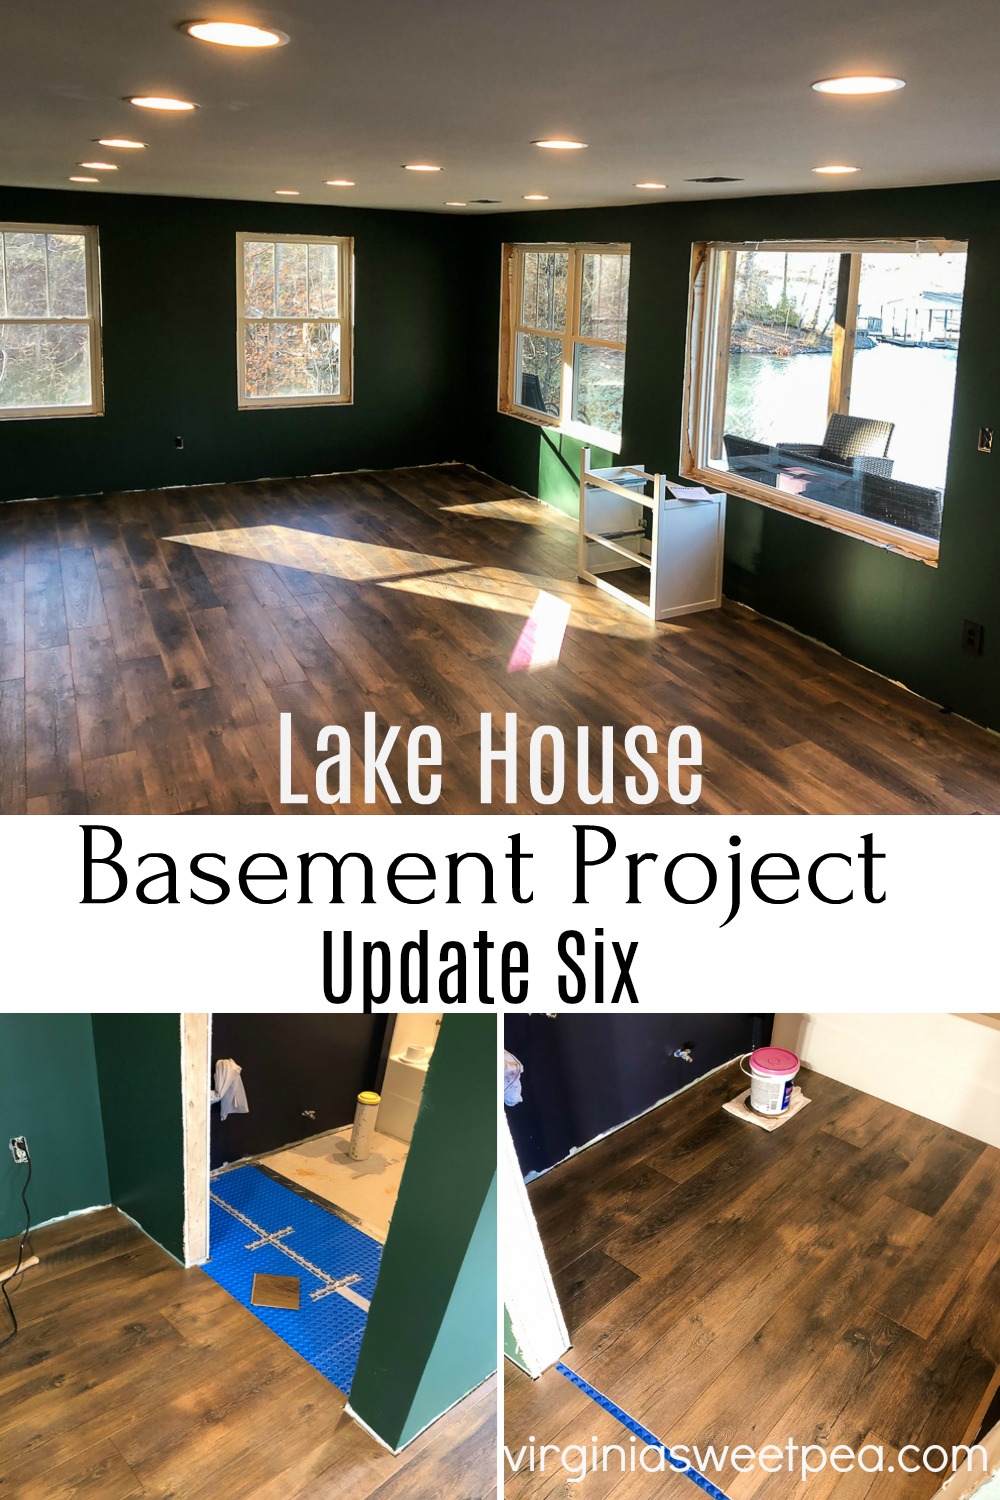
Last weekend our goal was to finish the flooring and we did with the exception of installing two thresholds.
If you need to catch up on what we are doing in our basement, check out these posts:
- Lake House Basement Project Plans
- Lake House Basement – Update One
- Lake House Basement – Update Two
- Lake House Basement – Update Three
- Lake House Basement – Update Four – Paint
- Lake House Basement – Update Five – Flooring
- Lake House Basement – Update Six
- Lake House Basement – Update Seven
- Lake House Basement – Update Eight
- Lake House Basement – Update Nine
- Lake House Basement – Update Ten – Installing a Newel Post
- Lake House Basement – Update Eleven – Installing a Banister
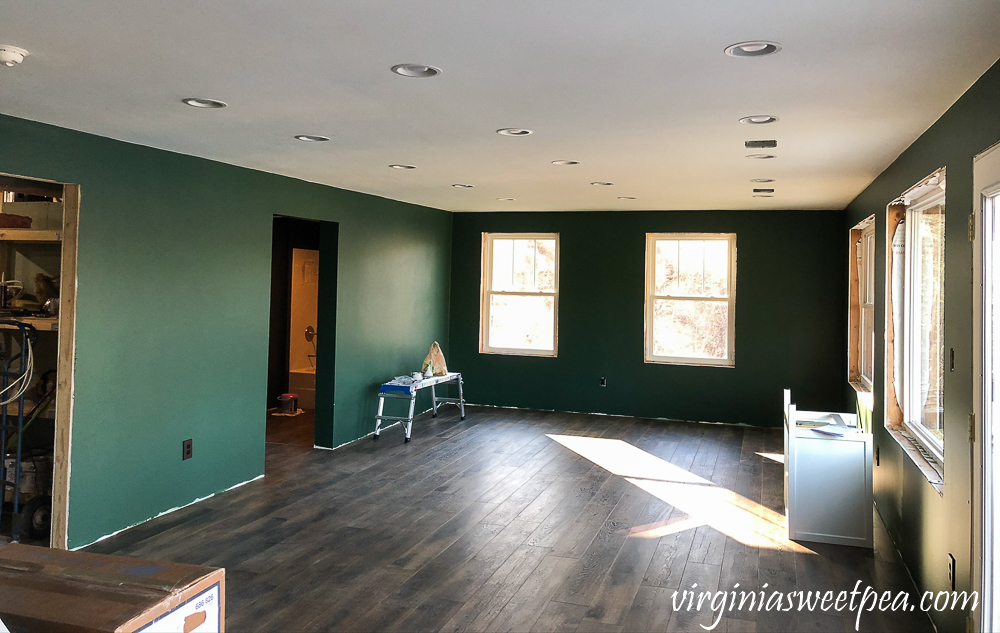
Finishing the Flooring
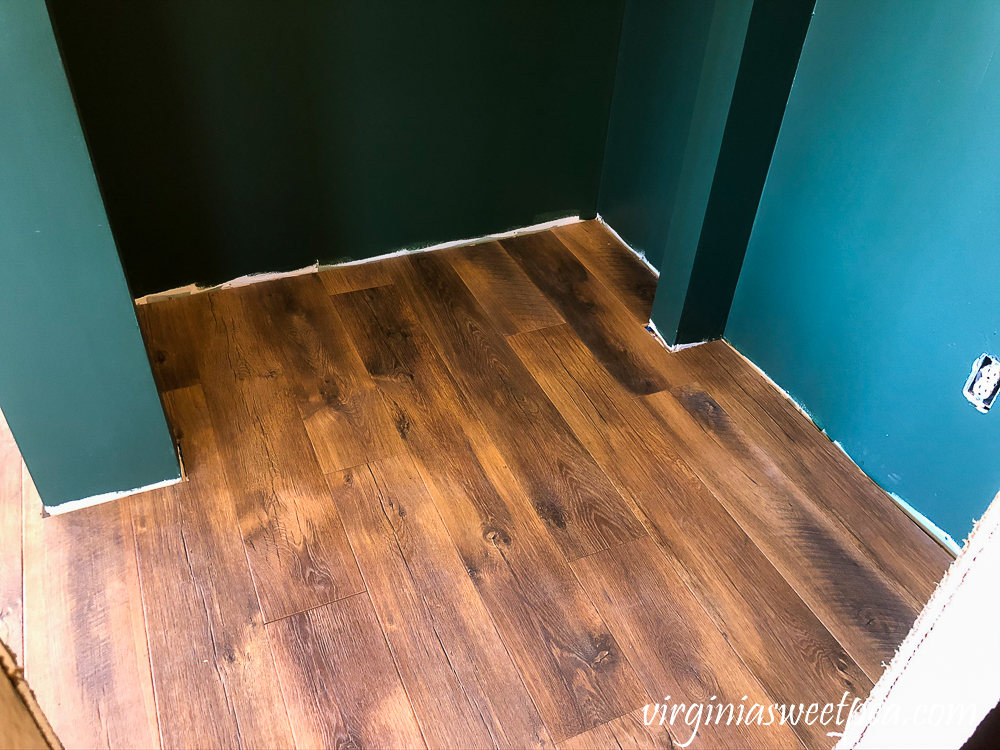
In update five, I shared the process of installing our Mohawk Crest Loft in Praire House Oak ordered through Piedmont Floors.
We were able to finish the family room and extra room but did not have time to do the hallway, closet, and bathroom.
Mr. SP installed the flooring in the closet and hallway on Saturday.
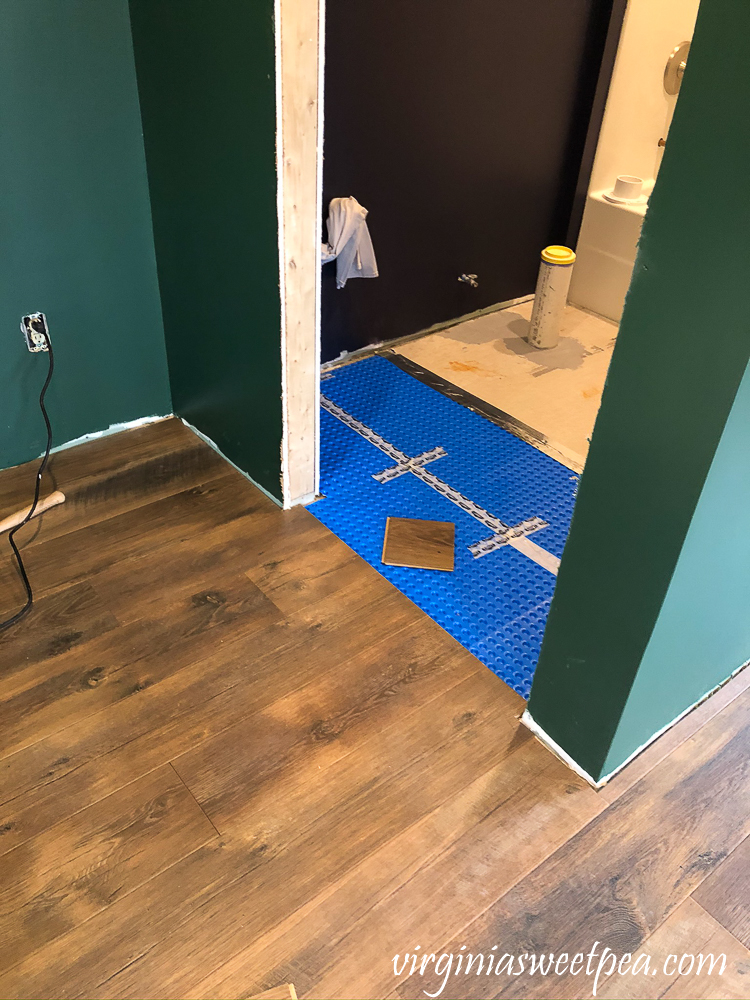
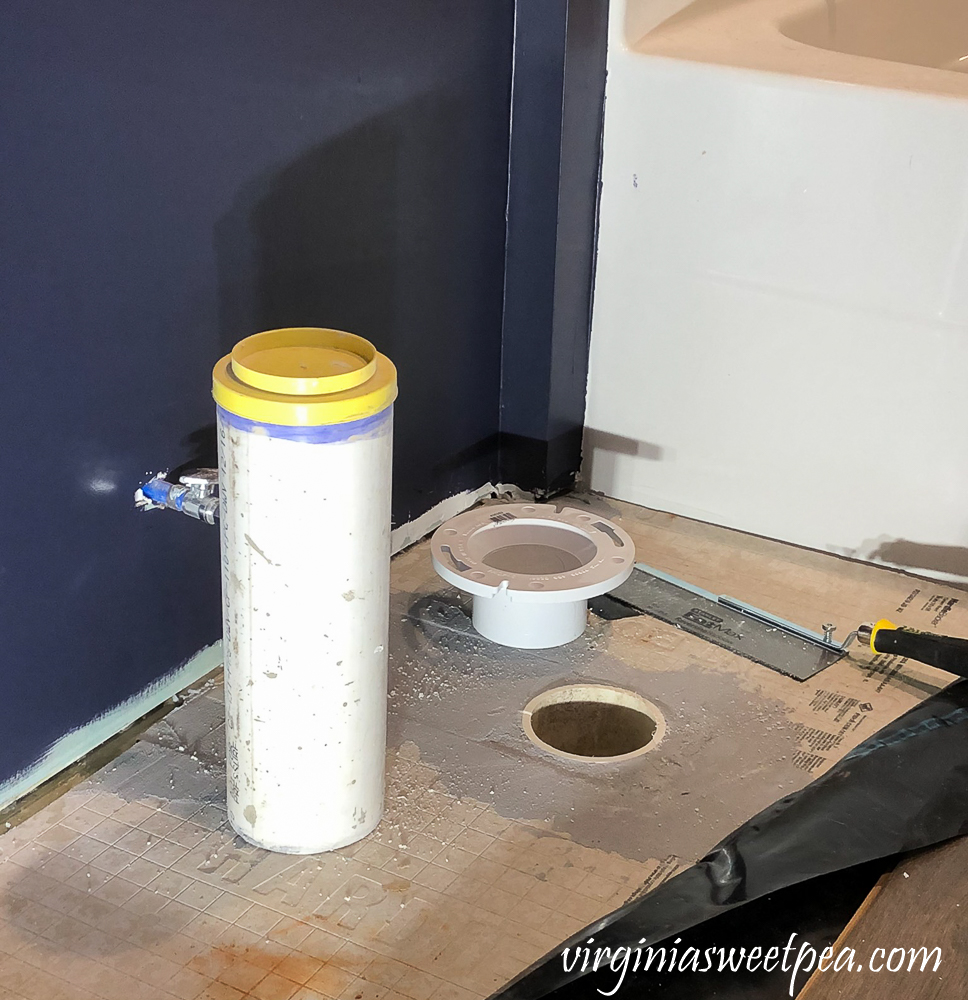
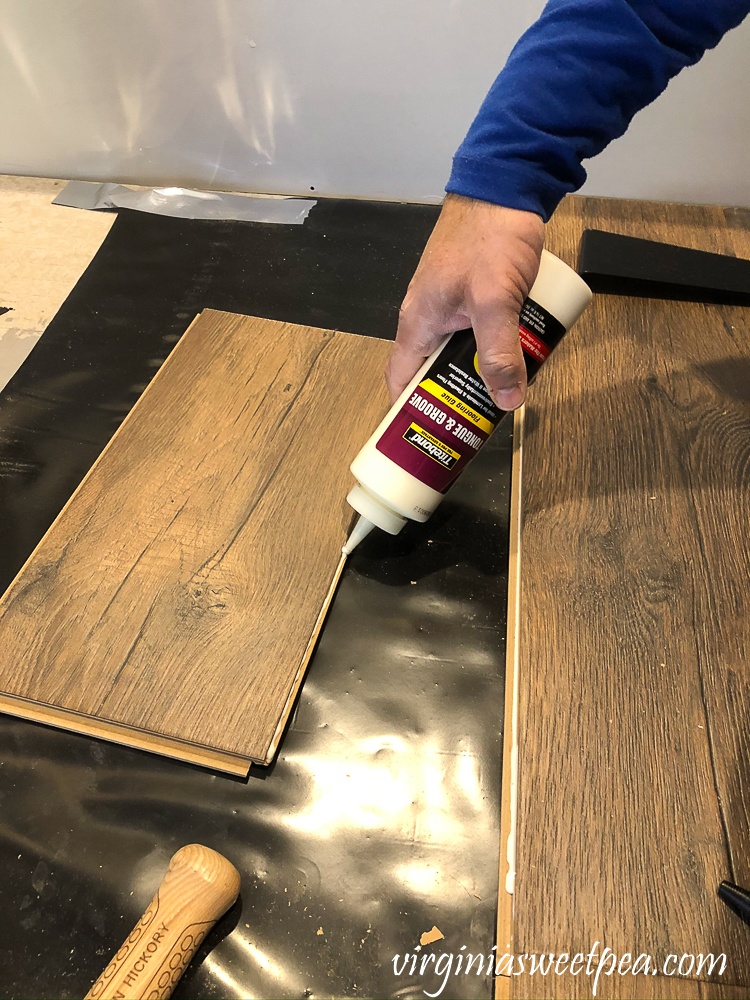
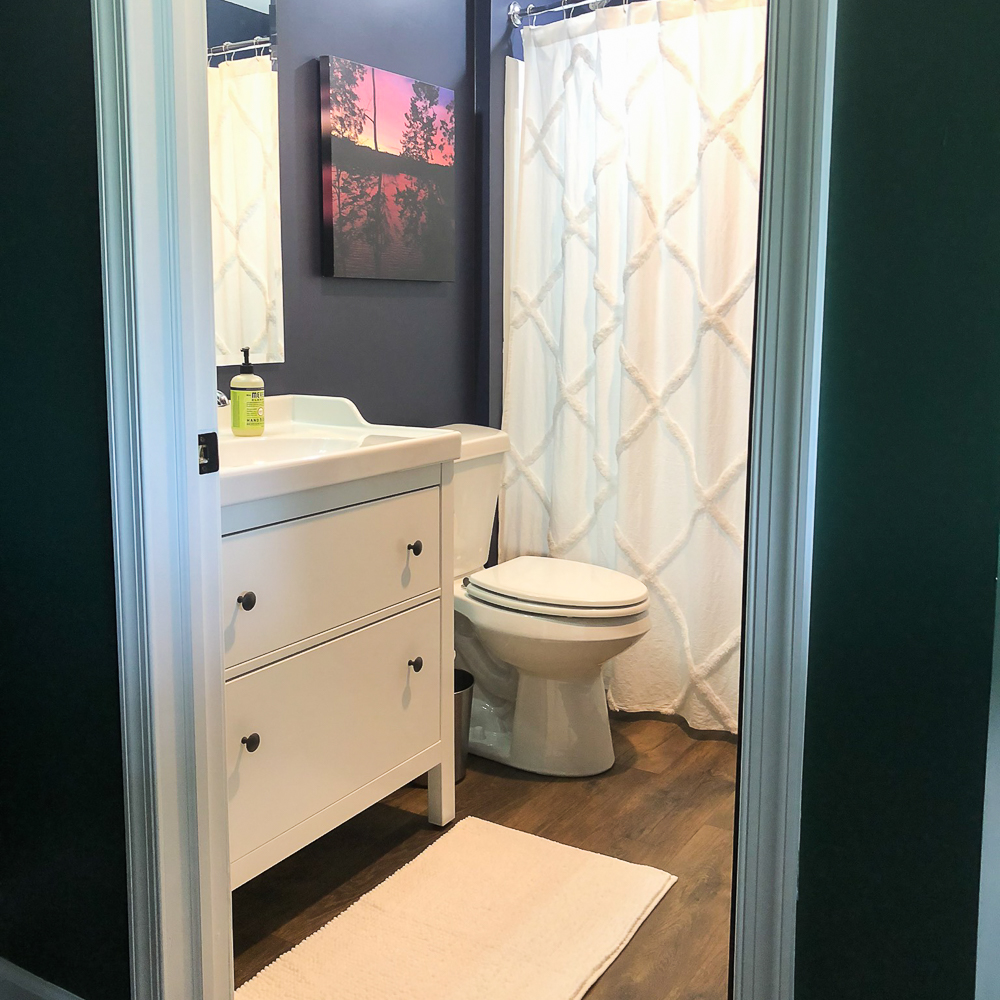
The bathroom was more of a challenge. Because we wanted to butt the flooring up to the tub without a gap, we needed to have a gap at the doorway to be hidden beneath a threshold. We also wanted the boards to line up from the hallway to the bathroom as though we had run them across the threshold seamlessly. We also needed to cut flooring around the sewage pipe and the closet flange.
Before starting the flooring, concrete patch was used to fill in the gap between the sewage pipe and the concrete backer board that we installed last week. This was to provide a level floor surface and to prevent any possible water intrusion beneath the flooring if we had a water leak.
You can see here that the DMX was butted up to the concrete backer board. They are the same thickness, but we wanted the toilet to rest on the concrete for a rock solid platform.
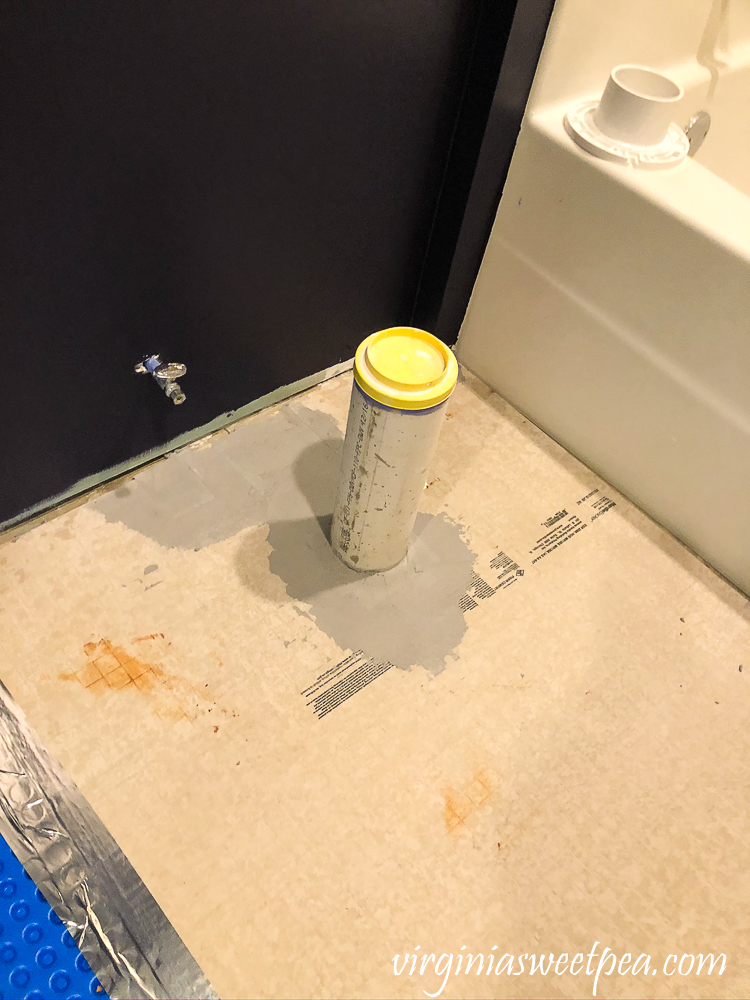
After the concrete was dry, the sewage pipe was cut flush with the floor in order to install the closet flange.
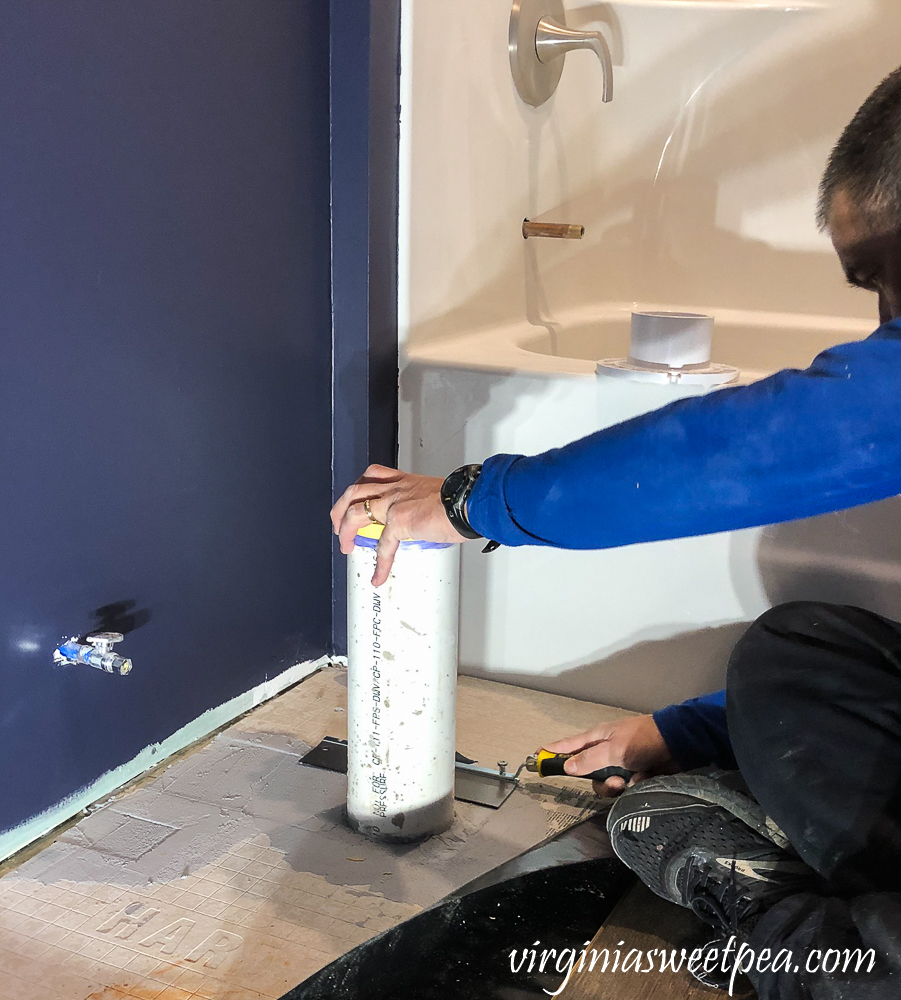
Mr. SP used a hacksaw to cut the exposed PVC pipe flush with the concrete.
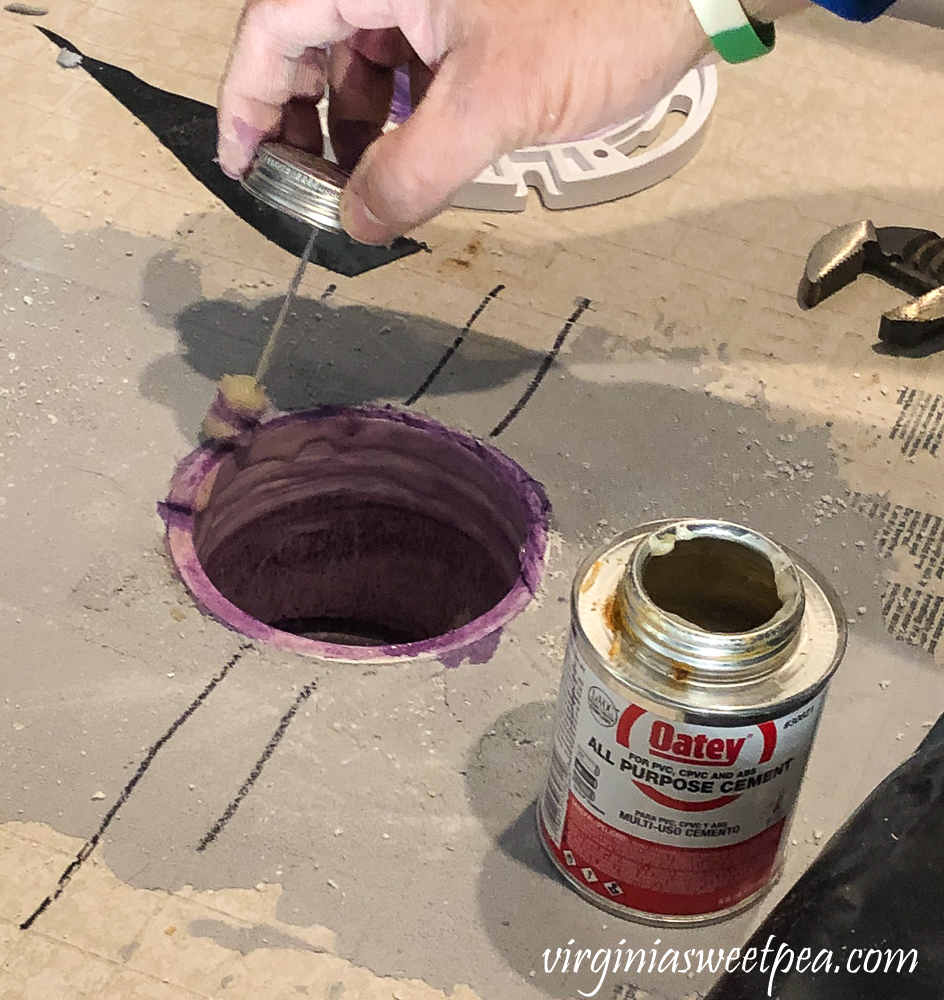
He then prepped the PVC with Oatey Purple Primer.
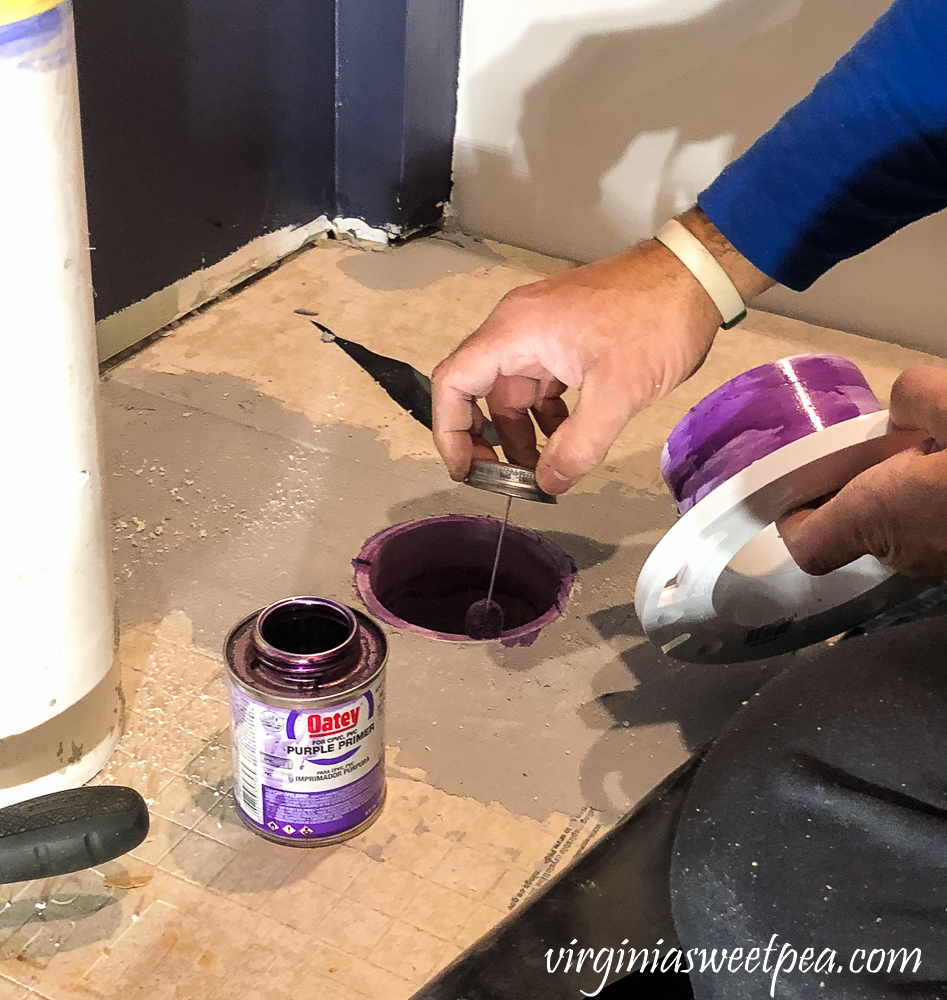
Then Oatey All Purpose Cement was applied over the purple primer. Both of these products really smell!
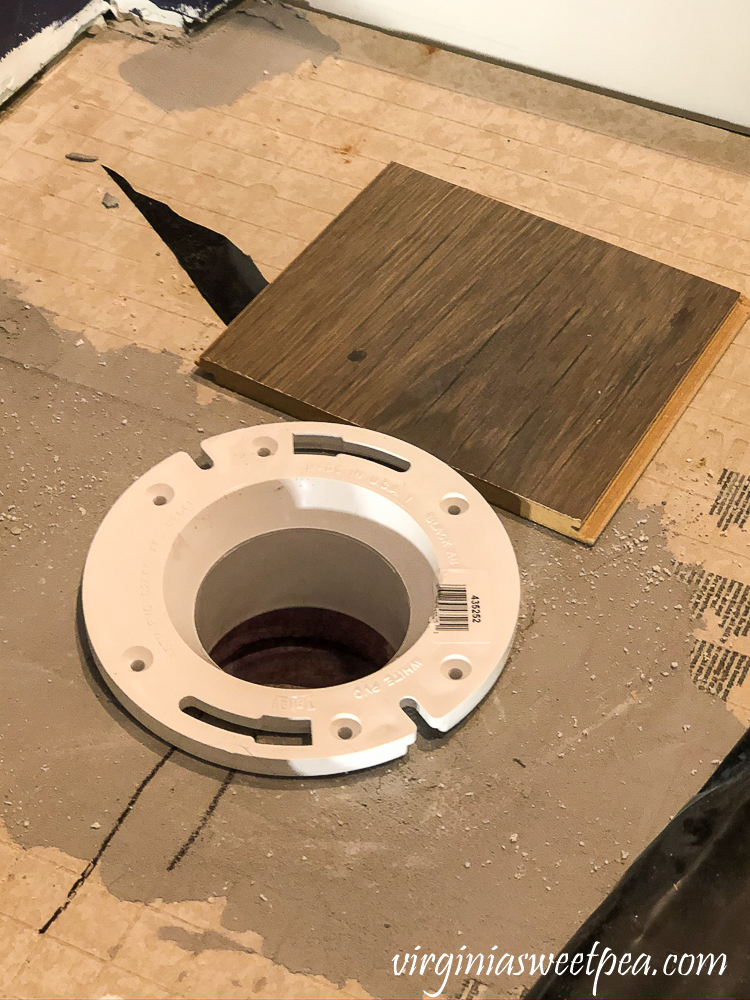
The toilet flange was slightly proud of the floor, just what was needed (it is recommended that the flange sit somewhere between flush with the floor, and 1/4″ above the floor). At the time of this writing, the closet flange is not yet screwed into the floor. We will drill into the concrete and use concrete screws to fasten the flange to the floor.
Since this is a bathroom and the floor could potentially get wet, an extra layer of underlayment/vapor barrier was added over the blue DMX-1 Step and the concrete backer board. Flooring glue was added to the wood planks’ seams for additional waterproofing and stability.
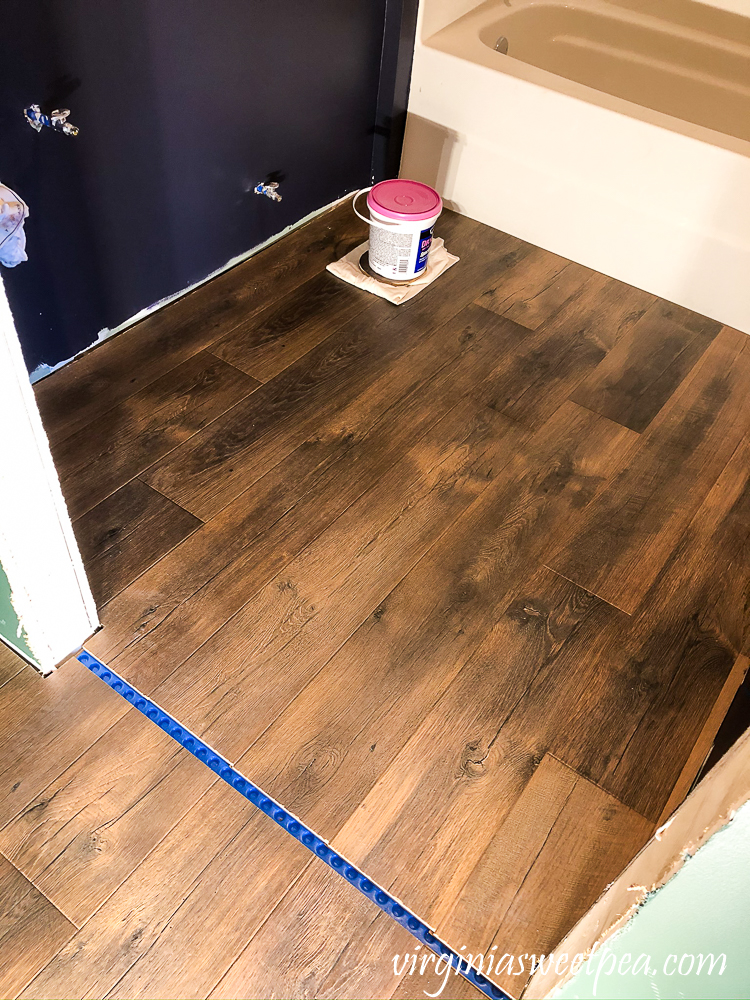
A gap was left between the hall and bathroom to allow for floor expansion. A threshold will be installed in this area next weekend.
I have to brag on Mr. SP’s work. Look how he aligned the boards to make them flow seamlessly from the hall to the bathroom.
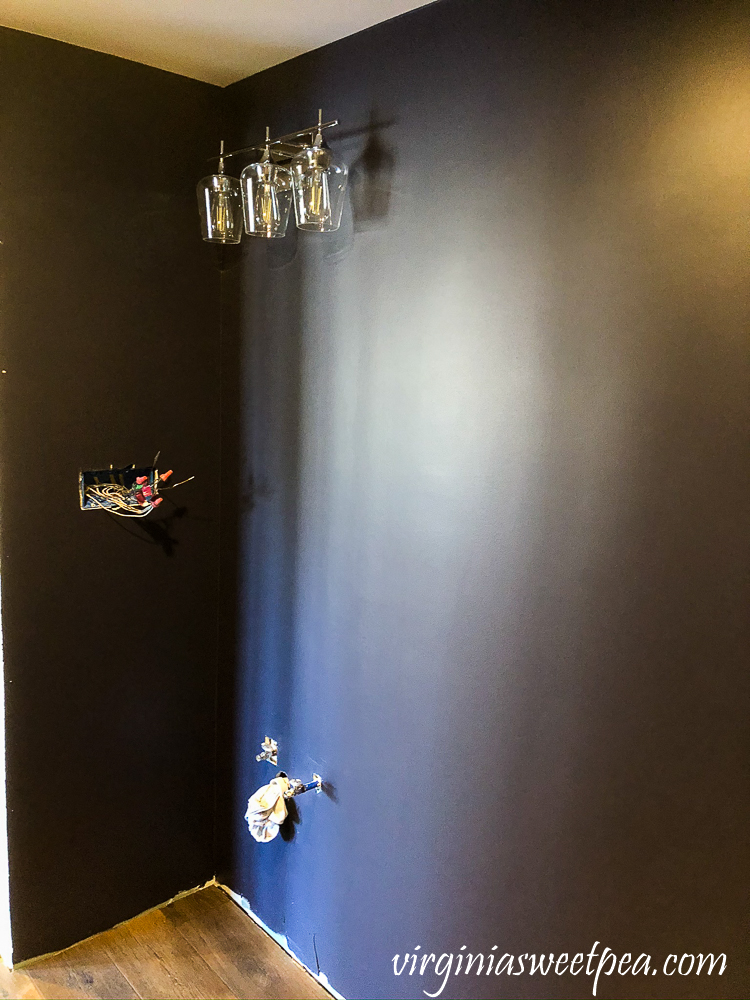
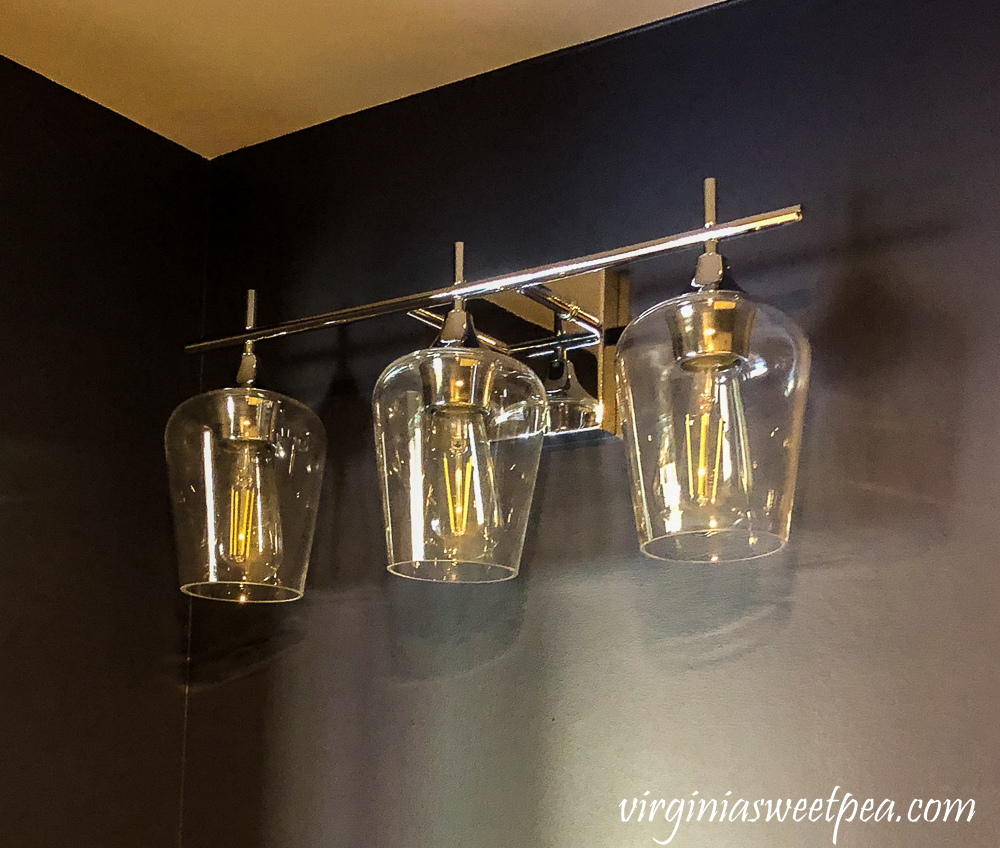
The bathroom light was also installed. The switch needs electrical work, so turning it on will have to wait until next weekend.
The light is the Hickerson 3 Light Vanity ordered from Wayfair. I can’t wait to see how it looks when the light is on.
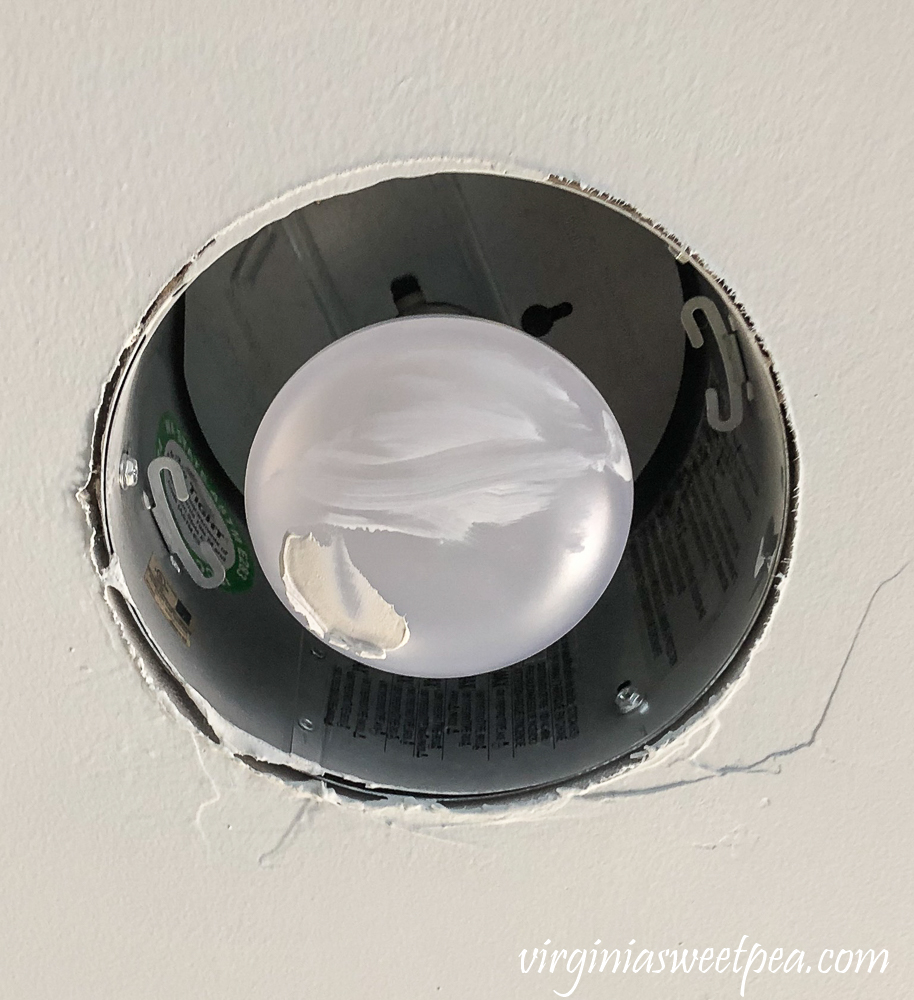
Paint Touch Up and Can Lights
While Mr. SP worked on the flooring, I did paint touch up followed by installing the can light covers.
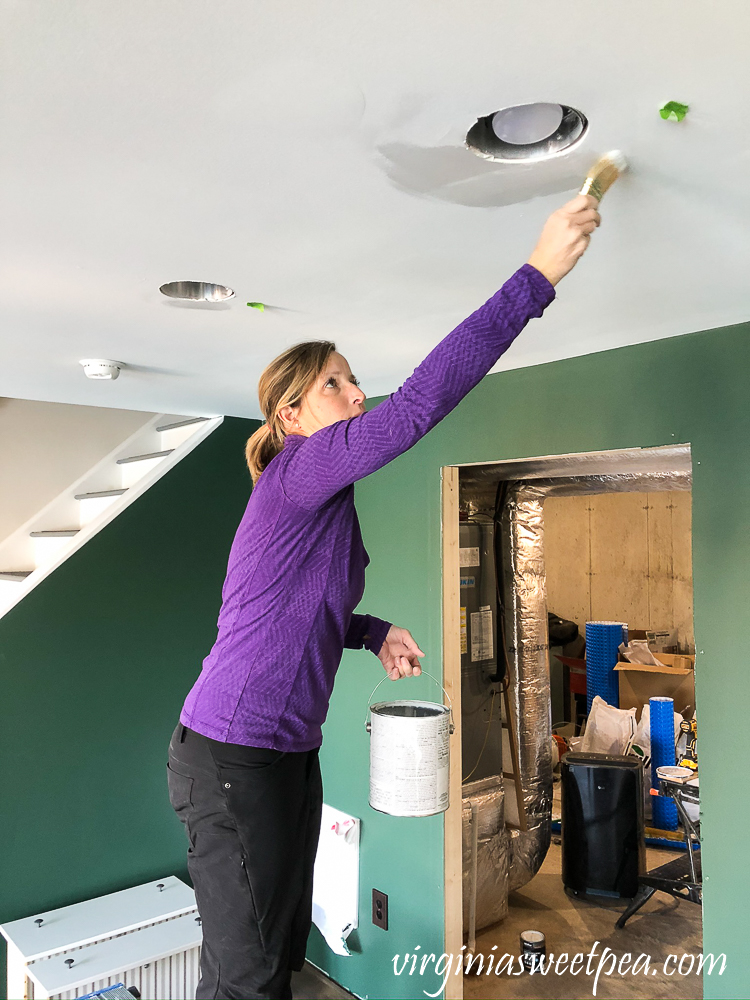
Every light bulb in the entire basement had either drywall mud, paint, or both on it. Luckily they were easy to clean with a Scotch Brite sponge and a damp microfiber cloth.
All the ceiling needs now are ceiling vents which we’ll buy this week and install next weekend.
Bathroom Vanity
Our bathroom vanity is the Ikea Hemnes Raettviken which we purchased back in August. We have a Hemnes sink at home and it’s been great, so we didn’t hesitate to buy another for this space.
The sink came in a flat box and had to be assembled. Assembly was easy following the directions.
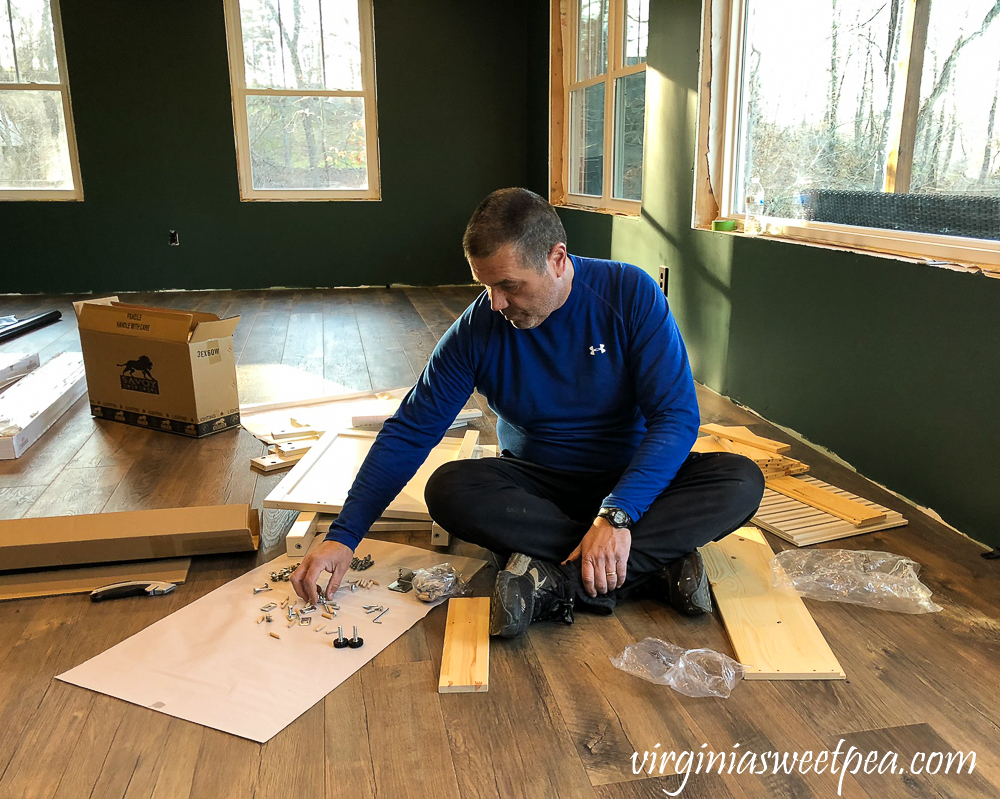
This cabinet costs $260, a very reasonable price. We also purchased the matching sink ($81) and an Ikea faucet ($69.99).
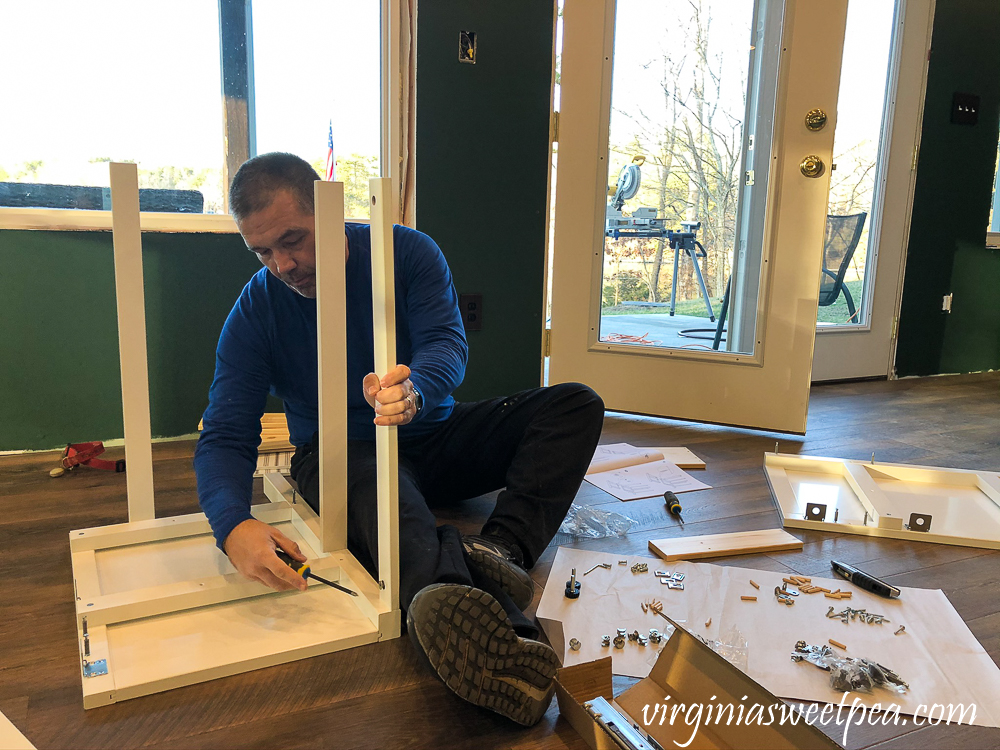
I am not at all mechanical and I was able to help put this vanity together. Ikea’s directions are great!
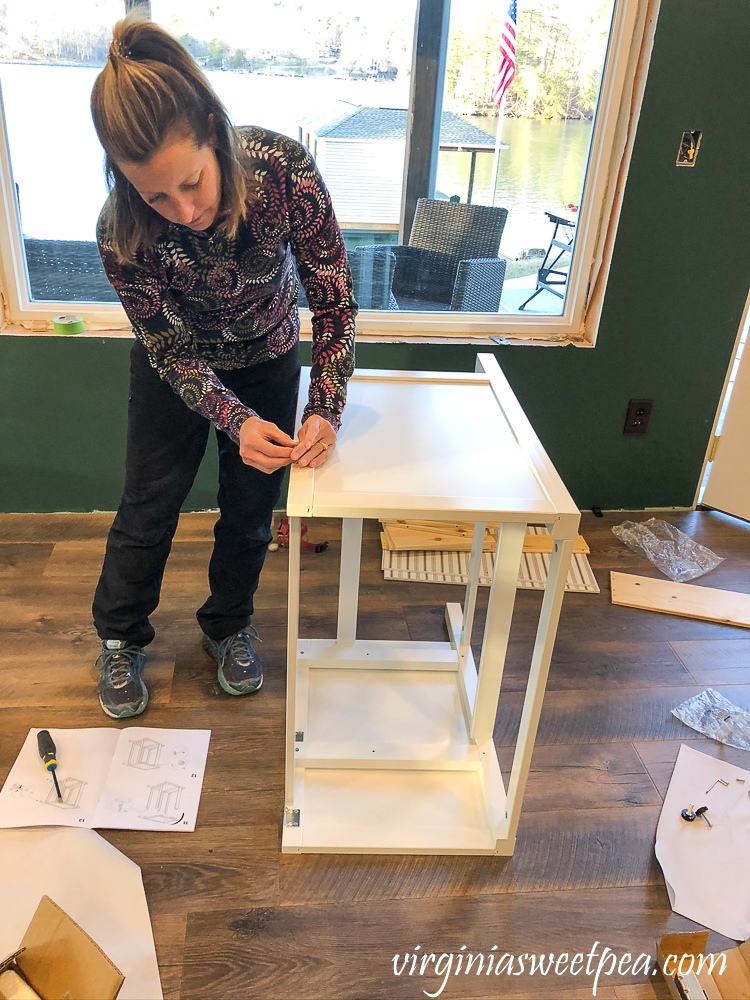
We hoped to install both the vanity and toilet but realized that we needed to install the baseboard in the bathroom first.
Wallpaper
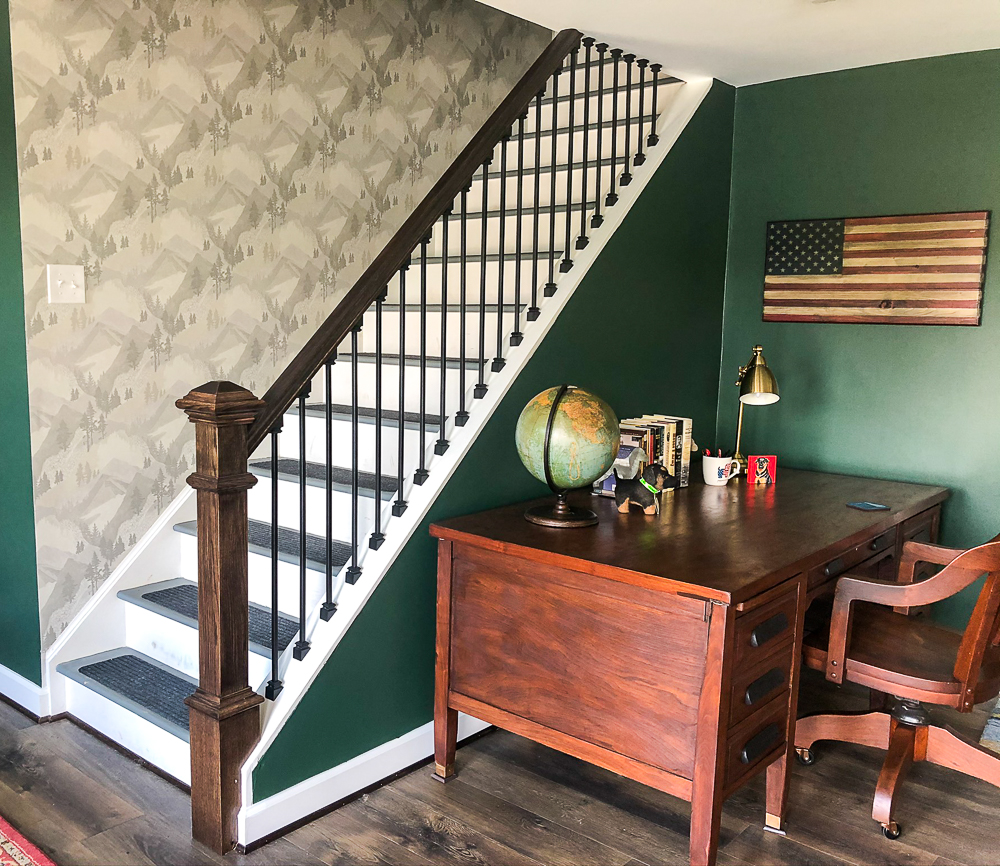
Our plan is to wallpaper the stairwell walls. Since we are going for a cabin look, my original idea was to use wallpaper with Birch trees thinking that as one walked down the steps, it would feel like walking through a forest.
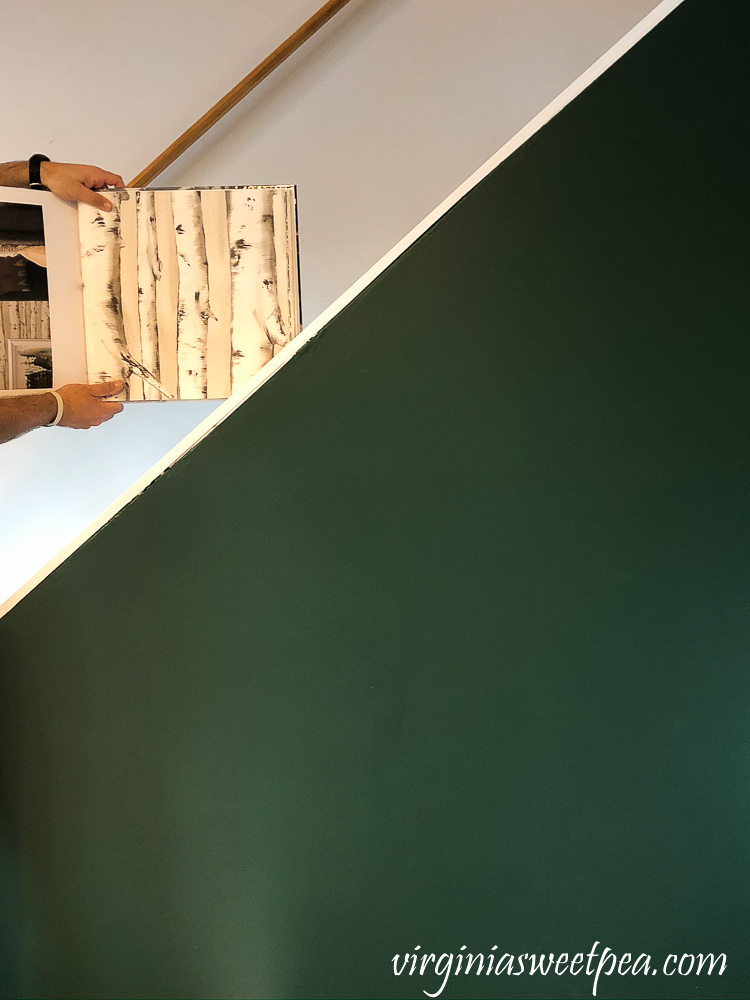
I shopped online for the wallpaper that I envisioned but could only find peel and stick versions and the reviews on it were not great.
I then stopped by Mahone’s Wallpaper Shop in town and described the paper that I was interested in. Within minutes, the helpful young lady working found exactly what I had in mind in this wallpaper book.

While leafing through the book, I spotted this wallpaper and instantly fell in love.

This paper is Brewster Wallpaper, Range Light Grey Mountains 3118-12633. I’m linking to it so you can see it online but if you are going to purchase it, I would recommend finding a local wallpaper shop to both get a better price and support a local business.
The Birch tree paper is Brewster Wallpaper, Pioneer Off-White Birch Tree 3118-12601.
I ordered the wallpaper from Mahone’s Wallpaper Shop and it arrived in two days with free shipping. The wallpaper won’t be hung until we figure out how we are going to install a railing in the stairwell which is needed to pass our building inspection.
What’s Next?
Next weekend we plan to paint and then install the baseboard as well as finish electrical work on two switches and a few outlets.
This basement project is a rewarding process and we are both learning a lot as we go through the steps in its progress.


Wow. Excellent detail in the bathroom, and what a great job aligning the boards! Love the light fixture and the wallpaper. Did you end up getting the Range Lt. Grey Mountains or the Birch Trees? It looks like you already have a railing, what else is required, or do you want something different? You’ve already demonstrated how tough those floors by putting the vanity together without a dropcloth!
You’re getting so close to finished now!
Thank you for your sweet comment, Rita! For the wallpaper, I went with the mountain one. I love it and can’t wait to see it up, but it probably will be a project for late March. For the staircase, there is a railing on the wall, but it won’t pass inspection with the open side. If you go back to the original post that shows the before (https://www.virginiasweetpea.com/lake-house-basement-project-plans/) you can see that the builder had this area covered with a series of boards. I think we are going to put a newel post at the bottom of the steps and move the railing to that side. I hate to cover up the opening, but someone could fall, especially if we have children visiting.
Paula
Love that wallpaper…perfect and beautiful for a lake house!!
Thank you, Karolyn! I’m looking forward to putting the wallpaper up but we are several weekends away from that project.
Paula
It’s looking great! Your stairs are configured just like ours, or at least very similar. Did you see my post on that recently?
Liberty from B4andAfters.com
Your stairs look SO GOOD, Liberty! I love how you incorporated your love of music into the design.
Paula
Everything looks great, Paula! You’re lucky to have a handy husband, and it looks like you two make a great team. I love that wallpaper! It’s perfect for a lake house. I can’t wait to see how it all comes together!
Thank you! My husband is really handy and he enjoys DIY. We both have learned a lot about construction by doing this project. I’m ready for it to be finished but we still have a ways to go before we can call it done.
Paula
Your project looks like it’s coming along! Beautiful lake house!
Thank you, Lauren! We love going up there each weekend and bit by bit we are making progress in the basement.
Paula
Wow this project is really coming along. I love the flooring and wallpaper you choose. Excited to see the completed space.
Thank you, Sonya! It is slow going since we can only work on it Saturday and Sunday but we are getting there!
Paula
This looks amazing! I am going to look back and see what damp proofing you did. But it is lovely to see the almost finished article. Love that light fitting.
Thank you so much! This project is slow going but it is rewarding to see how much we can accomplish each weekend.
Paula
It looks beautiful; I love that bathroom light.
Thank you! I am looking forward to my husband having time to do some electrical work so that I can see it lit up.
Paula
Your basement update is looking wonderful. I can just imagine the fun you will have sitting there looking out over the water. The bathroom floor looks great, so please tell Mr. VSP I said job well done!
Have a great week,
Kippi
It’s going to be so amazing!!!!
You have made amazing progress on this project, Paula. I can’t wait to see what’s next! Thank you for sharing at Party In Your PJ’s
Thank you, Ann! Bit by bit, we are getting there.
Paula