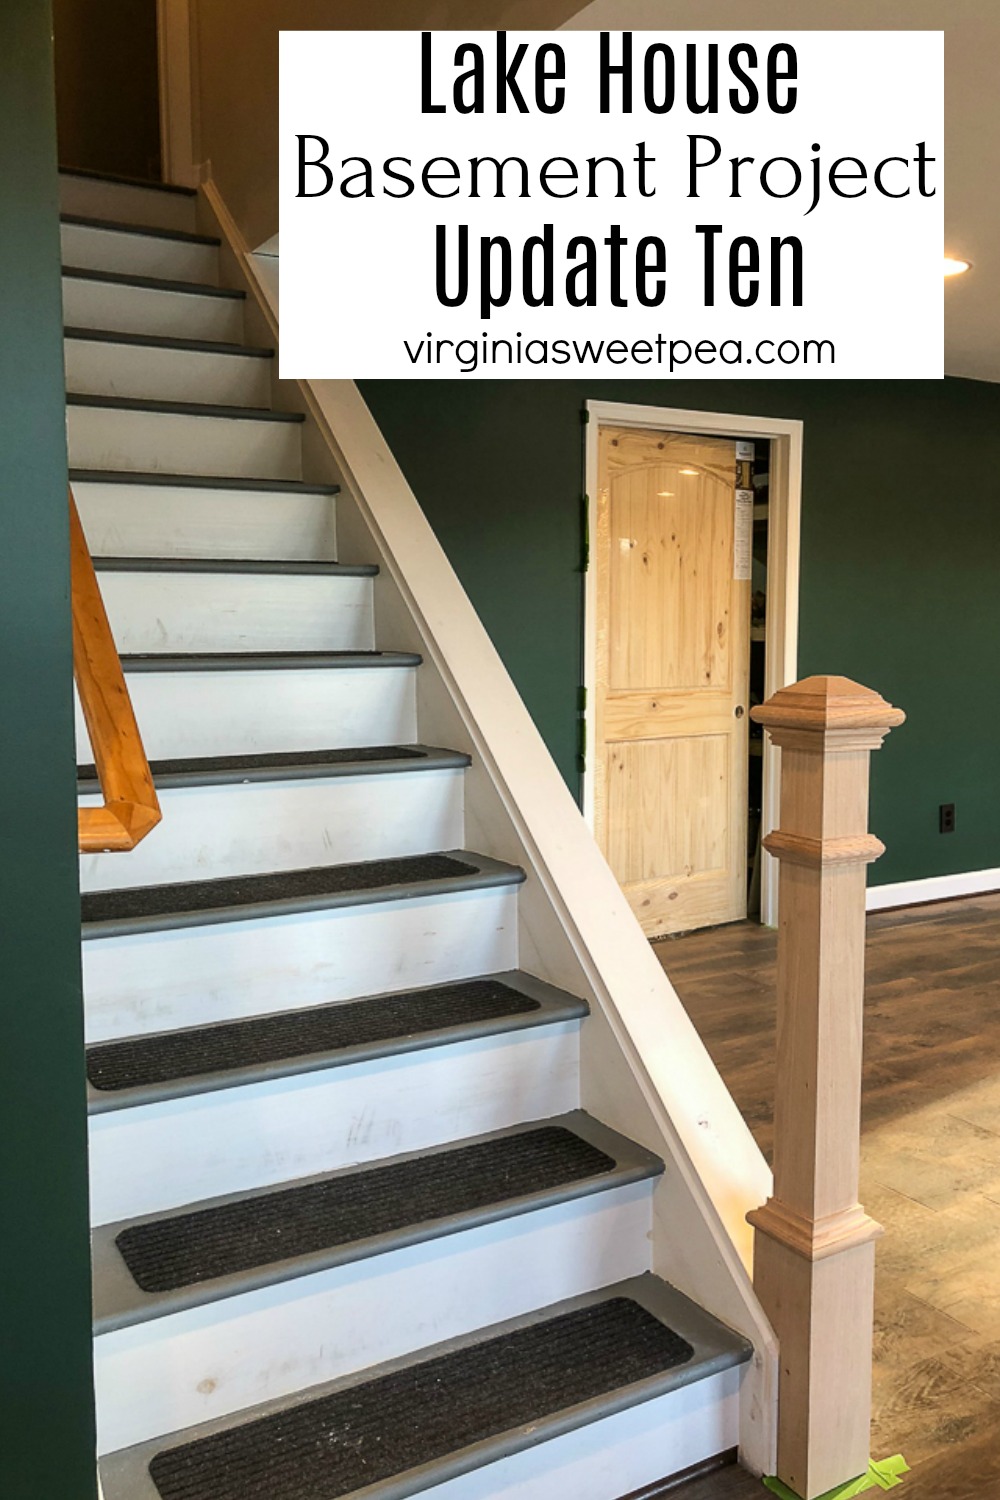
Lake House Basement Project – Update Ten – Installing a Newel Post
Last weekend was our tenth weekend in a row working on our lake house basement project. We were very productive and a lot was accomplished.
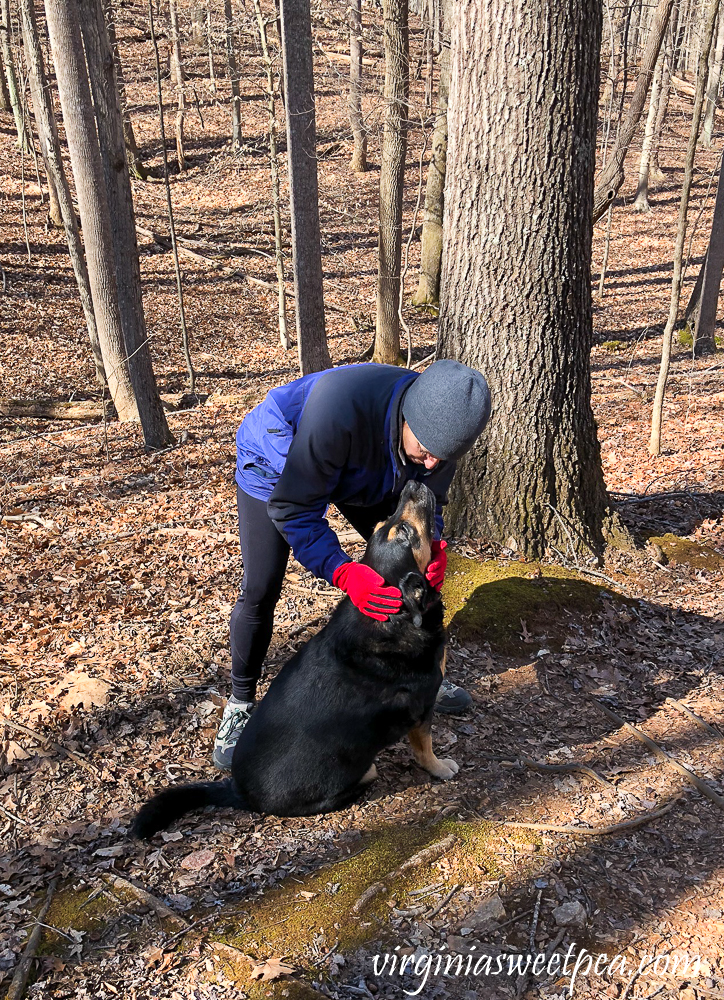
Like always, Sherman kept us company as we worked.

His favorite hang out spot is in the yard or on the patio.

If you are new here, we are transforming our basement into a family room, bathroom, and bedroom. These posts chronicle the work that we’ve accomplished so far:
- Lake House Basement Project Plans
- Lake House Basement – Update One
- Lake House Basement – Update Two
- Lake House Basement – Update Three
- Lake House Basement – Update Four – Paint
- Lake House Basement – Update Five – Flooring
- Lake House Basement – Update Six
- Lake House Basement – Update Seven
- Lake House Basement – Update Eight
- Lake House Basement – Update Nine
- Lake House Basement – Update Ten – Installing a Newel Post
- Lake House Basement – Update Eleven – Installing a Banister
Let’s take a look at what was accomplished over the weekend!
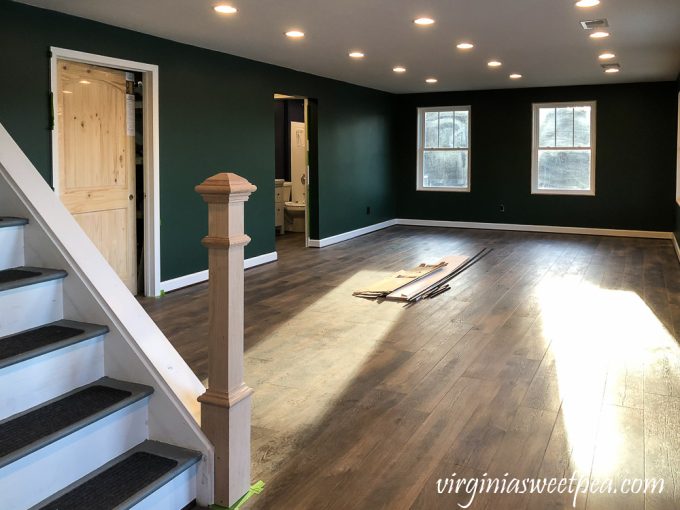
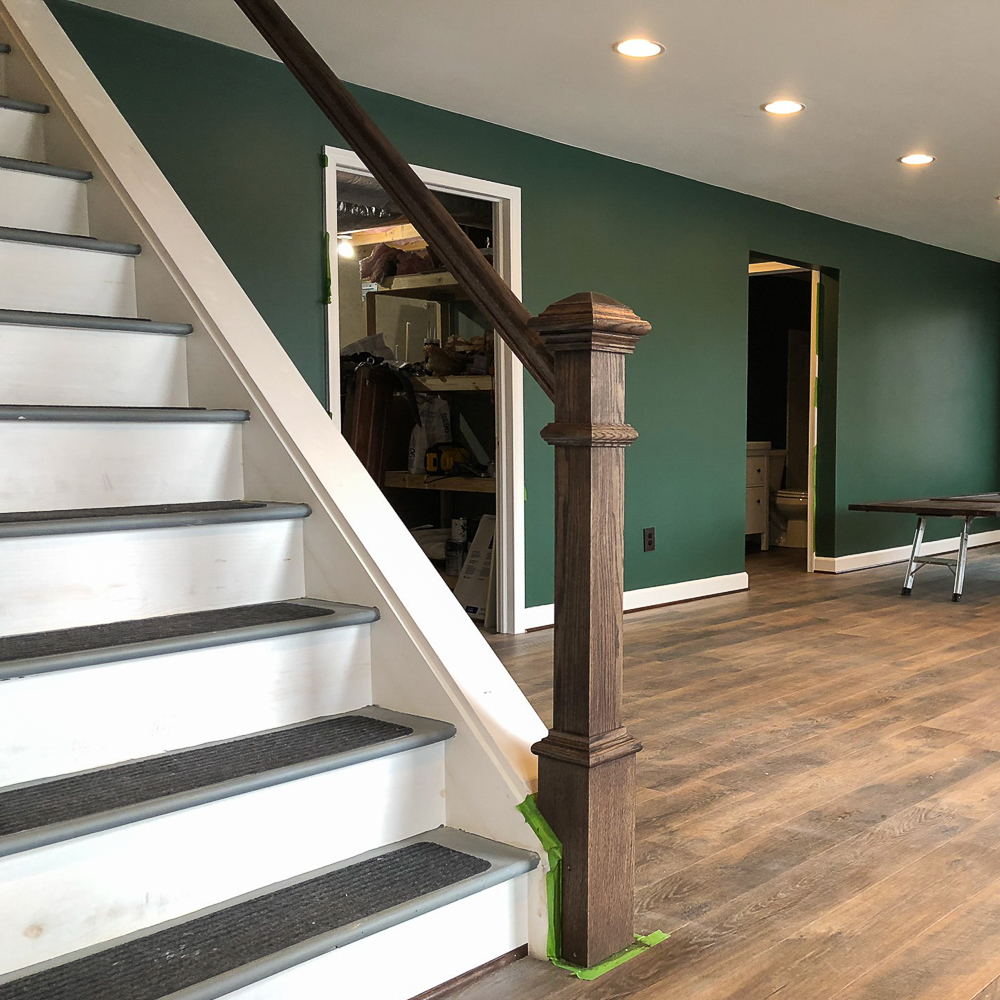
Installing the Newel Post
Mr. SP knew that installing the newel post would be a big job, but he was up for the challenge!
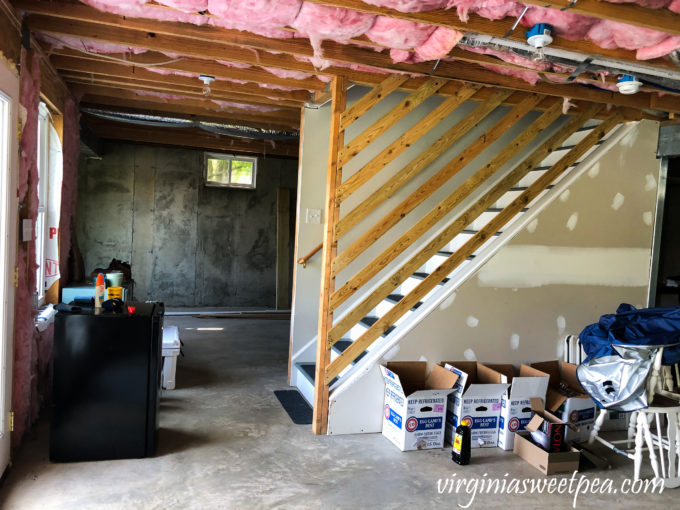
The stairwell needs a railing on the open side to pass inspection. Here you can see the current stairway configuration with Sherman coming down the stairs.

When the house was built, these temporary rails were installed so that it would pass inspection.
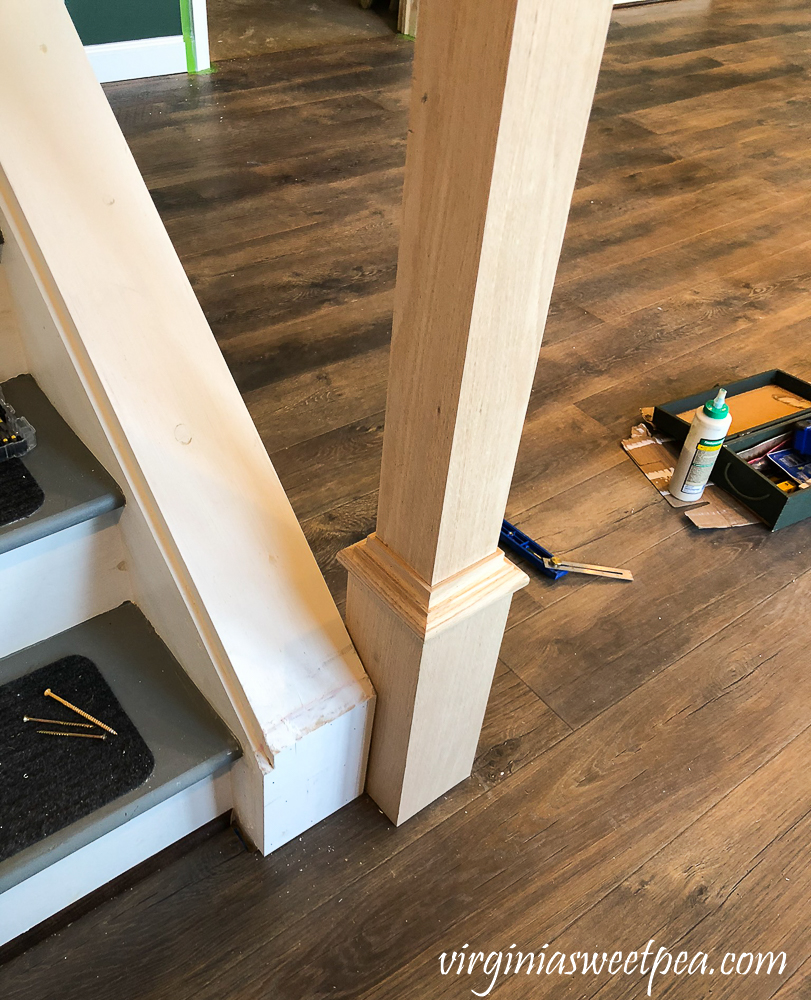
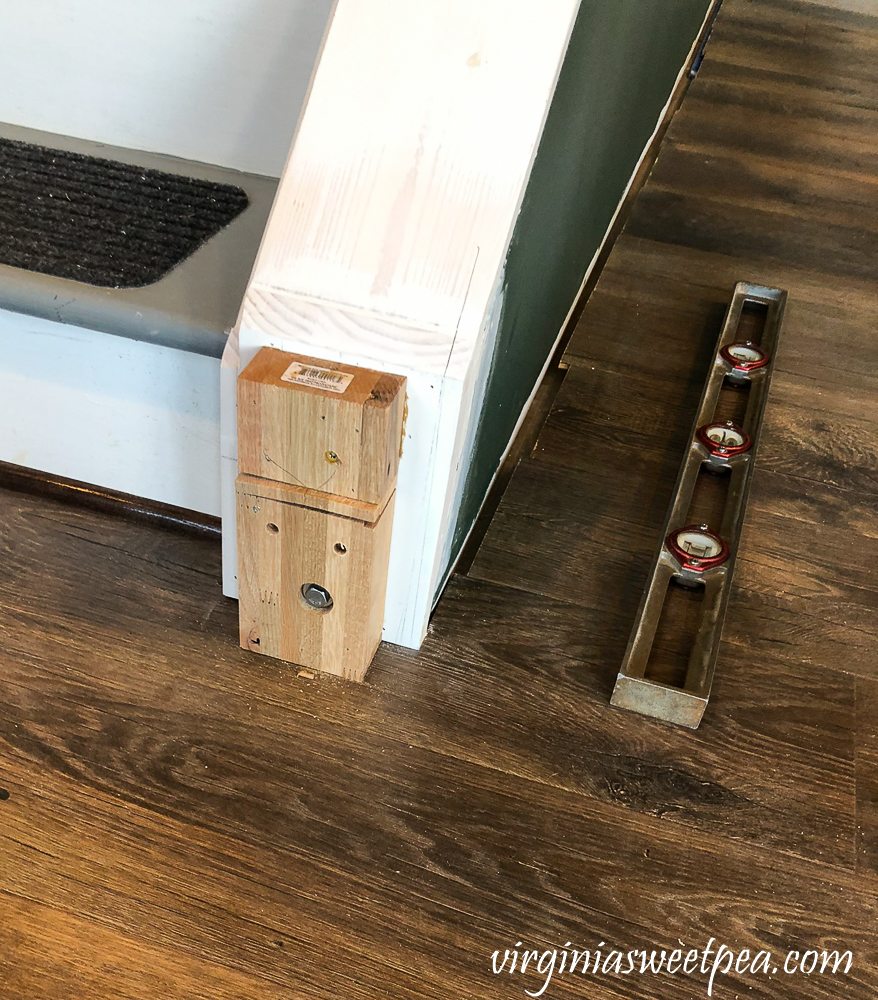
The first thing that Mr. SP had to do was cut a piece of wood to cover the opening left at the end of the staircase when we removed the temporary post that was there from the original construction.
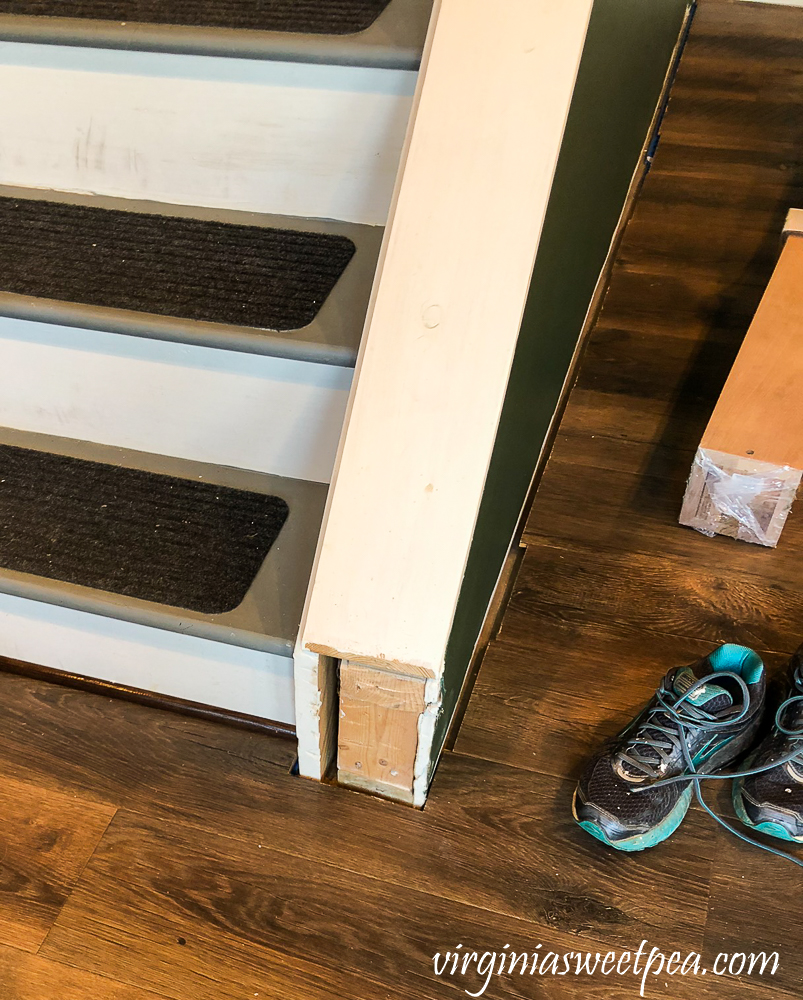
After taking some measurements and approximating the staircase angle, the piece was cut to size with the miter saw. The small notch to match the contour of the trim was cut with a handsaw.
The underlying 2×4 framing of the knee wall will be the structure to which we eventually will secure the newel post. This will be covered up by the end piece we just cut.
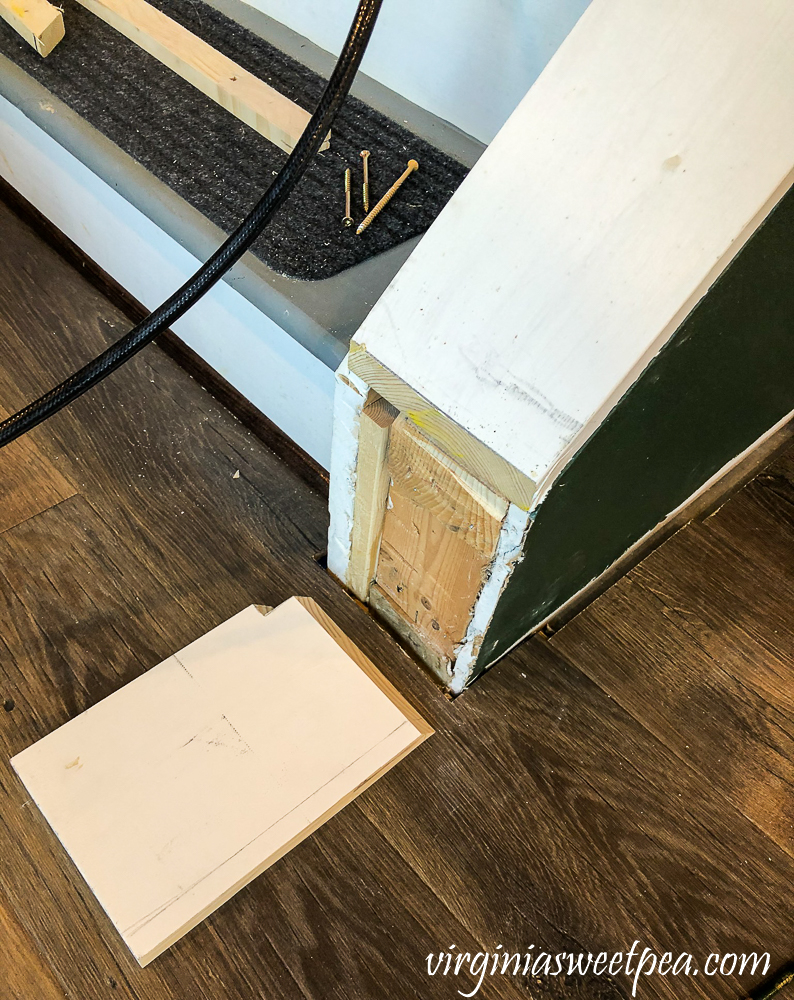
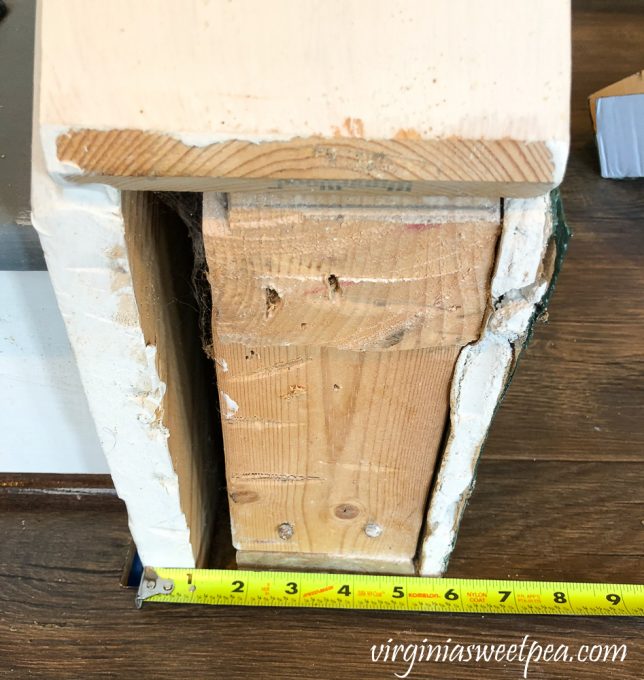
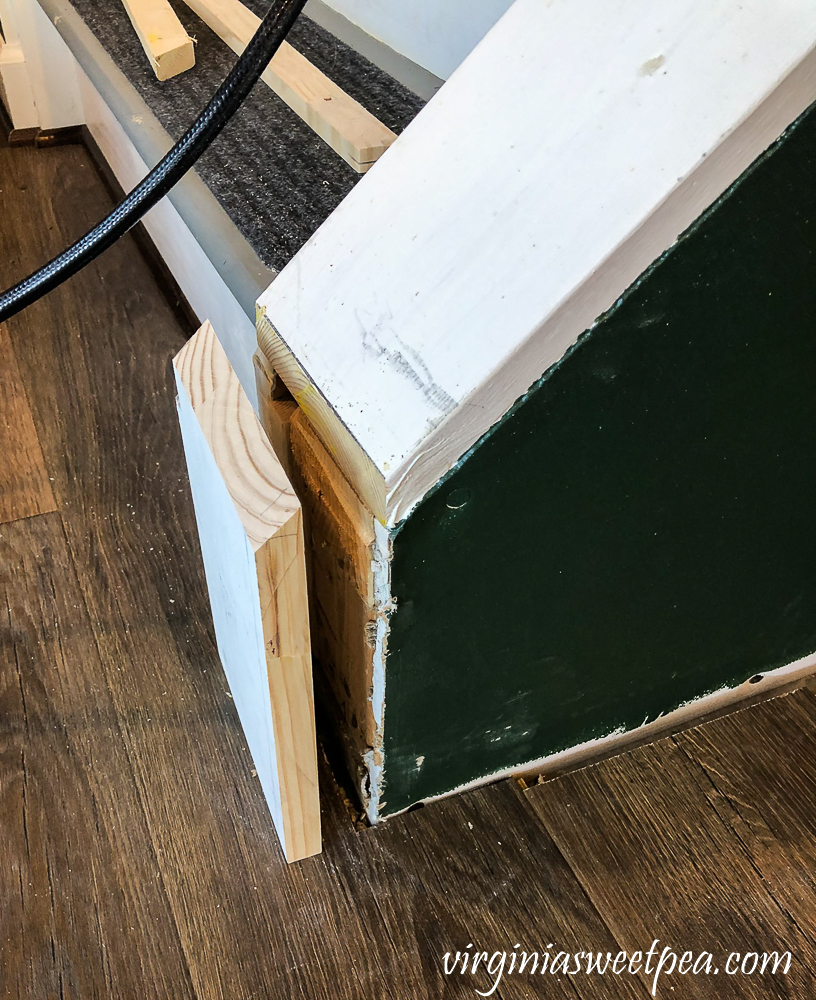
A trim piece was added to the gap in the framing to ensure that the end piece would be vertical. The end piece was dry fit to the end of the staircase, then glued and nailed (brads) into place.
After the piece was nailed and glued into place, gaps were filled with wood filler and sanded smooth.
Mr. SP did a great job getting the fit just right.
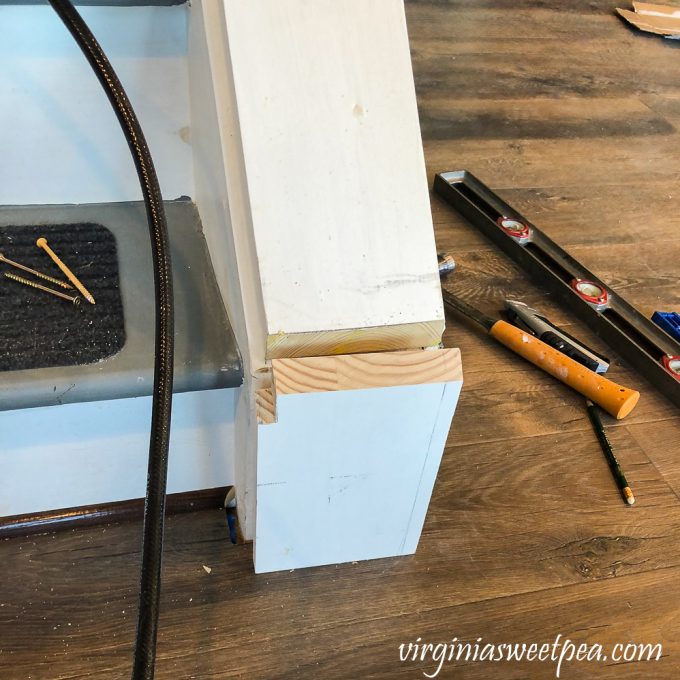
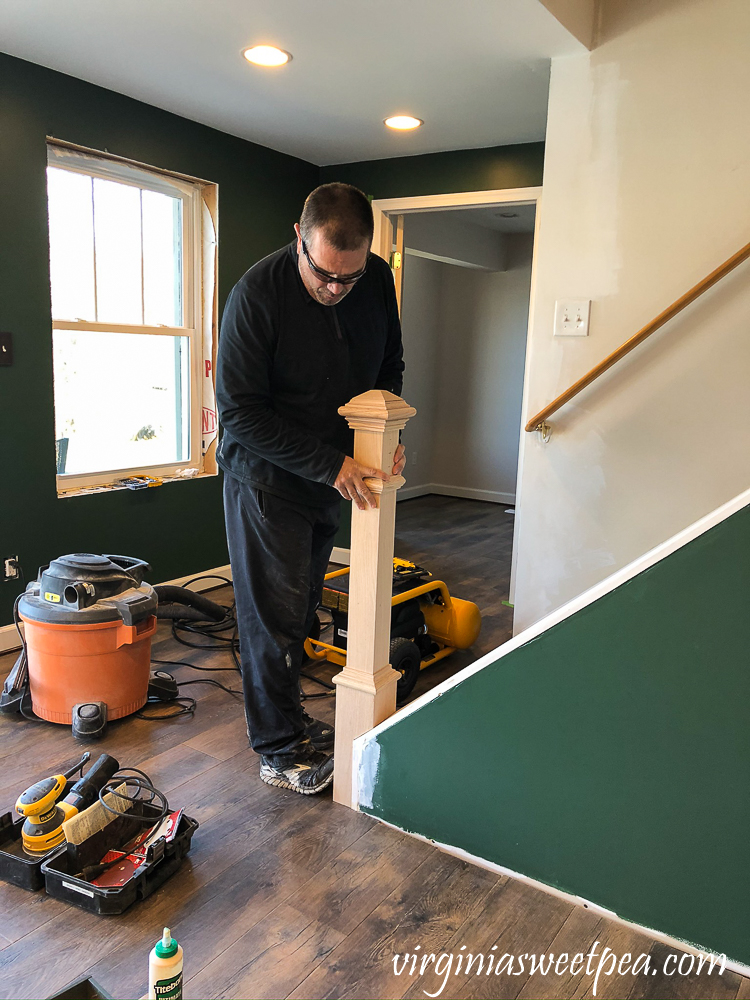
After the piece for the end of the staircase was in place, Mr. SP moved on to cutting the newel post to fit over the end of the staircase. For this project, we used a red oak 55″ x 5″ newel post from Home Depot.
We positioned the newel post into the position we wanted. Since the newel post is longer than needed, measurements were taken to determine the proper length of the newel post for installation so that the handrail will be the proper height. Once the newel post was cut to the proper length, it was put back into the approximate position, the contour of the end of the knee wall was scribed onto the base of the post. This will be cut so that the newel post is positioned so that half is on the end of the knee wall, and half on the floor. This was cut with a combination of the miter saw (using the same angle used on the end cap), circular saw, and hand saw.

Success! It fits like a charm.
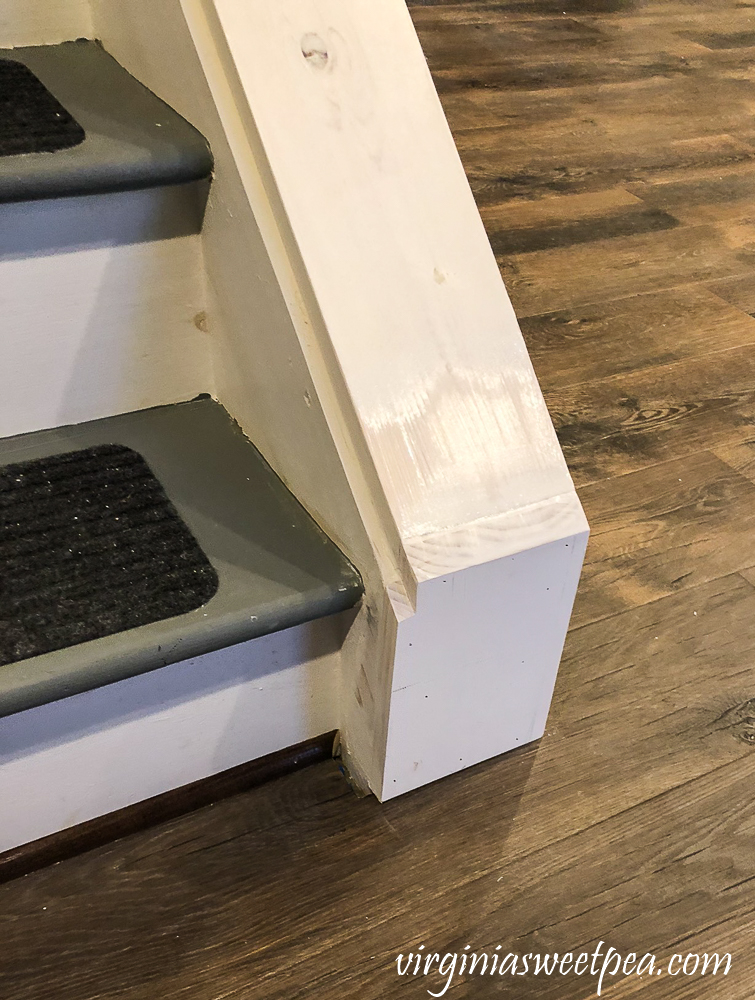
The newel post is hollow, with a solid oak center core. This center core piece was cut in half and put into place at the bottom of the knee wall. This will be the solid foundation of the newel post installation.
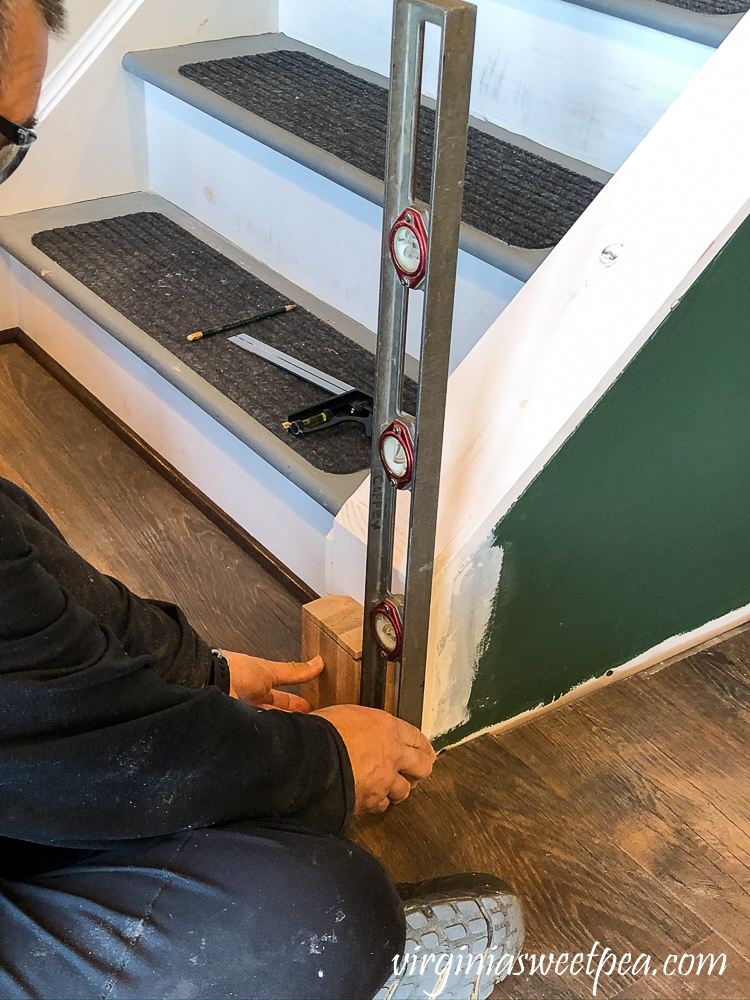
This core piece was glued and nailed into place, making sure that it was vertical. Once the glue dried, this piece was bolted into the knee wall underlying structure with a lag screw and long construction screws.
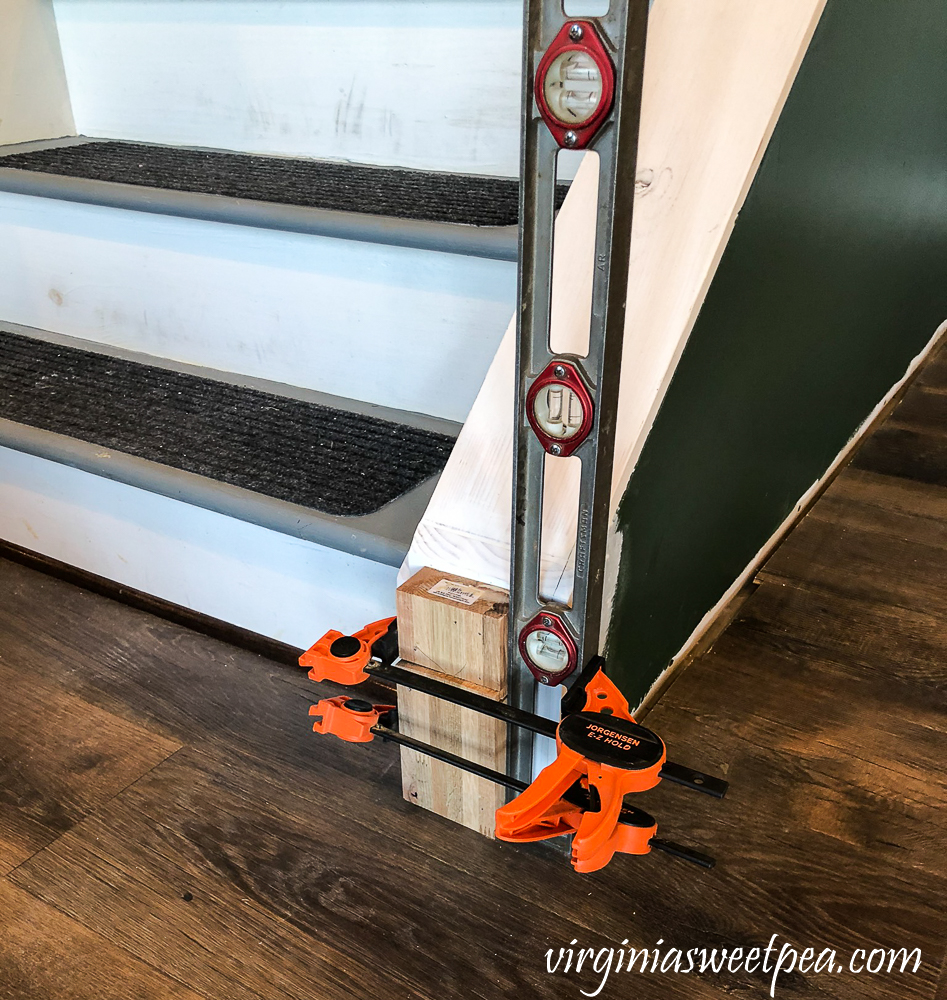
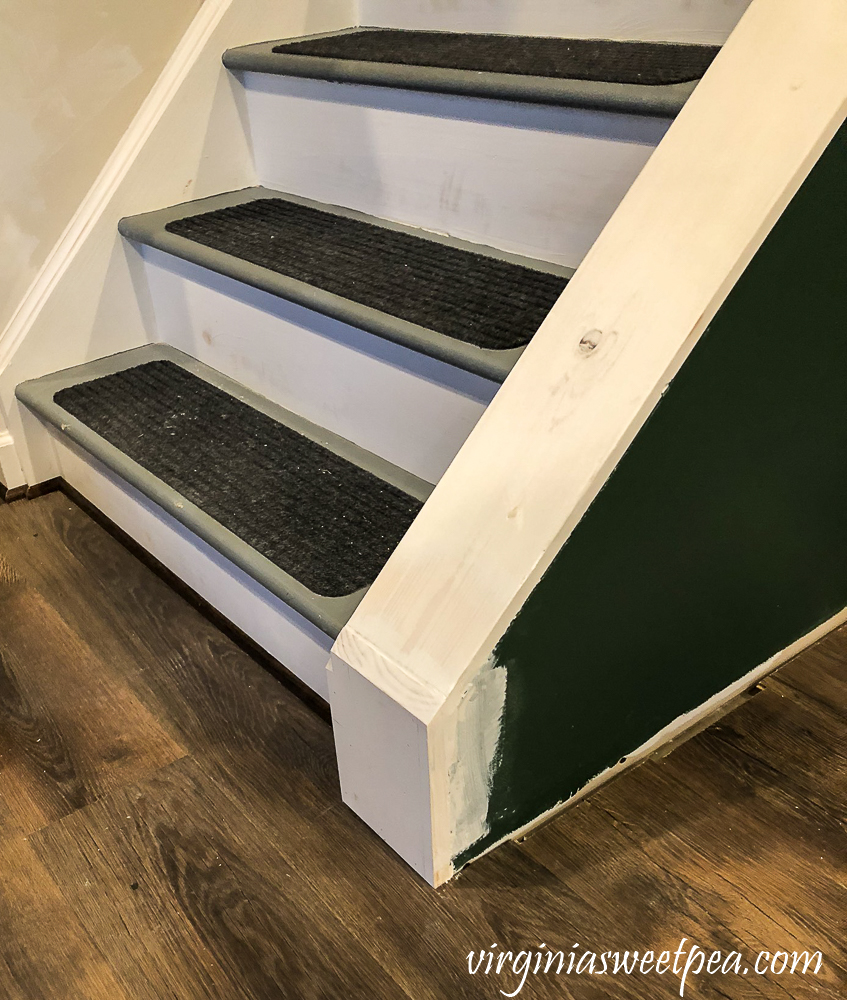
The newel post was then put into place. Making sure that it was vertical, it was glued into place and construction screws were countersunk into the sides of the newel post into the solid oak core. With the screws in place and the glue dried, this is rock solid.
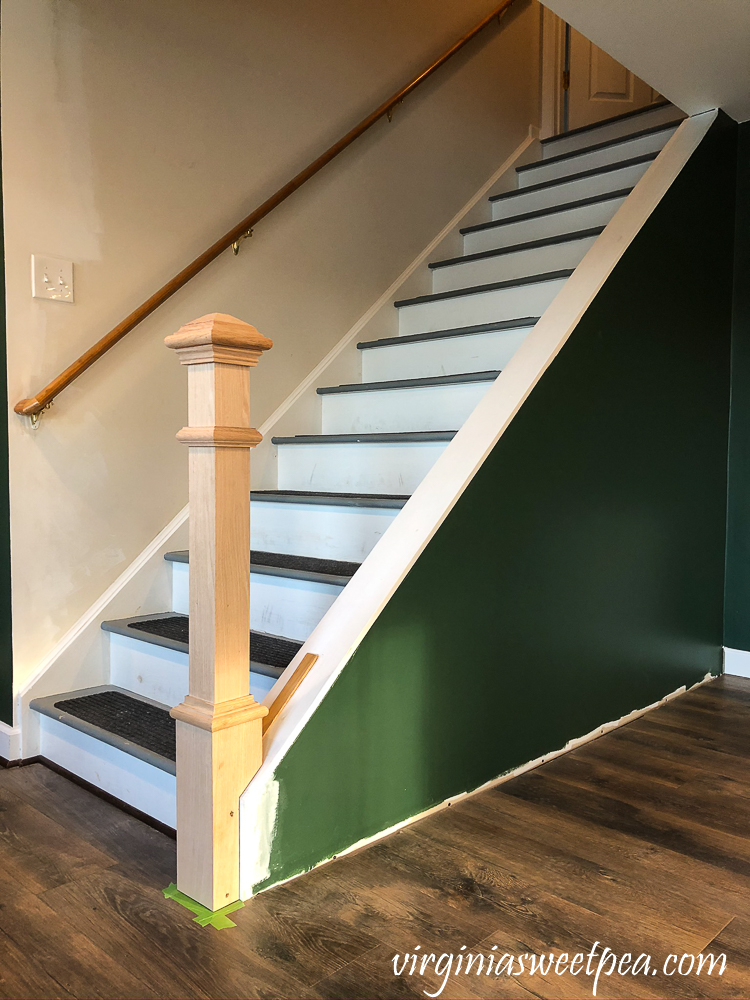
Mr. SP thought that installing the newel post would take a huge chunk of the weekend and he was correct.
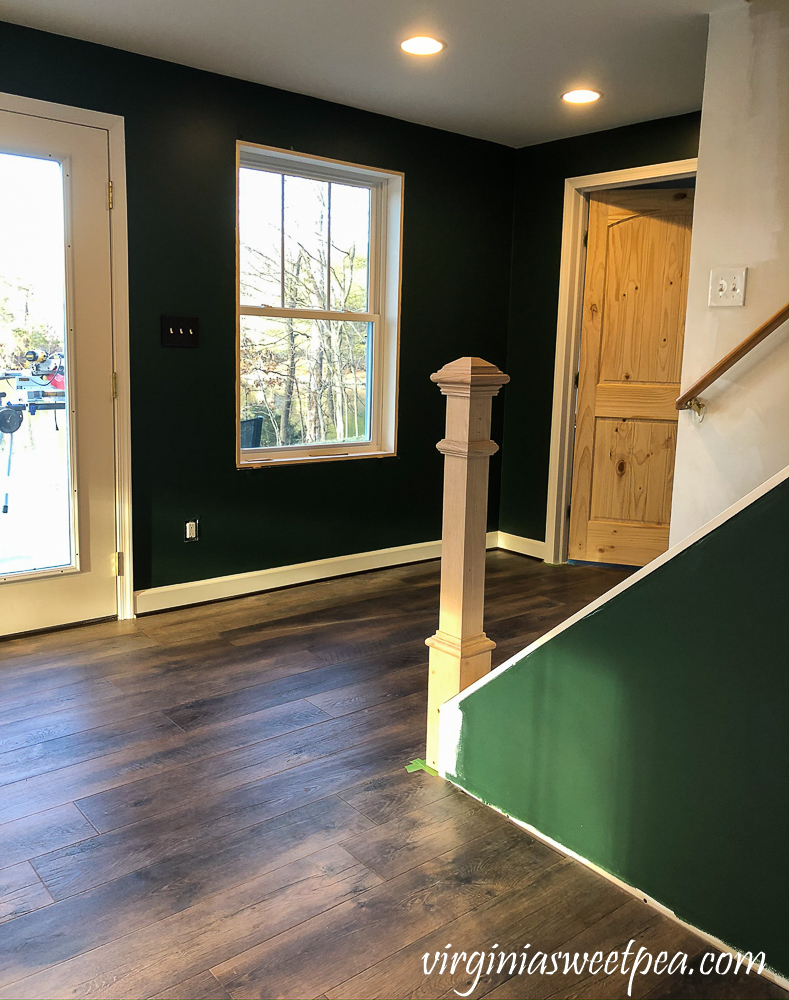
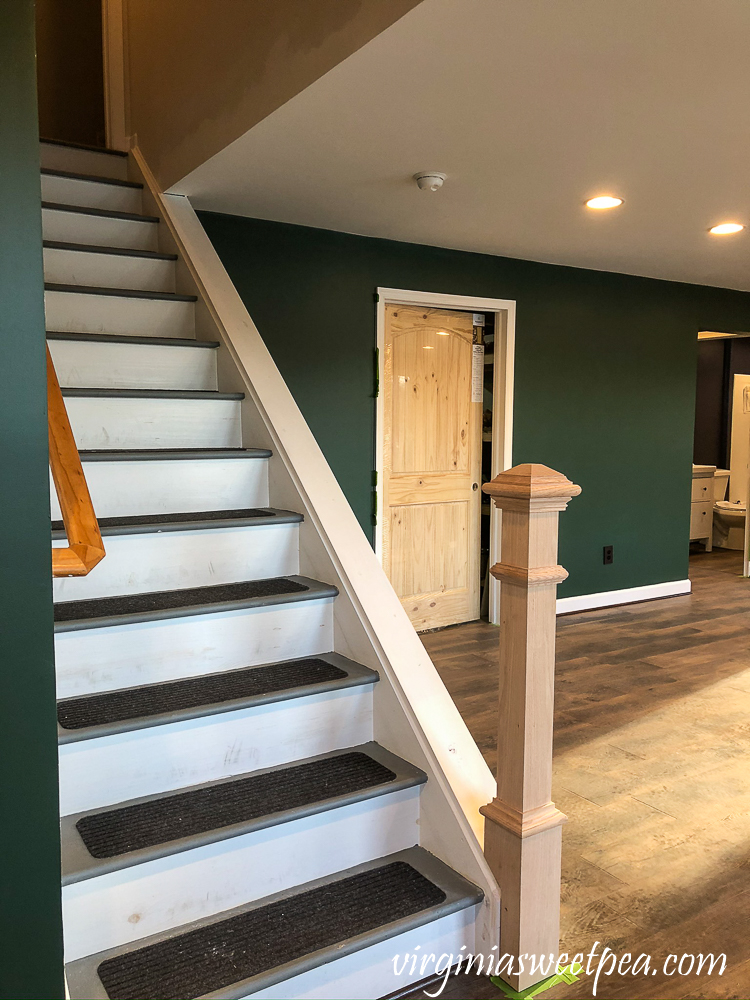
Now that the newel post is in place, we can move on to adding a railing and stair balusters.
Work in the Bathroom
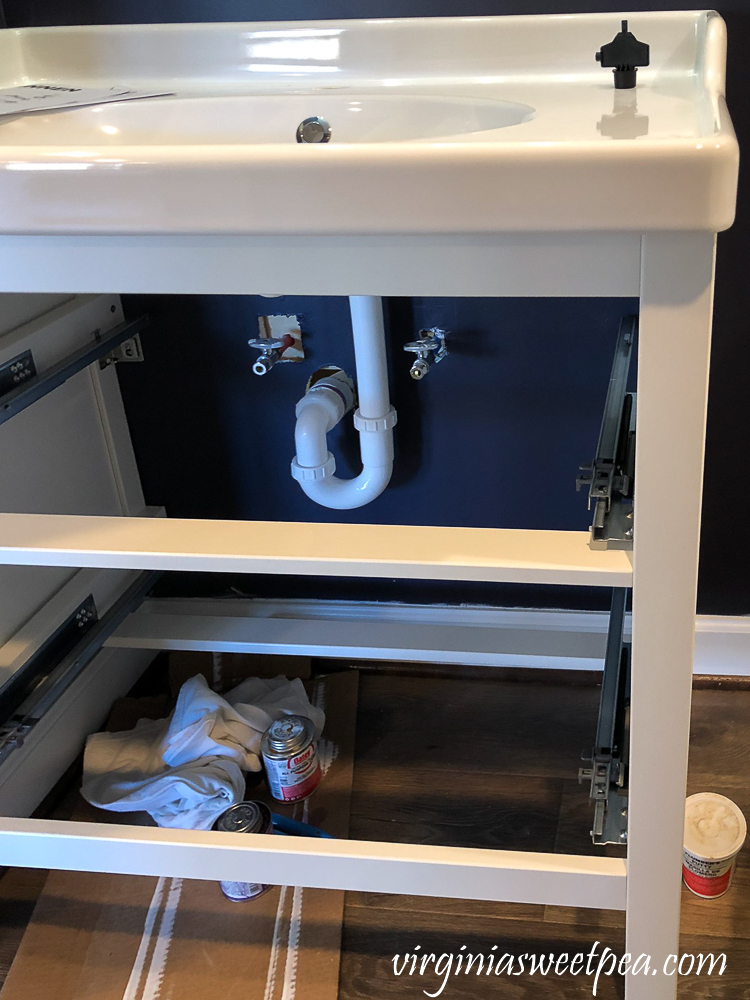
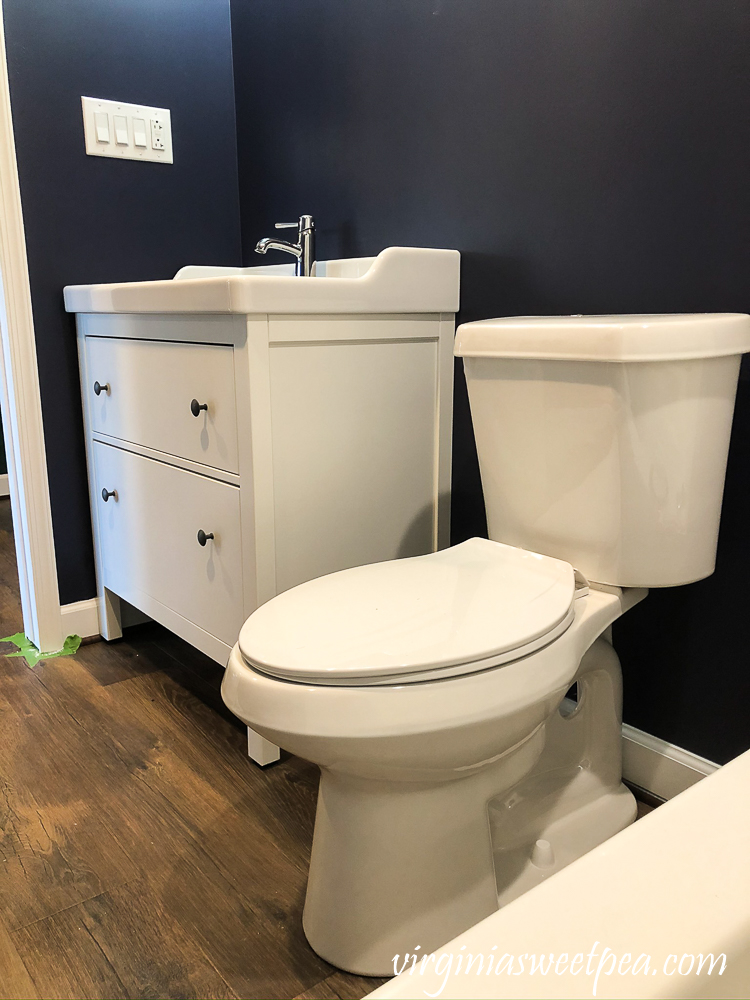
The plumbing was completed for the bathroom sink after a connection piece was purchased and installed into the drain piping. The stock Ikea plumbing fixtures fit perfectly and the drain plumbing was complete.
On Saturday when Mr. SP was adding the piece of wood to the end of the stairway, he wanted to sand it before adding the newel post but didn’t have an orbial sander with him. He texted our neighbor who helped us with the floor and he not only loaned us a sander, he stopped by Sunday afternoon to help us out.
The Ikea faucet has integral supply lines attached, and they were just short of mating with the supply lines installed early on in the basement project. To rectify this, the Pex supply lines were cut and an elbow added to essentially lengthen the water supply lines to mate with those of the faucet. Luckily, Don had the necessary Pex parts that we needed to connect the hot and cold water lines. He quickly made the modification, then tested the faucet. Water running and no leaks meant success!
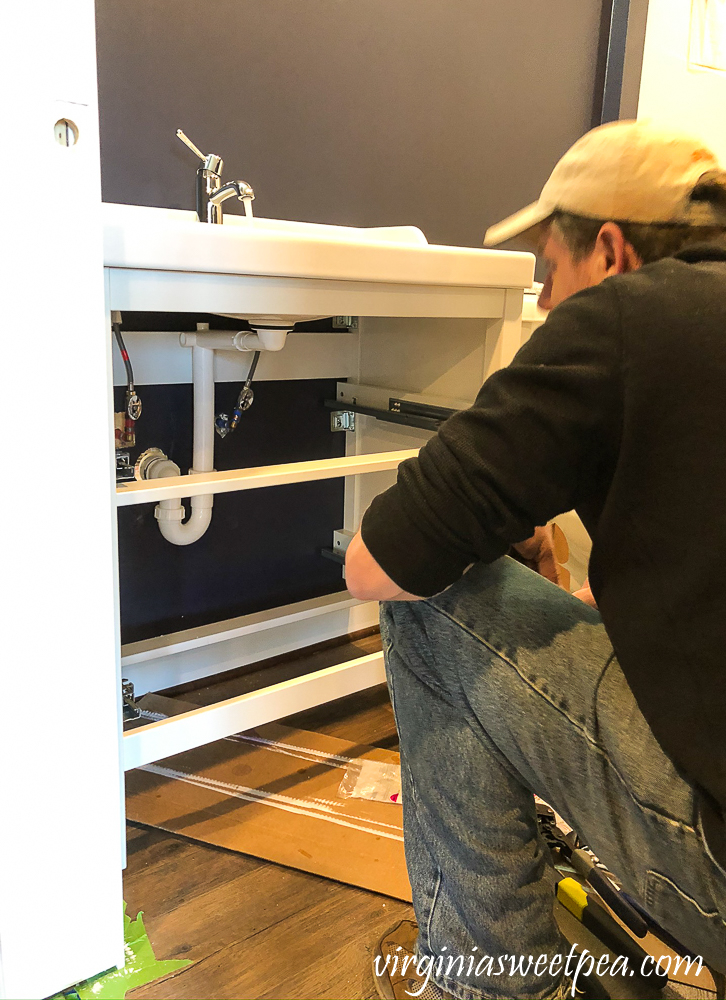
The vanity is now good to go and all the toilet needs is a different seat to be installed. (The seat that came with the toilet is plastic, so we are replacing it with a better quality one.)
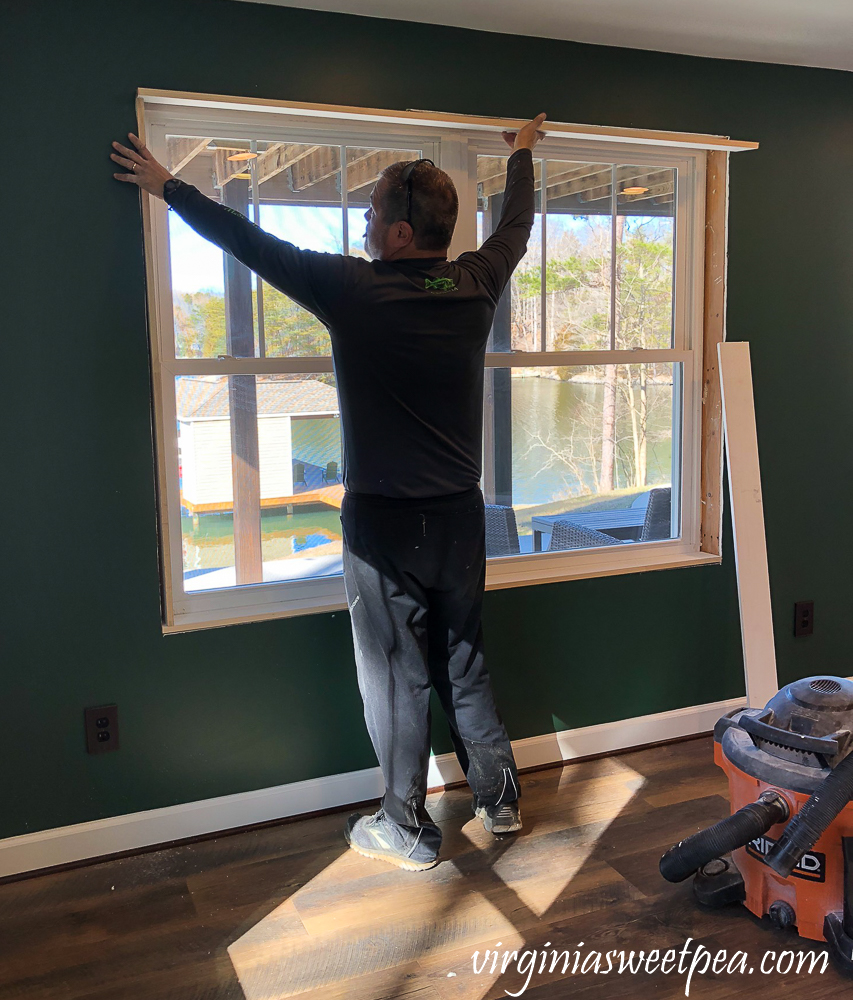
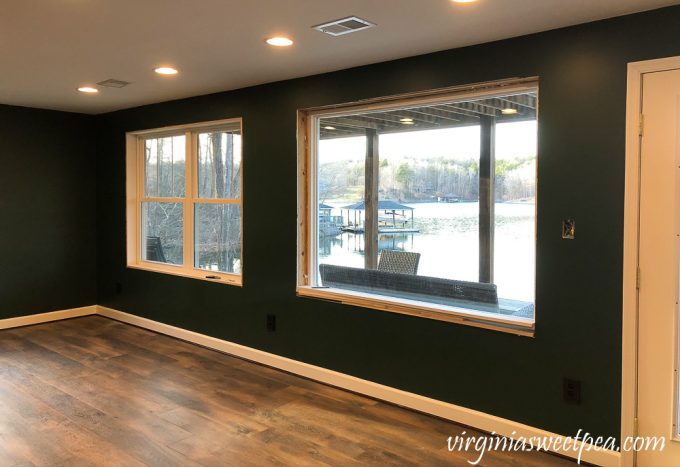
Framing the Windows
Mr. SP was able to frame four of the five windows in the family room.
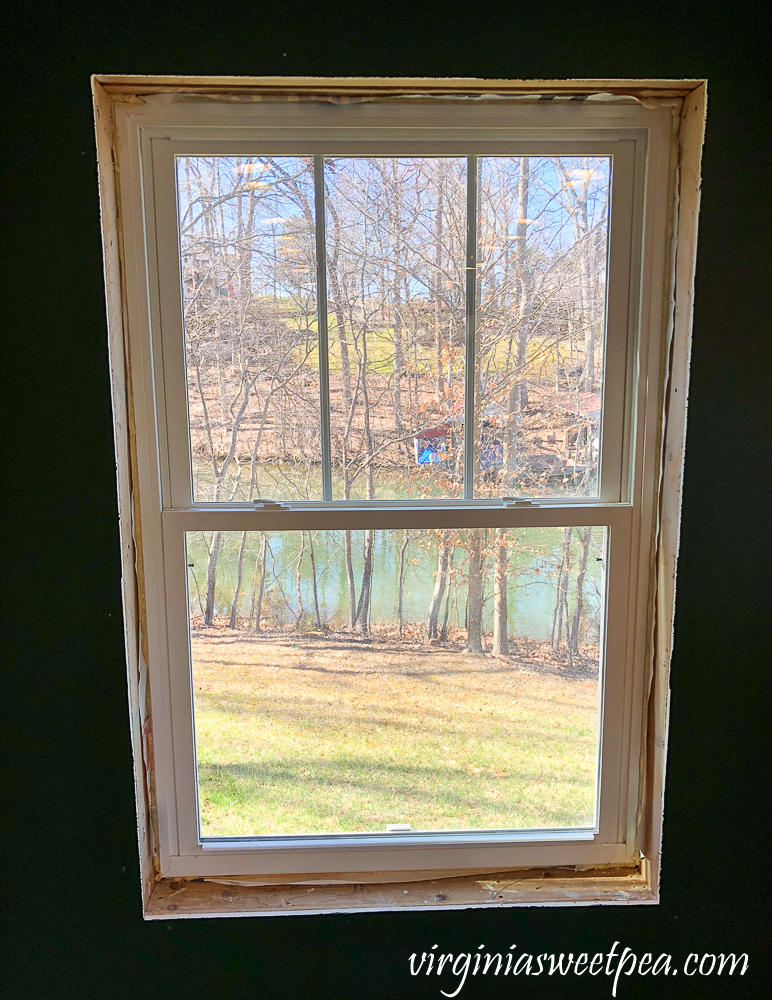
We decided to frame the windows without a window ledge which greatly simplified the process. We first measured the depth of the window from sheetrock to window frame. We ripped pre-primed pine lumber to the correct width with a portable table saw. We then measured the horizontal top and bottom of each window, and vertically each side. Luckily, the windows were generally square and even. We cut the pieces with the miter saw and then created a box by nailing the pieces together.
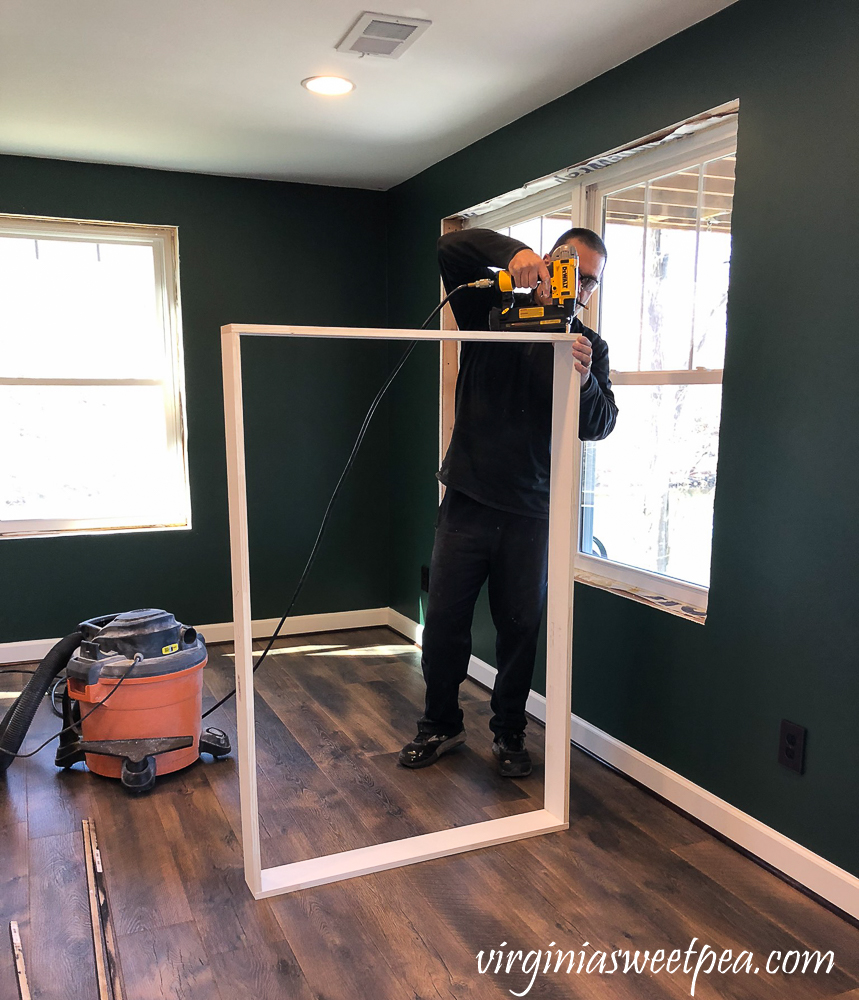
This box was then inserted into the window opening, leveled, and nailed into place.
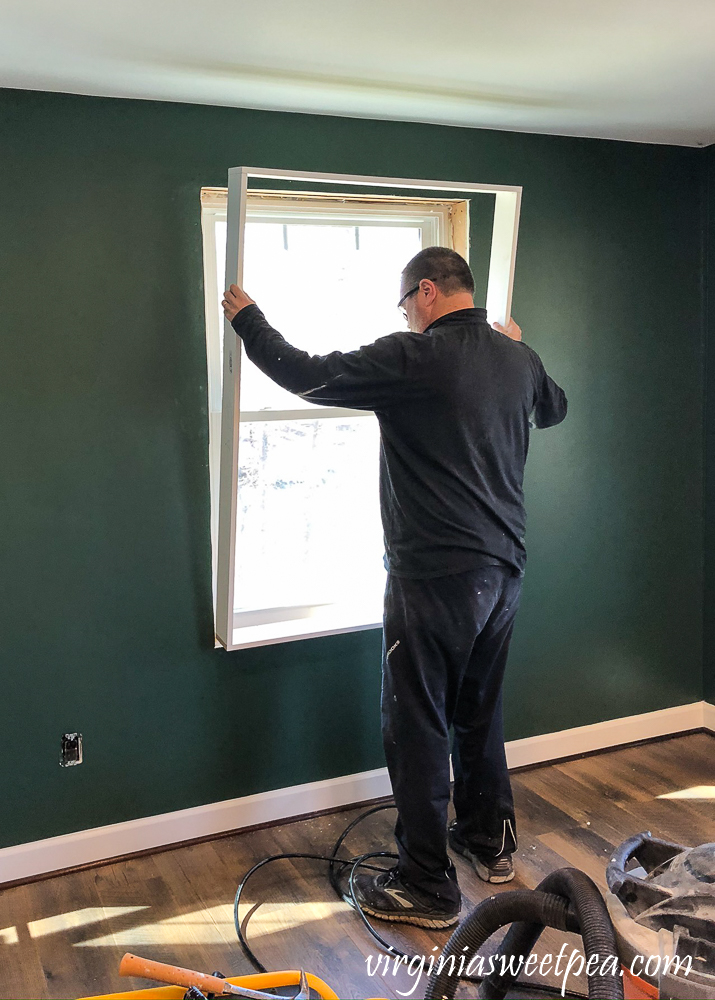
Shims are used to make the window box level.
A tool that has been SO useful for our basement project is a Dewalt 18-Gauge Pneumatic Brad Nailer. It has saved us a huge amount of time and effort for installing the doors, baseboards, quarter round, and now the window boxes. (Please note that Mr. SP moved his fingers out of the way before nailing. Brads have a tendency to pop out of the side of the wood on occasion. Safety first!)
Here Mr. SP is dry fitting the window box pieces before using the brad nailer to nail them together.
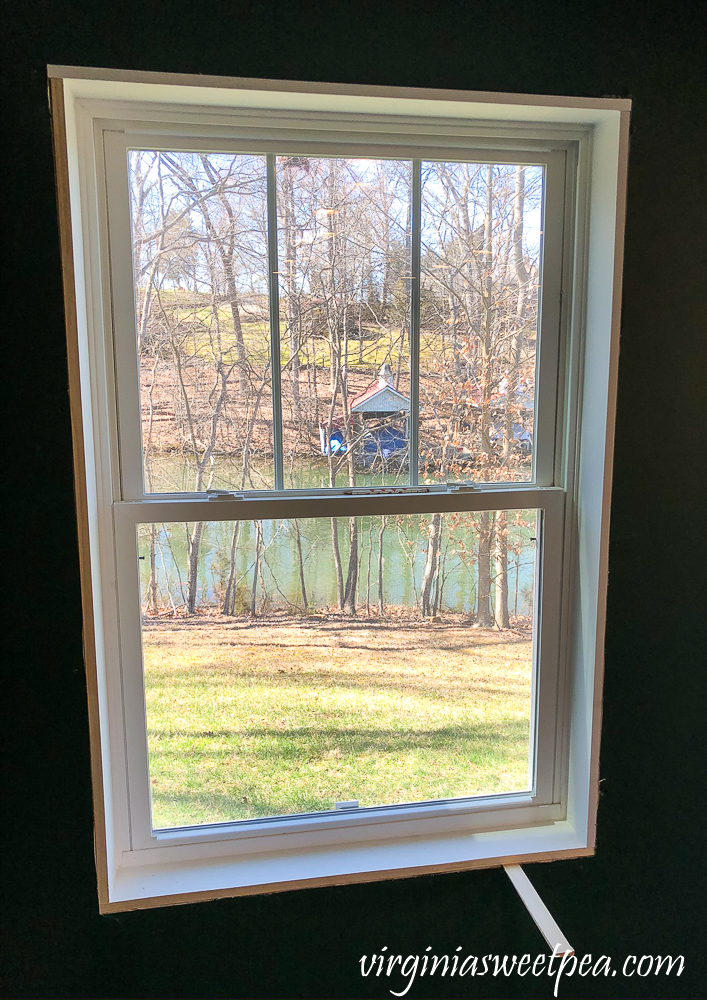
These three windows and the window at the base of the steps are framed and ready for trim to be added.
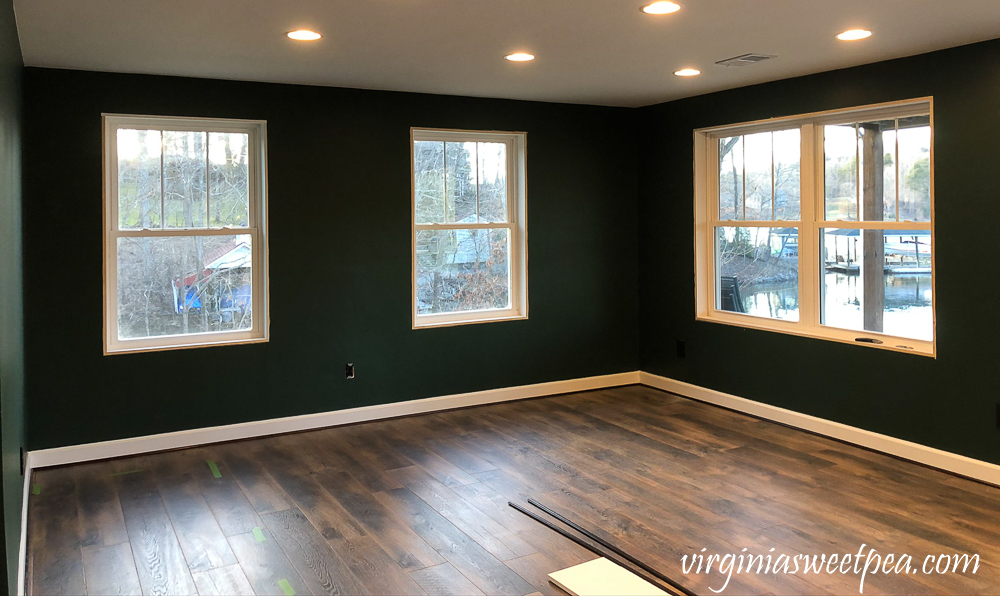
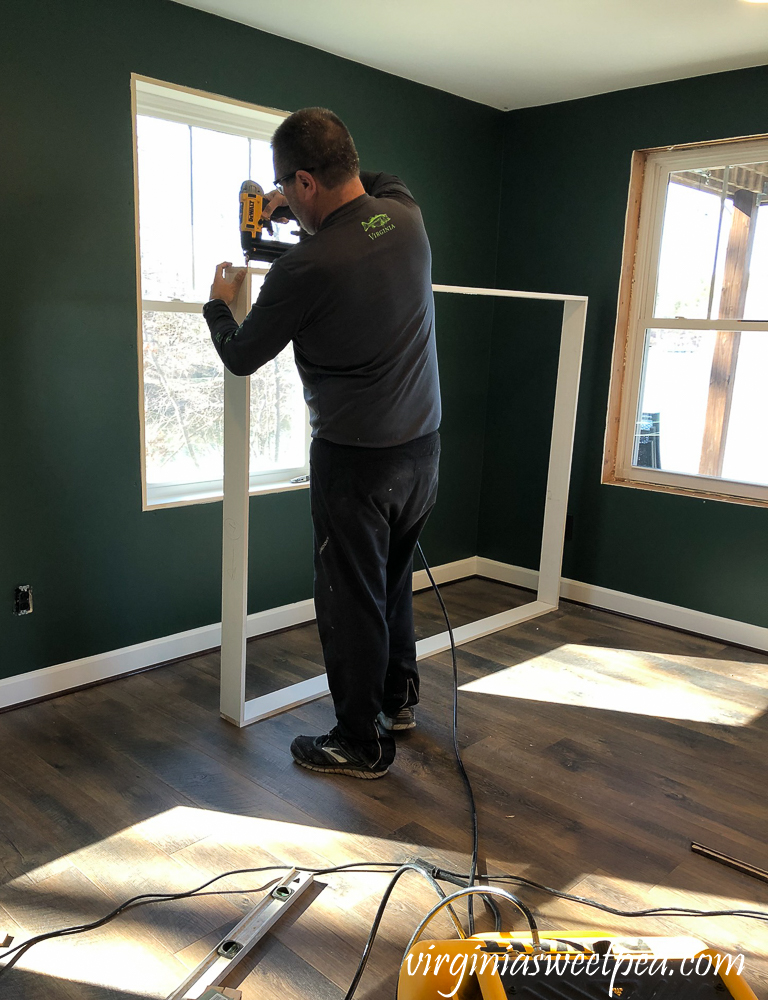
The window box pieces are cut for this window and it will be finished this coming weekend along with the two windows in the bedroom.
Painting Trim
While Mr. SP was working on his projects, I painted the doorway trim. Since this was raw wood, I primed with Kilz and then painted the trim with Sherwin Williams Pure White (SW 7005).
Over the weekend I was able to do two coats of paint after priming with Kilz and this coming weekend, I’ll decide if a third coat is needed.
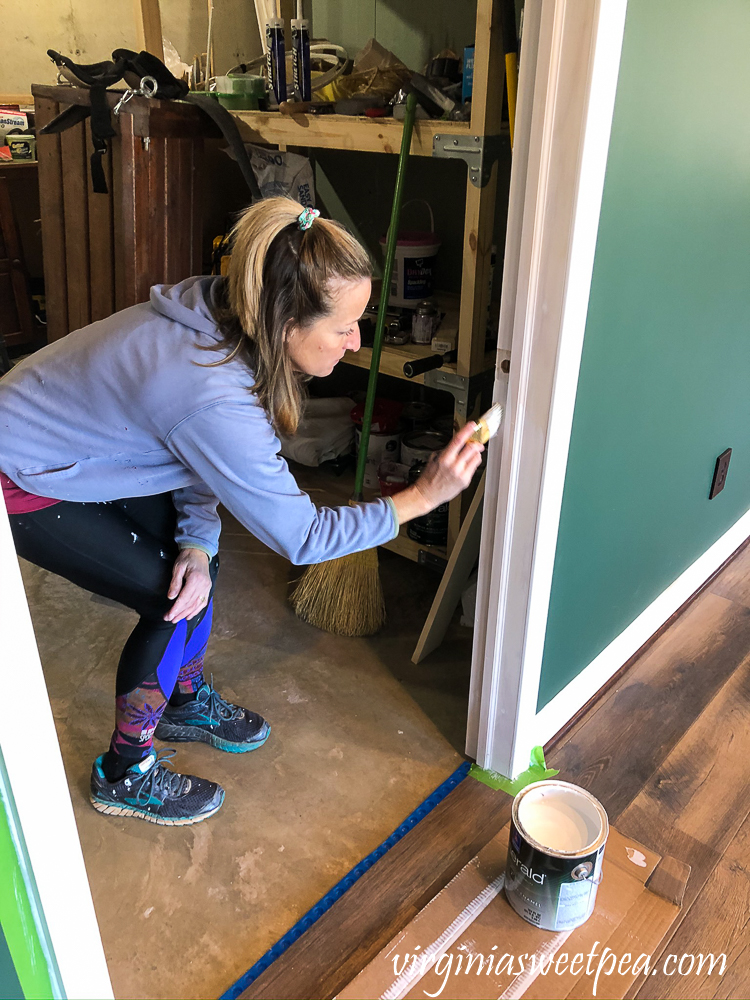
I also caulked around all of the doors and gave the trim another coat of paint. (We painted the trim around the doors prior to installing it.)
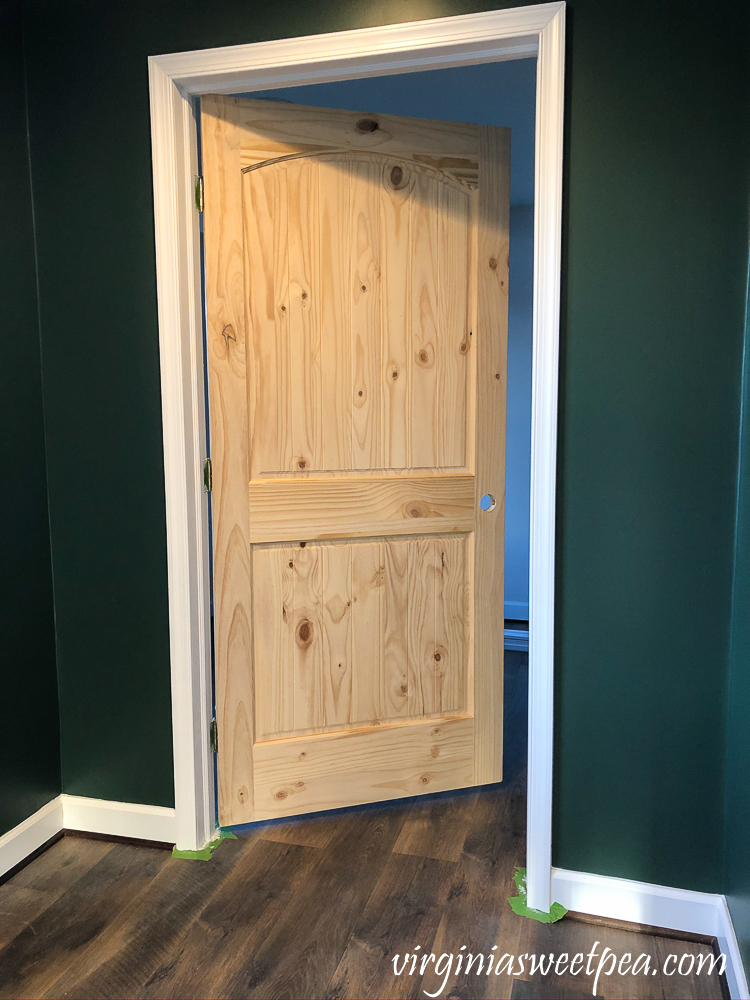
Getting the trim painted makes the doorways look much more finished. Next, I need to decide on a stain color and get the doors stained.
Furniture
Last week I purchased a reclining sofa and two recliners for the family room. Our furniture upstairs at the lake house is Homestretch and is hands down the most comfortable furniture that I’ve ever relaxed on in my life.
I didn’t get to purchase the exact style of sofa and recliner that I wanted because the one that I wanted only came in power version. Since the furniture is going to be placed in the middle of the room in the basement, plugging them in would be a problem, so I had to go with a less attractive model that was available in manual.
This is not at all pretty furniture, but our goal is to have a comfortable family room for relaxing and what I purchased is sooooo comfortable.

Another reason that we are fans of Homestretch is that it is made in the USA.
The reclining sofa fabric will be the same as the recliner, not what is shown below.

I purchased the furniture from Grand and it will arrive on April 3.
Walking Sherman
Like always, we walked Sherman at Smith Mountain Lake State Park on Saturday and Sunday. Saturday was a cold walk but Sunday it was nice enough to take off our coats by the end of the walk.

Walks always include a few kissing sessions with Sherman.
What’s Next?
Next weekend we will finish framing the windows and hopefully add trim to them and work on the handrail for the stairs.

Wow! The newel post blooks great! You will surely deserve to relax in that room once it is done. I think it’s amazing what all you accomplish each weekend. I installed a new kitchen faucet and sink the past two days. I did have a bit of trouble with it, but so glad I jumped in, and that my husband could help with the tough spots.
Liberty
You are amazing to tackle a kitchen faucet. I would for sure need help if I were to tackle something like that. I like DIY but am better at doing the grunt type work.
Paula
Paula,
Amazing progress every time I visit. Mr. SP did a great job with the new post. Looks like its been there.
Your furniture is perfect for a family retreat to kick back and spend time together. It’s about relaxing and building memories.
Sherman gets a kiss from me.
Cindy
Thank you, Cindy! And Sherman says thank you for the kiss!
Paula
It’s so fun to see your updates on this project, Paula. I am impressed and amazed at the language you’ve picked up and written! I was reading very slowly to be able to follow. You did a great job explaining for anyone like me who would be a construction dummy. Must be the educator still in you. 🙂
All of that technical language was written by my engineer husband. I had to ask him to explain what he did because even though I vaguely knew, I didn’t have the language skills to explain it. He is the brains of the operation, I’m good for grunt work!
Paula
Loved the latest update! Thank you,
Thank you, Fleta! It’s been a fun project and we are starting to see the finish line.
Paula
As always, great job!
Thank you so much, Rhonda! I really appreciate you taking the time to leave a comment. Each weekend we get a little more done. Looking forward to being finished!
Paula
Everything looks to be coming along very nicely …loving it …loving the color…very happy for you and I am in love with watching it come to life. Very fun and I look forward to seeing the progress each time.
Thank you so much, Jackie! It is getting closer and closer to being finished. Hopefully we will be soon relaxing down there, enjoying the lake view.
Paula
I love seeing the progress. It’s looking so good, I can’t wait to see your nexterm update.
Thank you so much! It is a lot of work but very rewarding work. We can see the end in sight which is a great thing.
Paula
I’m always amazed, Paula, at what you all have been able to accomplish with each new update. It’s looking fabulous!!!
Thank you so much, Debra! It is really coming along and we are getting closer and closer to being finished.
Paula
Paula, I’ve been following along with your basement work, but this week–WOW! That newel post project looks really hard, yet Mr. SP did an amazing job. And just look at everything else you’ve accomplished! Well done, friend!! I know you’re glad to have a place to get away and you’ve had this project to occupy your time this spring. Wild times, huh?
Thanks so much for joining the Grace at Home party, my friend. I’m featuring you this week!
Wow, I can’t wait to see the finished project. What a great getaway.